
Can You Use a Bread Machine to Just Knead Dough?

Yes, you can absolutely use a bread machine to just knead dough! Many home bakers find this a huge time-saver. It’s one of the most underrated features of these handy kitchen appliances.
You don’t have to bake your bread in the machine if you only want to use its kneading power. It’s perfect for when you prefer to shape your dough by hand. Then you can bake your creations in a conventional oven, like a pizza or a braided challah.
- A bread machine can knead dough without baking.
- It saves you time and effort in the kitchen.
- You get perfectly kneaded dough for various recipes.
- It’s great for shaping and baking in a traditional oven.
- Using it just for kneading is a common practice.
Let’s dive into how this works and why it’s such a fantastic option for your baking adventures. We’ll explore exactly how to get the most out of your bread machine for kneading.
Getting Your Bread Machine to Knead Like a Pro
Using your bread machine for just kneading is a smart move. It saves your arms from tiring out. Plus, it gives you perfectly developed dough every time.
The secret is using the “Dough” or “Knead” cycle. Most machines have one of these. This cycle mixes, kneads, and often includes a rise time. Then, it stops before baking.
Why Just Kneading Makes Sense
You might wonder why someone would buy a bread machine and not use it for baking. Well, there are many good reasons! We found that it opens up a whole new world of baking possibilities.
For example, maybe you love the crust a traditional oven gives. Or perhaps you want to make intricate shapes. A bread machine is fantastic for the hard work. You take over for the fun parts.
Benefits of the Dough Cycle
Think about the time you spend kneading. It’s often 10-15 minutes of hard work. Your bread machine does this with ease. It’s like having a little helper in your kitchen (The Kitchn).
- Hands-Free Kneading: No sticky mess on your counter or hands.
- Consistent Results: The machine kneads with steady power. This gives you a uniform dough structure.
- Built-in Proofing: Many dough cycles include a warm rise. This is perfect for activating your yeast.
- Versatility: Use the dough for endless recipes beyond a simple loaf.
Choosing the Right Cycle on Your Machine
Every bread machine is a little different. But the basic functions are quite similar. You’ll want to look for a specific button or setting.
Usually, it’s clearly labeled. Check your machine’s manual if you’re unsure. It’s a quick read that will clear things up fast.
Common Cycle Names
What should you look for? Here are the most common names for the cycle you need:
- Dough: This is the most common. It mixes, kneads, and gives one rise.
- Knead: Some simpler machines might just have a “Knead” button. It handles the mixing and kneading.
- Pizza Dough: This cycle is often shorter. It’s designed for doughs that don’t need a long rise.
- Pasta Dough: Even shorter, usually just for mixing and kneading. No rise time.
If your machine has a “Delay Timer” function, be careful not to use it with active yeast recipes. You don’t want the yeast to over-proof before kneading even starts.
Ingredients: What to Put In
Using your bread machine for dough means you still need to follow a recipe. The measurements are key. Always use your bread machine’s recipe book if you have it.
If not, standard bread recipes work well. Just make sure your ingredient amounts match your machine’s capacity. Don’t overfill it!
Order of Ingredients Matters
Did you know the order you add ingredients can affect the outcome? We found that most machines like liquids first. Then dry ingredients. And yeast goes on top.
This keeps the yeast from getting wet too soon. Premature activation can sometimes lead to less effective kneading. Here’s a general order to follow:
- Liquids (water, milk, oil)
- Salt and Sugar
- Flour
- Yeast (dry, on top of the flour)
Some recipes call for different orders. Always trust your specific recipe first. It was designed for a reason.
When to Take Your Dough Out
The “Dough” cycle will usually beep when it’s done. This signals it’s time to remove your beautiful, pliable dough. Don’t leave it in too long.
Over-proofing in a warm machine can cause your dough to collapse. You want it at its peak. This usually means it’s doubled in size and feels springy.
What to Do with Your Dough Next
Once you take the dough out, your culinary adventure truly begins! What will you make?
Your perfectly kneaded dough is ready for shaping. You can divide it, roll it, or braid it. Think about the possibilities:
- Pizza: Roll it out, add toppings, and bake in a hot oven.
- Dinner Rolls: Shape into small balls, let rise, and bake until golden.
- Cinnamon Rolls: Roll flat, spread filling, roll up, slice, and bake.
- Focaccia: Press into a pan, dimple, add olive oil and herbs, bake.
- Bagels: Shape, boil briefly, then bake for that classic chew.
The world is your oyster when your dough is ready to go. You’ve skipped the mess and the arm workout.
Troubleshooting Common Dough Cycle Issues
Sometimes, things don’t go exactly as planned. Don’t worry, even experienced bakers face challenges. We’ve compiled some common issues and their easy fixes.
Most problems relate back to ingredients or temperature. A little adjustment can make a big difference.
Dough Is Too Sticky or Too Dry
This is the most frequent issue. It’s often a simple matter of hydration. Humidity in your kitchen can even play a small role!
If your dough is too sticky, it likely has too much liquid. If it’s too dry and crumbly, it needs more liquid.
Adjusting Consistency
During the first few minutes of kneading, watch your dough. It should form a smooth ball. It should also clean the sides of the pan (Oregon State University Extension Service).
Here’s your quick fix checklist:
- Too Sticky: Add flour, 1 tablespoon at a time. Let it knead in.
- Too Dry: Add water, 1 teaspoon at a time. Let it knead in.
- Humidity Check: On humid days, you might need slightly less liquid.
- Flour Type: Different flours absorb water differently. Adjust as needed.
- Weigh Ingredients: Using a kitchen scale gives the most accurate measurements.
Don’t be afraid to open the lid and peek. Just don’t do it too often, as it can affect temperature.
Dough Doesn’t Rise
A dough that doesn’t rise is disappointing. But it’s usually easy to figure out why. The culprit is almost always the yeast.
Yeast is a living organism. It needs the right conditions to thrive. Think of it like a finicky plant.
Common Reasons for No Rise
What could be stopping your dough from rising? We found a few usual suspects:
| Problem | Solution |
|---|---|
| Dead Yeast | Check expiration date. Test yeast in warm water with sugar before adding. |
| Water Too Hot/Cold | Use lukewarm water (105-115°F or 40-46°C). Too hot kills yeast; too cold doesn’t activate it. |
| Too Much Salt | Salt can inhibit yeast. Make sure it’s not directly touching the yeast when adding. |
| Too Little Sugar | Sugar feeds the yeast. Ensure enough is in the recipe for activation. |
| Drafty Area | Even after the machine, let it rise in a warm, draft-free spot if additional proofing is needed. |
Always double-check your yeast’s freshness. It’s often the simplest answer. A quick test in warm water with a pinch of sugar will tell you if it’s still alive.
You’ll see bubbles if it’s active. If not, it’s time for a new packet of yeast. No shame in that, it happens to everyone!
Conclusion
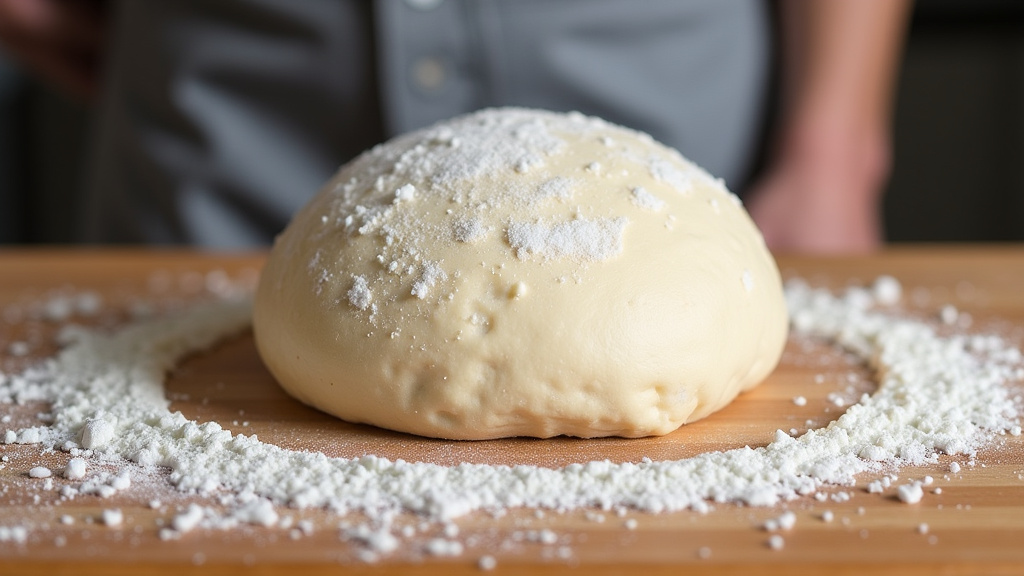
Using your bread machine just for kneading is a brilliant shortcut for any home baker. You get to skip the messy, arm-tiring part of dough preparation. This frees you up to explore endless creative baking projects. Your machine delivers consistent, perfectly kneaded dough every time. From delicate pastries to hearty pizzas, the possibilities are vast. So, don’t let your bread machine sit idle if you prefer oven baking. Fire it up for the “Dough” cycle and discover how much easier and more enjoyable your baking can be!
Frequently Asked Questions
Can I use any bread recipe with my bread machine’s dough cycle?
Generally, yes! Most standard bread recipes will work well. Just be sure to adjust the ingredient quantities to match your bread machine’s capacity. Also, pay attention to the order of ingredients your machine prefers, typically liquids first.
Does using the dough cycle save energy compared to full bread machine baking?
Yes, it does. The dough cycle only runs the kneading and proofing elements, which use less power than the full baking cycle. Baking in a conventional oven might use more energy depending on the oven and bake time, but for the bread machine part, it’s more energy-efficient.
How do I know if my dough is kneaded enough by the machine?
After the dough cycle finishes, your dough should be smooth, elastic, and spring back when gently poked. It should also pass the “windowpane test” – you can stretch a small piece thin enough to see light through it without tearing.
Can I leave the dough in the bread machine longer after the cycle finishes?
It’s best to remove the dough promptly after the cycle ends. Leaving it in a warm machine can cause it to over-proof and potentially collapse. If you need more rise time, transfer it to a bowl in a warm, draft-free spot.
What if my bread machine doesn’t have a “Dough” cycle?
If your machine lacks a dedicated “Dough” cycle, look for a “Knead” or “Manual” setting. Some simpler machines might require you to run a full cycle but remove the dough before the baking phase begins. Check your manual for specific instructions.
