
What Is the Crust Setting on a Bread Machine?
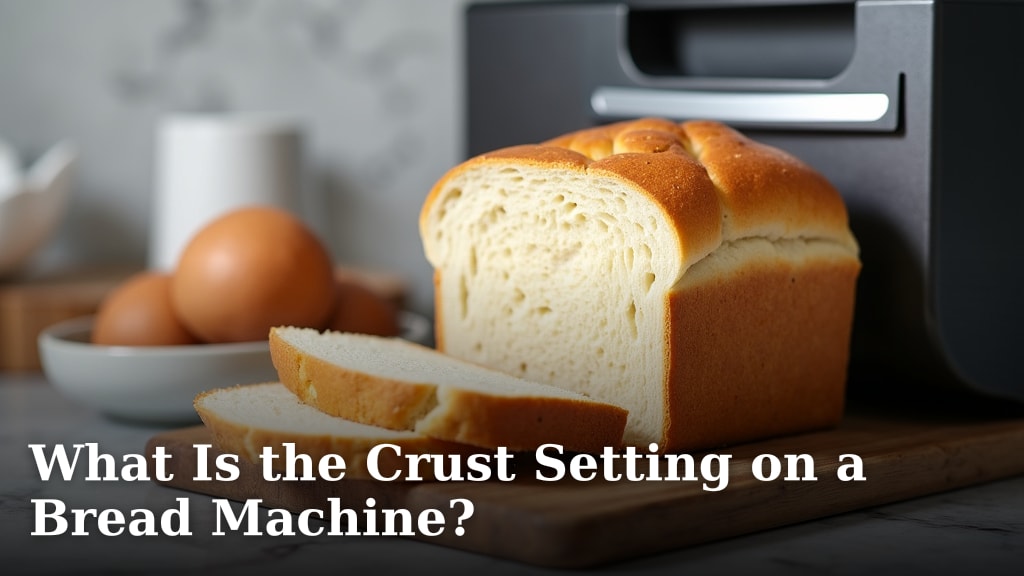
The crust setting on your bread machine is a simple dial or button that lets you choose how dark you want your bread’s outer layer to be. You can usually pick from light, medium, or dark to get your perfect crust every time. It directly controls the baking time and temperature for the final stage of the loaf.
Understanding this setting can transform your homemade bread experience. You’re not stuck with a pale, underdone crust or a burnt, bitter one. Many users find that adjusting the crust setting is the easiest way to personalize their bread. It’s a small but mighty feature for achieving bakery-quality results at home.
- The crust setting controls how dark your bread gets.
- Options typically include light, medium, and dark.
- It affects baking time and temperature.
- Choose your preferred crust for perfect homemade bread.
So, ready to find your favorite crust shade? Let’s look closer at what this bread machine setting really does and how you can use it to your baking advantage.
Customizing Your Bread Machine’s Crust Shade
You’ve likely noticed a setting on your bread machine dedicated to the crust. This is your crust setting. It’s a straightforward but impactful feature. It gives you control over the final appearance and texture of your homemade bread’s exterior. Think of it as your personal baker’s touch.
This setting directly influences the baking phase. It adjusts the duration and intensity of heat. This happens in the final stages of the bread-making cycle. You’re not just baking bread; you’re crafting it to your exact liking.
How the Crust Setting Works
The magic behind the crust setting involves two main factors. These are the baking temperature and the baking time. Your bread machine’s internal computer manages these. It extends or shortens the final bake. It might also slightly alter the heat. This ensures your crust reaches your desired level of browning.
A light crust setting means a shorter bake time at a moderate temperature. This results in a pale, soft crust. It’s ideal for those who prefer a very tender exterior. It’s like a gentle hug for your bread.
The medium crust setting is the standard for many. It offers a balance. The bake time is longer than light. The temperature is consistent. You’ll get a golden-brown crust. This is often the default choice for classic loaves.
Choosing the dark crust setting means the longest bake time. The temperature might also be a touch higher. This caramelizes the sugars more. It yields a deep brown, sometimes even slightly crispier crust. This is perfect for those who love a robust crust flavor.
Why You Should Care About the Crust Setting
Why bother with this setting? It’s about achieving personal satisfaction. We all have different preferences. Some love a soft bite. Others want that satisfying crunch. Your bread machine accommodates these tastes.
Imagine baking a loaf for a friend who loves a very dark crust. You can select ‘dark’ and deliver perfection. Or perhaps your child prefers a soft, barely-browned exterior. ‘Light’ will be their favorite setting. It makes homemade bread truly tailored to everyone.
Research shows that crust color can affect perceived flavor. A darker crust often signals a more complex, slightly bitter, or caramelized flavor profile. A lighter crust suggests a milder, sweeter taste. This setting lets you **align taste with appearance**.
Understanding Your Bread Machine’s Options
Most bread machines offer at least three options. These are commonly labeled as Light, Medium, and Dark. Some newer or more advanced models might have additional settings or even a numbered scale.
Let’s break down what these typical settings mean for your loaf.
The “Light” Crust: A Gentle Approach
This setting is for the lovers of softness. It involves the shortest bake time. The machine focuses on ensuring the bread is cooked through. It avoids over-browning the exterior. You’ll get a pale yellow to light tan crust.
Think of this as the “no-burn” zone. It’s excellent for very tender breads. Brioche or challah might benefit from this. These enriched doughs can brown very quickly. A light setting prevents this. It ensures the delicate crumb is preserved. It’s a good starting point for beginners too.
The “Medium” Crust: The Crowd Pleaser
This is your go-to for a classic look and feel. The bake time is extended. The temperature is maintained for optimal browning. You’ll achieve that beautiful, even golden-brown hue. It’s the most common choice for everyday sandwich breads.
This setting usually delivers a crust that is pleasantly chewy. It has a good balance of softness inside and a slight resistance outside. Most standard recipes are designed with this setting in mind. It’s a reliable choice for consistent results.
The “Dark” Crust: For the Bold and the Brave
If you enjoy a crust with more character, this is for you. The machine bakes for the longest duration. It might also use a slightly higher temperature. This encourages more caramelization. The crust will be a deep brown. It might even have some crispness.
This setting is ideal for breads with a stronger flavor profile. Think rustic loaves or whole wheat. The robust crust complements these. Some users find this setting can make the crust quite firm. This is perfect for dipping in soups or stews. You’ll want to watch closely to avoid burning.
Tips for Perfecting Your Crust Setting Choice
Selecting the right crust setting isn’t always a one-size-fits-all situation. Several factors can influence your decision. It’s about understanding your machine and your preferences.
Matching the Crust to the Bread Type
Different types of bread dough behave differently. Enriched doughs, with eggs and butter, tend to brown faster. They have more sugars to caramelize. For these, you might want to select a lighter crust setting than usual.
Whole wheat or rye breads often have a denser crumb. They may require a longer bake. A darker crust setting can sometimes help ensure these loaves are fully baked. It also complements their robust flavor. Basic white bread recipes usually do well on the medium setting.
Considering Your Oven and Climate
Believe it or not, your home environment matters. Some bread machines run hotter than others. This is a known variation between brands and even models. What’s ‘medium’ on one might be closer to ‘dark’ on another. You might need to experiment.
Humidity can also play a small role. In very dry climates, bread might crust faster. In humid areas, it could take a little longer. Pay attention to how your machine performs in your specific kitchen.
The Role of Ingredients
The ingredients in your recipe can greatly impact crust development. Sugars, honey, and molasses all contribute to browning. They add sweetness and color. Using more of these ingredients might lead you to choose a lighter setting.
Dairy products like milk or butter also affect browning. They add richness. They can speed up caramelization. Conversely, recipes with less sugar or fat might benefit from a darker setting to achieve a satisfying crust color. We found that recipes with added cocoa powder often need careful monitoring, regardless of the setting.
Adjusting Based on Your Preferences
Ultimately, the best crust setting is the one you enjoy most. Don’t be afraid to experiment. Try the same recipe on different settings.
For example, bake your favorite white bread on medium first. Then, try it on dark next time. See which one you prefer. You might find you like a medium-light crust. Some machines allow for slight adjustments. This is where personalization truly shines.
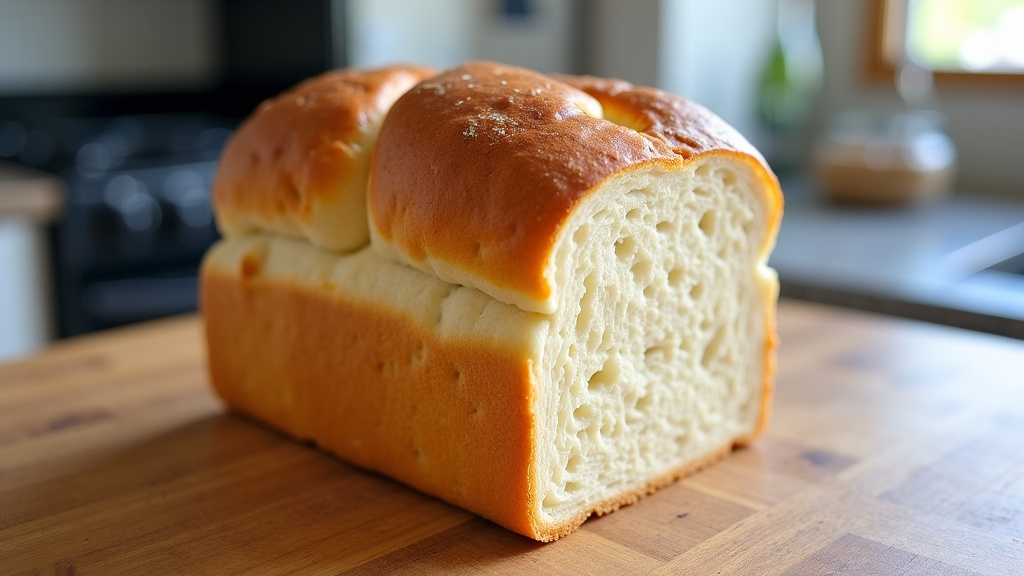
Troubleshooting Common Crust Issues
Even with the crust setting, you might encounter occasional problems. Here are a few common ones and how to address them.
My Crust is Too Pale, Even on Dark!
If your ‘dark’ setting still yields a pale crust, several things could be happening. Your machine might run cooler than average. The recipe might lack browning agents like sugar or milk. Try increasing the sugar slightly. Or, consider adding a tablespoon of milk powder.
You can also finish the bake in your regular oven. Once the bread machine cycle is done, remove the loaf. Place it directly on your oven rack. Bake at 350°F (175°C) for 5-10 minutes. This will give it that extra color. We found this trick works wonders for achieving a deeply browned crust.
My Crust is Too Dark or Burnt!
If your crust is consistently too dark, even on the ‘light’ setting, your machine likely runs hot. You can try a simple workaround. When the bread machine signals the end of the bake cycle, remove the bread immediately. Do not let it continue to sit in the machine. This prevents residual heat from over-browning it. You might also try reducing the sugar in your recipe.
For future bakes, you may need to select the ‘light’ setting. Then, consider finishing the loaf in your oven for a shorter time. Or, use a foil tent over the bread during the last 15-20 minutes of baking. This reflects some heat. It helps prevent excessive browning. This approach offers excellent control.
Inconsistent Browning
Sometimes, one side of the crust is darker than the other. This can happen if the heating element isn’t perfectly balanced. It could also be due to how the loaf sits in the pan. Try rotating the bread pan halfway through the baking cycle if your machine allows. This can help ensure even browning.
Another factor is the quality of your bread pan. If it’s old or scratched, it might not distribute heat evenly. Ensure your pan is clean and in good condition. For some recipes, using the ‘extra time’ feature on a manual bake setting can help. This allows you to check and adjust as needed.
Quick Checklist for Crust Control
Here’s a quick rundown to help you master your crust setting:
- Know Your Settings: Understand what Light, Medium, and Dark mean for your specific machine.
- Match Crust to Dough: Enriched doughs often need lighter settings than whole grains.
- Adjust for Ingredients: More sugar means more browning, so consider a lighter setting.
- Experiment Boldly: Try the same recipe on different settings to find your preference.
- Watch for Variations: Your machine might run hotter or cooler than average. Adjust accordingly.
- Oven Assist is Okay: Don’t hesitate to finish your loaf in a conventional oven for perfect color.
| Setting | Typical Result | Best For | Considerations |
|---|---|---|---|
| Light | Pale, soft crust | Enriched doughs (brioche), delicate breads, children’s preferences | May require oven finishing for color; good for beginners. |
| Medium | Golden brown, slightly chewy crust | Standard sandwich breads, basic white and whole wheat loaves | Most recipes are designed for this; reliable for consistent results. |
| Dark | Deep brown, potentially crisp crust | Rustic breads, strong flavored loaves, dipping breads, personal preference | May become too hard if over-baked; watch closely to avoid burning. |
Conclusion
You’ve now seen how the crust setting on your bread machine is more than just a button. It’s your direct line to crafting homemade bread exactly how you like it. From a soft, pale exterior to a deep, rich brown, this feature lets you personalize your bake. Remember to consider your bread type, ingredients, and even your kitchen’s environment. Don’t be afraid to experiment with settings. Your perfect loaf is just a dial turn away!
Frequently Asked Questions
Can I change the crust setting mid-bake?
Generally, you cannot change the crust setting once the baking cycle has started. The machine’s program is set from the beginning. If you realize you’ve chosen the wrong setting, your best bet is often to either let it finish and note it for next time, or to remove the bread early to prevent over-baking.
Why does my bread machine crust brown differently than another person’s?
Bread machines can vary in their heating elements and thermostats. What one machine considers a ‘medium’ crust might be ‘dark’ on another. Factors like ambient kitchen temperature and humidity can also play a small role. It’s why personal experimentation is key.
What if my bread machine doesn’t have a crust setting?
Some older or very basic models might not have a dedicated crust setting. In such cases, the machine defaults to a standard bake. You can achieve some control by watching the loaf closely and manually removing it from the pan as soon as it reaches your desired color. You might also finish it in a preheated conventional oven.
Does the crust setting affect the inside of the bread?
The crust setting primarily controls the final baking time and temperature, which directly impacts the crust’s browning. While a longer bake on a dark setting might dry out the bread slightly more, it doesn’t fundamentally change the crumb structure itself, which is determined by the recipe and the dough’s development.
Is a darker crust healthier?
A darker crust means more caramelization and Maillard reactions have occurred, which can create complex flavors. While these reactions produce some beneficial compounds, the difference in overall healthiness between crust shades is usually minimal and depends more on the ingredients of the bread itself. Enjoy the crust you like best!
