
How to Fix Bread Machine Bread That Is Too Wet?

If your bread machine is producing loaves that are too wet, don’t worry. You can usually fix this by adjusting the flour to liquid ratio. Adding a bit more flour is often the solution. Too much liquid is the most common culprit for gummy or dense bread. If your bread machine is producing loaves that are too wet, you can usually fix this by adjusting the flour to liquid ratio.
A wet dough won’t develop gluten properly. This leads to a bread that is heavy and undercooked. We found that even small variations in ingredient moisture can make a big difference. Understanding these ratios is key to success.
- Adjust flour or liquid for a better consistency.
- Too much liquid causes dense, gummy bread.
- Measure ingredients accurately for best results.
- Check your machine’s manual for specific tips.
Let’s walk through exactly what might be causing your bread to be too wet and how to fix it step by step.
Troubleshooting Dough That’s Too Wet in Your Bread Machine
It’s incredibly frustrating when you’ve followed the recipe, and your bread machine spits out a loaf that’s more like a gooey mess than a beautiful bake. You were probably expecting a lovely, golden crust and a soft interior, but instead, you got something dense and undercooked. We’ve all been there! The good news is, this is usually a fixable problem.
The most common reason for wet bread dough is an improper flour-to-liquid ratio. Your bread machine needs a specific balance to create the right consistency. Too much liquid, and your dough will be sticky and won’t form a good structure. Too little, and it will be dry and crumbly.
Understanding Dough Consistency: The Key to Success
Think of your bread dough like a cake batter or cookie dough. Each needs a particular texture to turn out right. Bread dough should be elastic and slightly tacky, but not so wet that it sticks to everything. It needs to be able to hold its shape during the kneading and rising cycles.
Why Does Dough Become Too Wet?
Several factors can contribute to a dough that is overly wet. Let’s break down the most common culprits so you can identify what might have gone wrong with your bake.
Ingredient Moisture Content Variation
Did you know that the moisture content of your ingredients can change? Flour, for instance, can absorb more or less moisture depending on the humidity in your kitchen. If your flour feels unusually damp, you might need to adjust your recipe. We’ve found that even small environmental changes can affect the dough (King Arthur Baking Company).
Measuring Errors
This is a big one. Are you scooping flour directly from the bag with your measuring cup? This packs the flour in, leading to too much being used. The best method is to spoon the flour into your measuring cup and then level it off with a straight edge. Liquid measuring cups are also different from dry measuring cups. Using the right one is important.
Recipe Adjustments Gone Wrong
Sometimes, you might want to tweak a recipe. Maybe you’re adding seeds or fruits. If you’re not careful, these additions can throw off the balance. For example, adding something like mashed banana or pureed vegetables adds extra moisture. You might need to reduce other liquids if you add wet ingredients.
Type of Flour Used
Different flours have different absorption rates. Whole wheat flour, for example, absorbs more liquid than all-purpose flour. If a recipe calls for all-purpose flour and you substitute whole wheat, you’ll likely need to increase the liquid slightly. Conversely, if you use a very finely milled bread flour, it might behave differently.
Recognizing the Signs of Wet Dough
Before your bread machine even finishes its cycle, you can often tell if the dough is too wet. During the kneading phase, observe the dough. Does it look like a shaggy, sticky mess that’s clinging to the sides of the pan? A properly formed dough ball should gather itself into a smooth, elastic mass. If it’s constantly splattering or refusing to come together, that’s a red flag.
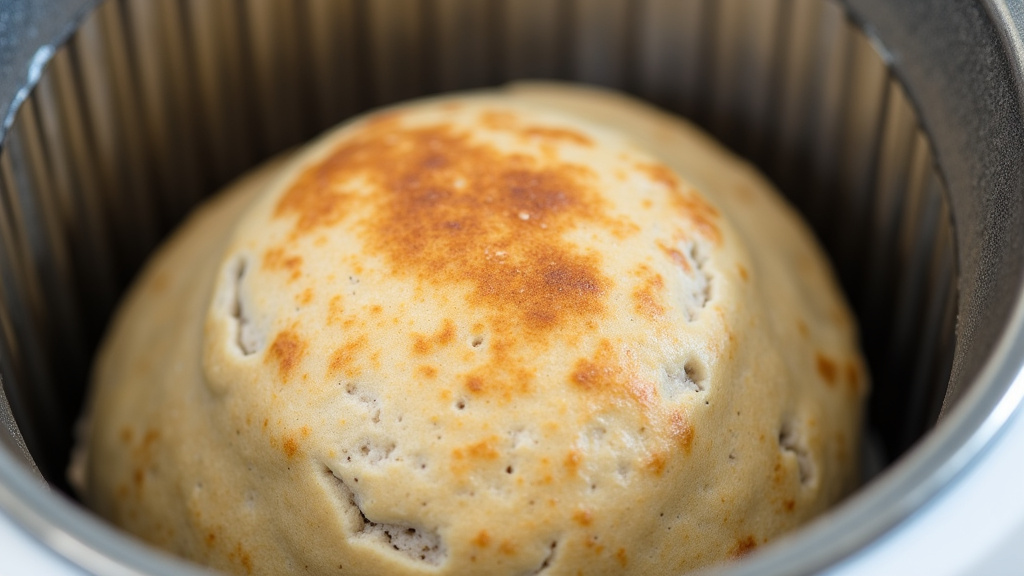
Another sign is the crust. If your bread comes out with a pale, gummy top or a sunken center, it’s often a symptom of dough that was too wet and couldn’t support its own structure during baking. The inside might also feel dense and chewy, like it hasn’t fully cooked through, even when it’s cooled.
How to Correct Overly Wet Dough in Your Bread Machine
So, your dough is looking a bit like a sticky disaster. What can you do right now? And what can you do for future bakes?
Immediate Fixes During the Cycle
If you catch the dough being too wet during the kneading cycle, you have a small window to intervene. Most bread machines have a pause or stop button. When you see that sticky, shaggy mess, it’s time to act!
Add Flour Gradually: Don’t dump a whole cup of flour in at once! This will likely make it too dry. Add flour, one tablespoon at a time. Let the machine knead for a minute or two to incorporate it. Watch the dough’s consistency. You’re looking for it to start pulling away from the sides and form a cohesive ball. Be patient; it might take a few additions.
Avoid Adding Liquid: Unless your dough is clearly falling apart and dry, resist the urge to add more liquid. Your problem is likely too much liquid already. Adding more will just exacerbate the issue.
Preventative Measures for Your Next Bake
The best way to deal with wet bread is to prevent it from happening in the first place. Here are some tips to ensure your next loaf is perfect.
Precise Ingredient Measurement
This is the most critical step. We cannot stress enough the importance of accurate measuring. Use dry measuring cups for flour and solid ingredients. Use liquid measuring cups for liquids. Always spoon and level your flour. For liquids, place your measuring cup on a flat surface and read the measurement at eye level. This avoids the common error of packing too much flour.
Understanding Your Flour
Not all flours are created equal. Bread flour has a higher protein content, which helps develop stronger gluten. All-purpose flour is fine, but it might require slight adjustments. If you’re experimenting with different types of flour, research their absorption properties. Whole grain flours typically need more liquid than white flours.
Room Temperature Ingredients
Many bread machine recipes call for room temperature or slightly warm ingredients. This helps activate the yeast properly. If your liquids are too cold, the yeast might not wake up, and your dough could seem sluggish and wet. If they’re too hot, you can kill the yeast. Aim for a lukewarm temperature, around 100-110°F (38-43°C) for yeast activation (The Universal Bread Machine Cookbook).
Consult Your Machine’s Manual
Every bread machine is a little different. Your machine’s manual is your best friend! It often contains specific advice on dough consistency and troubleshooting tips tailored to your model. Some machines have a “dough cycle” that you can use just to mix and knead if you want to test the dough before committing to a full bake.
A Simple Dough Consistency Checklist
Use this quick checklist to assess your dough. When it’s just right, you’ll have a smooth, elastic ball.
- Dough gathers into a ball.
- Slightly tacky, but not sticky.
- Smooth surface.
- Pulls away from the sides of the pan.
- Feels elastic when touched.
Troubleshooting Common Bread Machine Recipe Issues
Beyond just wet dough, bread machines can present other challenges. Understanding these can help you diagnose your wet dough problem too, as they are often interconnected.
The Impact of Humidity and Temperature
Your kitchen environment plays a huge role. On a humid day, flour absorbs moisture from the air, making it heavier. On a dry day, it might be lighter. High temperatures can make dough rise too quickly, leading to collapse, while cold can slow it down. Always consider the weather when you’re baking!
Yeast Activity Levels
Yeast is a living organism. If your yeast is old or has been stored improperly, it might not be very active. This can lead to a dough that doesn’t rise well and might appear wetter than it should be because it hasn’t developed structure. Always check the expiration date on your yeast and store it in a cool, dry place, or even the refrigerator or freezer for long-term storage.
Understanding Flour Types and Absorption
Let’s get a little more specific about flour. Different types absorb liquids differently. Here’s a quick comparison:
