
How To Tell When Bread Maker Bread Is Done?
To tell when bread maker bread is done, look for a deep golden-brown crust and listen for a hollow sound when you tap its bottom.
An internal temperature between 200-210°F (93-99°C) is also a strong indicator that your bread maker bread is perfectly baked.
- Check for a rich golden-brown crust all around the loaf.
- Tap the bottom of the removed loaf; it should make a hollow sound.
- Measure the internal temperature; aim for a range of 200-210°F (93-99°C).
- The bread should feel firm and spring back when gently pressed, not sticky or doughy.
- An unmistakable, fragrant baked bread aroma fills your kitchen.
There’s nothing quite like the smell of fresh bread wafting from your kitchen, especially when it comes from your trusty bread maker. But how do you really know when that loaf is perfectly baked and ready to enjoy? It’s a question many bakers, both new and experienced, often ask. We want you to feel confident in your bread-making skills!
How To Tell When Bread Maker Bread Is Done?
The best way to tell if your bread maker bread is done is through a combination of visual, auditory, and temperature checks, ensuring a perfectly baked loaf every time.
Why Doneness Matters for Your Bread Maker Bread
Knowing exactly when your bread is done isn’t just about taste; it’s about texture and shelf life too. An underbaked loaf can be gummy or dense, making it unpleasant. Overbaked bread becomes dry and crumbly, losing its delightful moisture. We understand your desire for perfect results!
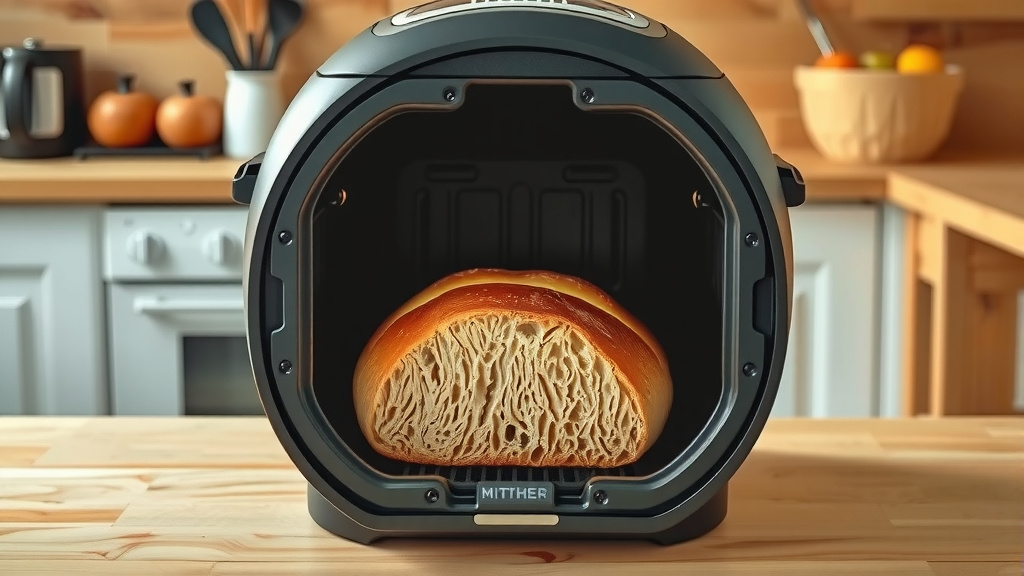
The Golden-Brown Crust Test
The crust is your first visual cue. When your bread maker cycles finish, take a look. A perfectly baked loaf will usually have a rich, even golden-brown crust. This color indicates that the sugars have caramelized beautifully and the heat has penetrated consistently.
What Does “Golden-Brown” Really Mean?
Think of the color of a toasted marshmallow or a perfectly browned cookie. It’s not pale, nor is it burnt. Many experts say a uniform golden hue suggests your bread has had enough time to develop its flavor and structure (Culinary Institute of America). If it looks too pale, it might need a little more time, perhaps on a “bake only” cycle if your machine has one.
The Hollow Tap Test
This classic baker’s trick is incredibly reliable. Once you carefully remove the bread from its pan, turn it over and gently tap the bottom with your knuckles. What sound do you hear? If it’s a hollow, resonant sound, like tapping on a wooden drum, your bread is likely done.
How to Perform the Tap Test
Carefully remove your hot loaf from the bread maker pan. Many machines have non-stick pans that release easily. Then, cradle the loaf in a clean kitchen towel or oven mitt and tap the very bottom. A dull thud usually means it needs more baking time. Think of it as your bread telling you it’s ready for its solo performance!
Temperature: The Ultimate Indicator
While visual and auditory cues are helpful, internal temperature provides the most accurate measure of doneness. This is especially true for yeast breads, which rely on specific temperatures for starch gelatinization.
Getting an Accurate Temperature Reading
You will need an instant-read thermometer. Gently insert the thermometer into the center of the loaf, avoiding the heating element. Research often suggests an ideal internal temperature range of 200-210°F (93-99°C) for most yeast breads (Food Safety and Inspection Service). We found this range consistently indicates full baking.
Here’s a quick guide for temperature checks:
| Bread Type | Target Internal Temperature |
|---|---|
| White Bread / Basic Loaf | 200-210°F (93-99°C) |
| Whole Wheat Bread | 200-210°F (93-99°C) |
| Enriched Breads (e.g., Brioche) | 190-200°F (88-93°C) |
Feeling for Doneness: Texture Cues
The way your bread feels can also tell you a lot. Once cooled slightly, your bread should feel firm yet elastic. It should spring back easily when you gently press it. A sticky or overly soft texture suggests it still needs more time in the machine.
The Squeeze Test
Give the side of the loaf a gentle squeeze. If it feels squishy or leaves an indentation, it’s probably not done. A well-baked loaf will offer some resistance and then return to its original shape. This elasticity comes from a fully developed gluten structure.
The Aroma of Success
Oh, that smell! There’s a distinct difference between the aroma of rising dough and the deep, complex scent of fully baked bread. As your bread maker nears the end of its cycle, your kitchen should fill with a rich, toasted, almost sweet fragrance. This isn’t just a pleasant smell; it’s an indicator of complete baking.
Weighing Your Options: Weight and Feel
This is a more subtle indicator, but some experienced bakers notice it. A properly baked loaf often feels slightly lighter than an underbaked one of the same size. This is because moisture has evaporated during the baking process. It will also feel firm and crispy on the outside, not dense or soggy.
Troubleshooting Common Bread Maker Issues
Sometimes, despite your best efforts, your bread might not look quite right. Don’t worry, we’ve all been there! Your bread maker is a fantastic tool, but it’s important to understand its nuances.
When Your Bread is Too Pale
If your bread’s crust is light, it might be due to insufficient baking time or too much moisture in the dough. You can often finish it with a “bake only” cycle on your machine, or even pop it into a conventional oven for 10-15 minutes at 350°F (175°C).
When Your Bread is Too Dark
Conversely, a very dark or hard crust means it’s been overbaked. This could be due to too long a baking cycle or too much sugar in your recipe. For future loaves, try selecting a lighter crust setting on your bread maker or reducing baking time slightly if possible.
Quick Doneness Checklist:
- Is the crust a uniform golden-brown?
- Does the bottom sound hollow when tapped?
- Is the internal temperature 200-210°F?
- Does it feel firm and springy to the touch?
- Can you smell that wonderful, fully baked aroma?
- Does the loaf feel lighter and crisper?
Conclusion
Learning how to tell when your bread maker bread is done involves a bit of observation and practice, but it’s incredibly rewarding. By combining visual cues like a golden-brown crust with the hollow tap test and a reliable temperature check, you’ll consistently achieve perfectly baked loaves. Remember, your bread maker is there to simplify the process, and with these tips, you’ll be baking with confidence and enjoying delicious, homemade bread every time. Happy baking!
What if my bread looks done but feels sticky inside?
If your bread looks golden-brown but feels sticky or gummy internally, it is likely underbaked. This often means it needs more time in the bread maker’s baking cycle. You might need to use a “bake only” setting for an additional 10-15 minutes or transfer it to a conventional oven to finish baking.
Can I put bread back in the bread maker if it’s not done?
Yes, you can often place an underbaked loaf back into the bread maker on a “bake only” cycle. Keep a close eye on it, checking every 5-10 minutes, especially for the internal temperature and crust color, to avoid overbaking.
How do I prevent my bread from getting a burnt crust in the bread maker?
To prevent a burnt crust, always use the correct crust setting (light, medium, dark) for your recipe. If your bread maker consistently over-browns, try covering the top of the pan loosely with aluminum foil for the last portion of the baking cycle. Reducing the sugar in your recipe slightly can also help, as sugar promotes browning.
Is it normal for bread maker bread to be denser than oven-baked bread?
Bread maker bread can sometimes be slightly denser than traditional oven-baked loaves due to the single pan environment and the compact nature of the machine. However, a properly baked bread maker loaf should still be light and airy inside. Excessive density often points to too little liquid, too much flour, or insufficient rising time.
How long should I let bread maker bread cool before slicing?
After removing your bread from the bread maker, let it cool on a wire rack for at least 30-60 minutes, or even longer for larger loaves. Slicing hot bread can lead to a gummy texture inside, as the internal cooking process continues during cooling and moisture redistributes throughout the loaf. Patience here yields the best results!


