Can Kids Use A Bread Maker?
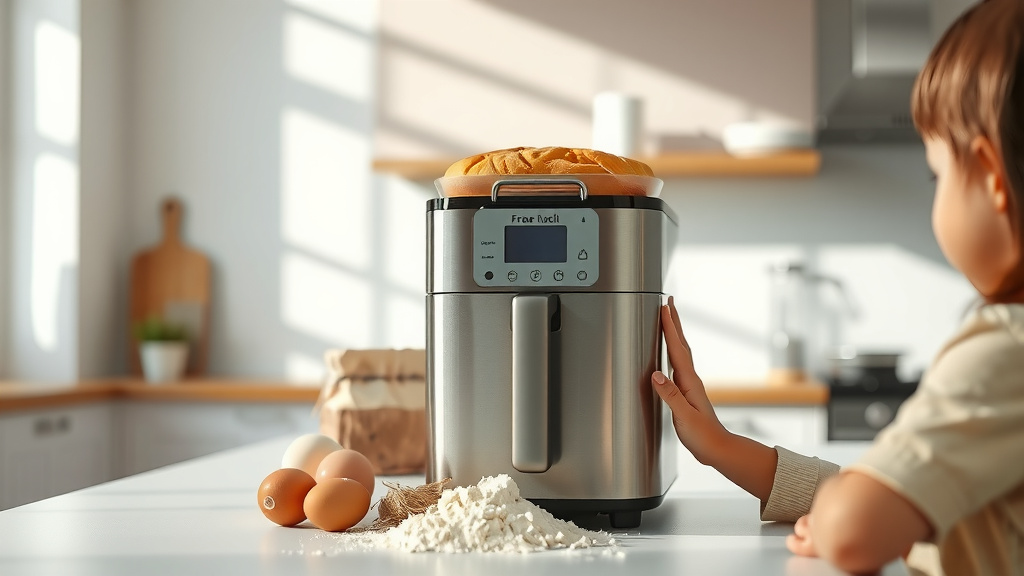
Kids can certainly use a bread maker, but always with adult supervision and guidance, especially when handling hot components or sharp tools.
A bread machine provides a fantastic, safe way for children to learn baking basics, promoting kitchen skills and a love for fresh bread.
TL;DR:
- Kids can use bread makers with proper adult supervision.
- It’s a wonderful tool for teaching baking skills and kitchen safety.
- Start with simple recipes and age-appropriate tasks.
- Emphasize safety, especially around hot parts.
- Make it a fun, shared family activity to create delicious bread.
Can Kids Use A Bread Maker?
Yes, kids can absolutely use a bread maker! It’s an excellent kitchen tool for them when you provide proper supervision and instruction.
Imagine the joy on your child’s face as they watch dough rise. A bread maker helps teach valuable life skills in a controlled, fun environment.
Why Involve Kids with a Bread Maker?
Bringing kids into the kitchen with a bread maker offers many advantages. You’re not just making bread; you’re creating learning opportunities.
It’s a unique way to introduce them to cooking without the complexities of traditional baking. Think of it as a miniature baking laboratory.
Building Confidence in the Kitchen
When children help make something delicious, their confidence soars. They feel a sense of accomplishment by contributing to mealtime.
This early exposure helps them feel comfortable and capable in the kitchen. Many experts say that cooking together aids in developing self-esteem (American Academy of Pediatrics).
Understanding Food Processes
A bread maker lets kids see the magic of baking. They witness raw ingredients transform into a loaf, fostering an understanding of where food comes from.
It’s a natural science lesson. They learn about yeast, gluten, and how heat affects dough, all while having hands-on fun.
Safety First: Key Considerations
While bread makers are generally safe, adult supervision is non-negotiable. Your role is to ensure a secure and positive experience.
Teaching safety from the start creates good habits. You’re showing them how to respect kitchen appliances and handle food responsibly.
Hot Surfaces and Moving Parts
Bread makers get very hot during operation. Always teach children to keep hands away from the machine’s exterior and viewing window.
The kneading paddle inside also moves during cycles. Remind them never to open the lid or reach inside when the machine is active. Safety is always paramount.
Measuring and Ingredients Safety
Some tasks, like handling yeast or precise measurements, might need your help. Ensure all ingredients are fresh and food-safe.
Teach kids about proper handwashing before and after touching food. This prevents the spread of germs and promotes good hygiene habits (CDC).
Choosing the Right Bread Maker for Families
Not all bread makers are created equal. When involving kids, look for features that simplify the process and enhance safety.
A user-friendly model means less frustration for little hands. You want a machine that makes baking an enjoyable journey, not a chore.
Features That Help Kids
Consider models with a clear viewing window. Kids love watching the dough mix and rise, making the process more interactive and engaging.
Simple, clearly labeled buttons are also a plus. A delay timer can be exciting too, letting them wake up to the smell of fresh bread.
Age-Appropriate Tasks for Little Bakers
Tailor responsibilities to your child’s age and skill level. This prevents overwhelm and keeps their interest alive and strong.
Think of it as a gradual learning curve. What they do today will prepare them for more complex tasks tomorrow.
Here’s a simple guide for different age groups:
| Age Group | Safe Tasks (with supervision) | Adult Supervision Level |
|---|---|---|
| Toddlers & Preschoolers (2-5) | Pour pre-measured ingredients, push the start/stop button. | High (hands-on assistance) |
| Young School-Aged (6-9) | Measure dry ingredients, add water, select basic cycle, decorate baked loaf. | Medium (close observation) |
| Pre-Teens & Older (10+) | Measure all ingredients, select cycles, help clean, experiment with flavors. | Low (guidance as needed) |
Toddlers and Preschoolers (Ages 2-5)
For the youngest chefs, focus on simple pouring. Have ingredients ready in separate bowls for them to tip into the pan.
Let them press the “start” button with your finger. This small action gives them ownership and a sense of purpose.
Young School-Aged Kids (Ages 6-9)
These kids can handle measuring dry ingredients like flour and sugar. Teach them about leveling off cups.
They can also help select the bread cycle. Guide them to read recipe instructions and follow steps carefully.
Pre-Teens and Older (Ages 10+)
Older children can manage most steps, including precise liquid measurements. This is a great time to introduce more complex recipes.
Encourage them to research different bread types. They can even take charge of the cleanup, fostering responsibility in the kitchen.
Simple Recipes for Kid-Friendly Success
Start with basic, fool-proof recipes. Success in early attempts will encourage them to keep baking.
You want to build confidence, not create frustration. Simple ingredients often yield the most delicious results.
The Classic White Loaf
A simple white bread recipe is the perfect starting point. It requires few ingredients and is typically very forgiving.
The satisfaction of slicing into a warm, homemade white loaf is truly unmatched. It’s a foundational skill for any budding baker.
Sweet Bread Adventures
Once they master white bread, try sweet variations. Cinnamon raisin bread or a simple brioche can be a delightful next step.
Adding chocolate chips or dried fruit makes it extra special. This lets them personalize their creations and explore new tastes.
Making It a Fun Family Activity
Baking with a bread maker isn’t just about the bread. It’s about spending quality time together and making lasting memories.
Turn it into a weekly tradition. Everyone can take turns picking the bread, fostering a shared family interest.
To keep things smooth and enjoyable, consider this quick checklist:
- Always unplug the bread maker when not in use.
- Teach children about hot surfaces before starting.
- Keep small hands and utensils away from moving parts.
- Use oven mitts or heat-resistant gloves for removing the hot bread pan.
- Have all ingredients prepped and measured for young kids.
Conclusion
Allowing kids to use a bread maker under your watchful eye is a wonderful gift. It teaches them about food, patience, and the joy of creating something from scratch. You’re not just baking bread; you’re kneading in valuable life lessons and strengthening family bonds. So, go ahead, get messy, and enjoy the delicious journey of baking together!
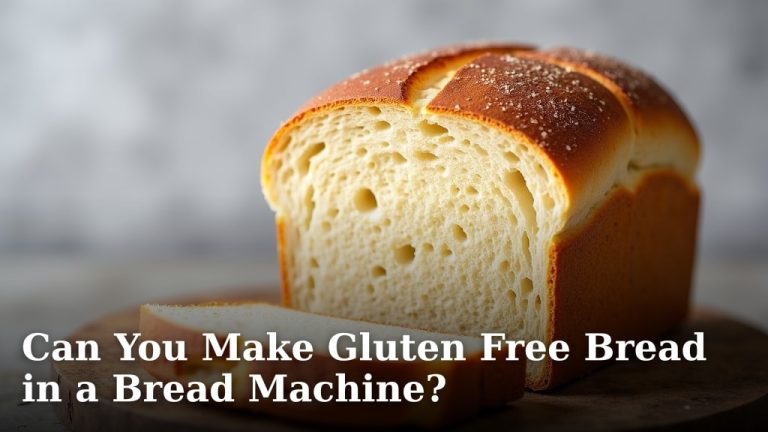
Can a bread maker make gluten-free bread?
Yes, most modern bread makers have a specific gluten-free cycle. This cycle is designed to mix and bake gluten-free dough, which often has a different consistency, preventing it from over-kneading. Always check your bread maker’s manual for specific instructions and suitable recipes.
What’s the best type of flour to start with for kids?
For beginner bakers, all-purpose flour or bread flour are excellent choices. They are easy to work with and produce consistent results. Whole wheat flour can be used, but it sometimes requires slight adjustments to liquid content, which might be more complex for young children.
How do I clean a bread maker after kids use it?
Always unplug the bread maker and allow it to cool completely before cleaning. Remove the bread pan and kneading paddle. These parts can usually be washed by hand with warm, soapy water. Wipe the interior and exterior of the machine with a damp cloth, avoiding harsh chemicals, as recommended by manufacturers.
Can kids add toppings or mix-ins to the bread?
Absolutely! Adding mix-ins like dried fruits, nuts (if no allergies), or chocolate chips is a fantastic way to personalize bread. Most bread makers have a “mix-in” alert beep during the kneading cycle, which is the perfect time for children to safely add these ingredients with your help.
Are there any specific safety accessories I should consider?
For added safety, consider heat-resistant oven mitts, especially for handling the hot bread pan. A sturdy step stool can help younger children reach the counter safely. Always ensure the bread maker is placed on a stable, flat surface away from the edge of the counter.