How To Make Cinnamon Raisin Bread In A Bread Maker?

To make cinnamon raisin bread in a bread maker, carefully layer your wet ingredients, then dry ones, with yeast placed separately on top of the flour. Select your machine’s “Sweet” or “Basic” bread cycle, usually for a 2-pound loaf, and let it complete the automated mixing, kneading, and baking process.
Add your raisins and cinnamon at the bread maker’s specific “mix-in” signal, or during the last five minutes of the final kneading cycle, to ensure even distribution and prevent them from being crushed.
- Load ingredients precisely: liquids first, then dry, keeping yeast separate until mixing.
- Add raisins and cinnamon either at the “mix-in” alert or during the bread maker’s last knead.
- Choose the “Sweet” or “Basic” setting and your preferred crust color on your machine.
- Allow the bread maker to handle the entire process from start to finish.
- Remove and cool the bread completely on a wire rack before slicing for the best texture.
How To Make Cinnamon Raisin Bread In A Bread Maker?
You can easily create delicious cinnamon raisin bread right in your bread maker with minimal fuss.
This convenient appliance handles all the hard work, from mixing to baking, making it a joy to bake.
Gathering Your Ingredients
Success in baking hinges on accurate measurements, so treat your kitchen like a precise laboratory.
Each ingredient contributes uniquely to the final loaf’s flavor and structure.
Essential Dry Ingredients
You will need bread flour, known for its higher protein content, which creates a stronger, chewier bread structure.
Granulated sugar adds sweetness and helps activate the yeast, while salt balances the overall taste.
Dry milk powder is optional, but it often leads to a softer crust and improved browning.
Wet Wonders
Warm water or milk is essential for waking up the yeast; aim for a temperature between 105-115°F (40-46°C).
Butter or oil contributes to a tender crumb and adds richness to your bread.
An egg, if used, will give your loaf a richer flavor and a slightly softer, more luxurious texture.
The Stars: Cinnamon and Raisins
These two ingredients are why we’re here, giving this bread its signature taste.
Ground cinnamon provides that warm, inviting spice that everyone loves.
Plump raisins bring bursts of natural sweetness and a lovely chewiness to every slice.
We found that using good quality, moist raisins truly makes a difference.
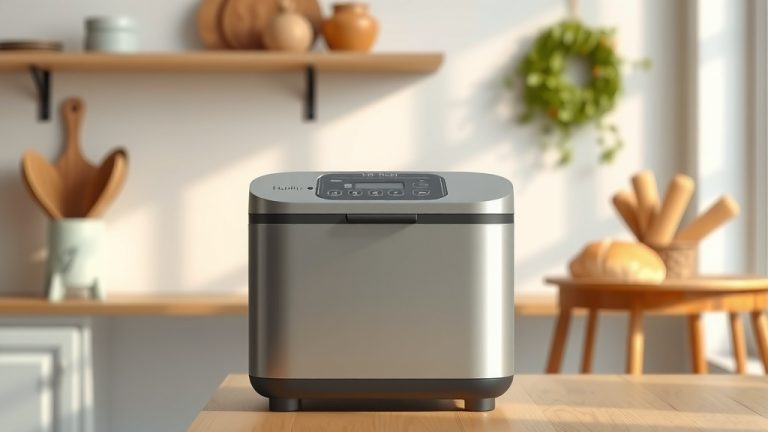
Preparing Your Bread Maker
Your bread maker is a clever device designed to simplify your baking journey.
Understanding its basic functions will help you achieve perfect results every time.
Understanding Cycles and Settings
Most bread makers feature a “Sweet Bread” cycle, which is ideal for this recipe due to its longer rise and bake times.
Alternatively, the “Basic” or “White Bread” cycle can also work well, depending on your machine.
Select your preferred crust color, usually light, medium, or dark, to match your taste.
Step-by-Step Baking Process
Let’s walk through the simple steps to load your ingredients and get your bread baking.
It’s straightforward once you understand the proper order and timing.
Layering Your Ingredients
Proper layering ensures your bread maker mixes everything correctly for optimal results.
First, pour all your warm liquid ingredients into the bottom of the bread machine pan.
Next, add the dry ingredients, carefully layering them over the liquids without mixing.
Make a small indentation in the center of the flour and place the yeast there, keeping it separate from salt and liquids initially (NIH).
Your cinnamon can go in with the dry ingredients, but raisins are added later.
Using the Mix-In Signal
Many bread makers beep to signal it’s time to add fruits or nuts, usually during the last knead cycle.
This is when you add your raisins, allowing them to be fully incorporated without being overly crushed.
If your machine doesn’t have a signal, add them about 5-10 minutes into the final kneading stage.
Post-Bake Rituals
Once baking is complete, carefully remove the hot pan using oven mitts.
Immediately take the bread out of the pan and place it on a wire rack to cool completely.
This crucial cooling step prevents a soggy bottom and allows the internal structure to set properly.
Common Mistakes to Sidestep
Baking can be finicky, and small errors can change your bread’s outcome significantly.
Being aware of common pitfalls helps you bake better loaves every time.
| Mistake | The Fix |
|---|---|
| Incorrect ingredient measurements | Use precise measurements, ideally a kitchen scale for flour. |
| Using inactive yeast | Always check yeast expiration; test it in warm water if unsure. |
| Adding raisins too early | Wait for the machine’s “mix-in” signal or the final knead. |
| Not cooling bread completely | Always cool fully on a wire rack for best texture and slicing. |
| Ignoring dough consistency | Observe dough during kneading; it should form a smooth ball. |
Pro Tips for a Perfect Loaf
Want to impress your family and friends with an exceptional loaf of bread? These simple tips can help.
Small adjustments often lead to big improvements in your baking results.
- Warm your liquids: Yeast thrives in warm, not hot, liquids for optimal activation.
- Soak dry raisins: If your raisins seem hard, soak them in warm water for 10 minutes, then drain well.
- Avoid opening the lid: Resist the urge to peek during the rising and baking cycles.
- Check yeast freshness: Old yeast is a common culprit for bread that doesn’t rise well.
- Don’t slice hot bread: It needs time to finish cooking and setting internally.
The Joy of Homemade Cinnamon Raisin Bread
There’s nothing quite like the aroma of freshly baked cinnamon raisin bread filling your home.
This homemade treat offers a satisfaction that store-bought versions simply cannot match.
The bread maker makes this indulgent pleasure accessible for busy schedules.
Environmental Adjustments for Baking
Your local environment, like altitude and humidity, can influence your baking outcomes.
At higher altitudes, dough tends to rise faster, sometimes requiring less yeast and more liquid (Mayo Clinic).
In very humid conditions, you might need a tablespoon more flour; in dry areas, a touch more liquid.
Storing for Lasting Freshness
Once your beautiful loaf is cool, how do you keep it tasting great for days?
Store it in an airtight container or a clean bread bag at room temperature for up to 3-5 days.
For longer preservation, slice the cooled bread and freeze individual portions; they thaw perfectly for quick enjoyment.
Conclusion
Baking cinnamon raisin bread in your bread maker is a wonderfully simple way to enjoy a classic comfort food.
With precise ingredients and a little attention to your machine’s process, you’re set for success.
Embrace the ease and delight of homemade bread, bringing warmth and flavor to your table with every slice.
What is the ideal water temperature for activating yeast in a bread maker?
The ideal water temperature for activating yeast is typically between 105-115°F (40-46°C). Water that is too cold will not activate the yeast effectively, leading to poor rise, while water that is too hot can kill the yeast, preventing any rise at all.
Can I add more cinnamon or different spices?
Yes, you can certainly customize your spice blend. You can increase the amount of cinnamon for a bolder flavor or add other warm spices like nutmeg, allspice, or cardamom. Just be mindful not to overdo it, as too much spice can sometimes inhibit yeast activity.
My bread maker paddle gets stuck in the loaf; what can I do?
The paddle often bakes into the loaf. Some bread makers have a feature to remove the paddle before the final rise and bake. If not, try greasing the paddle well before adding ingredients, or remove the bread immediately after baking and use a small hook tool (often included with the machine) to extract the paddle.
Why did my cinnamon raisin bread collapse in the middle?
A collapsed loaf often indicates that the dough over-proofed, meaning it rose too much and then deflated. This can happen with too much yeast, too much liquid, or if the room temperature is too warm. Adjusting yeast quantity or reducing the “Sweet” cycle time might help.
Can I use gluten-free flour for this recipe in a bread maker?
Yes, you can use gluten-free flour, but you will need a specific gluten-free bread recipe designed for bread makers. Gluten-free flours require different liquid ratios and often include binders like xanthan gum to achieve a proper structure, as they lack the gluten found in traditional wheat flour.