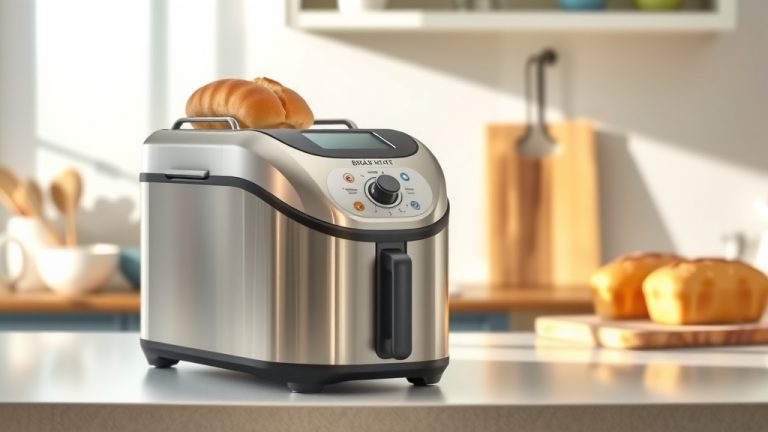
How To Make Milk Bread In A Bread Maker?

To make delicious milk bread in your bread maker, simply add the ingredients in the order specified by your machine, typically liquids first, then dry ingredients, and yeast last.
The bread maker then mixes, kneads, proofs, and bakes the milk bread for you, yielding a wonderfully soft loaf with minimal effort.
Here’s the straightforward answer you’re looking for before diving into all the details:
- Making milk bread in a bread maker simplifies the process, handling all the kneading and proofing steps.
- You’ll need common ingredients like milk, bread flour, sugar, active dry yeast, and butter for that signature soft texture.
- Always add ingredients in the correct order: liquids, then dry, then yeast, to ensure proper activation and dough development.
- Select your bread maker’s “Sweet” or “White Bread” cycle, which typically includes a longer kneading time ideal for enriched doughs.
- The result is a wonderfully soft, slightly sweet loaf perfect for sandwiches, toast, or enjoying plain with your favorite spread.
How To Make Milk Bread In A Bread Maker?
Making milk bread in a bread maker is surprisingly simple. You just load the correct ingredients into the pan, choose the right setting, and let the machine do the heavy lifting of mixing, kneading, and baking.
Why Choose Your Bread Maker for Milk Bread?
Are you tired of endless kneading? Your bread maker is a fantastic tool for milk bread. It automates the entire process, from mixing and kneading the dough to letting it rise perfectly and then baking it. This means less mess and more free time for you!
Many experts we found agree that bread machines are great for enriched doughs like milk bread. They provide the consistent warmth needed for a good rise (research from King Arthur Baking). Plus, the precise timing helps achieve that airy, soft texture we all love.
The Magic Behind Milk Bread
Milk bread, often called Japanese milk bread, stands out because of its incredibly soft, fluffy texture and delicate sweetness. It’s a real treat! The secret often involves a technique called tangzhong, a cooked flour paste, which helps keep the bread moist and fresh for longer.
Tangzhong Method: The Secret to Softness
While some traditional milk bread recipes use tangzhong, you can still achieve a beautiful, soft loaf without it in your bread maker. The machine’s thorough kneading and the use of milk and butter naturally contribute to a tender crumb. However, if you’re keen to try it, just mix a small amount of flour and milk/water, cook it into a paste, cool it, and add it with your wet ingredients.
Gathering Your Milk Bread Ingredients
Before you begin, make sure you have all your ingredients ready. Fresh ingredients make a big difference in the final taste and texture of your bread.
Here’s a quick list of what you’ll need for a standard loaf:
| Ingredient | Quantity (Approximate) | Notes |
|---|---|---|
| Milk (warm, about 105-115°F) | 1 cup (240ml) | Whole milk works best for richness. |
| Melted Butter | 3-4 tablespoons | Unsalted butter is preferred. |
| Granulated Sugar | 3-4 tablespoons | Adds sweetness and helps yeast activate. |
| Salt | 1 teaspoon | Balances flavor, strengthens gluten. |
| Bread Flour | 3 cups (360g) | Higher protein content for better chew. |
| Active Dry Yeast | 2 teaspoons | Ensure it’s fresh and not expired. |
Always remember, these are general guidelines. Your bread maker’s specific recipe might vary slightly, so always check its manual for the most accurate measurements for your model.
The Essential Ingredient Order
This is where many people get tripped up! The order you add ingredients to your bread maker pan is really important for a successful loaf. Why? Because the yeast needs to be kept separate from the salt and liquids until the kneading cycle begins.
Layering for Success
Most bread makers recommend adding liquids first, then dry ingredients, and finally the yeast on top. Think of it as building layers:
- Layer 1 (Bottom): Milk, melted butter.
- Layer 2 (Middle): Sugar, salt, and half of the flour.
- Layer 3 (Top): Remaining flour, forming a little mound, then the yeast placed gently on top of the flour.
This method prevents the yeast from activating too early or being killed by direct contact with salt or very warm liquids (research often connects proper yeast activation with excellent bread rise – The Spruce Eats).
Which Bread Maker Setting Is Best?
Choosing the correct setting on your bread maker is just as important as the ingredients. You’re looking for a cycle that offers enough kneading time for an enriched dough like milk bread and a suitable rising period.
Sweet or White Bread Cycle?
For milk bread, we found that the “Sweet Bread” cycle is usually the best option. This cycle is designed for doughs with higher sugar and fat content, providing a longer kneading and rising time. If your machine doesn’t have a “Sweet Bread” setting, the “White Bread” or “Basic” cycle can often work well too, especially if it includes a longer kneading phase.
Always refer to your bread maker’s instruction manual. Some machines have specific cycles just for enriched doughs that would be perfect for milk bread.
A Step-by-Step Baking Guide
You’ve prepped your ingredients and understand the settings. Now let’s walk through the simple steps to getting that perfect loaf of milk bread.
First, ensure your bread maker pan is clean and the kneading paddle is securely in place. You wouldn’t want a stuck paddle, would you?
- Add your warm milk and melted butter to the bread pan.
- Carefully add the sugar and salt. Try to keep them separate from where the yeast will sit.
- Add about half of your bread flour, then the rest on top, creating a small “mountain.”
- Make a small indentation in the flour mountain and add your active dry yeast there.
- Place the bread pan into the bread maker and close the lid.
- Select the “Sweet Bread” or “White Bread” cycle and choose your desired crust color (light, medium, dark).
- Press start and let your bread maker do its wonderful work!
- Once the cycle is complete, carefully remove the hot bread pan from the machine.
- Tip the loaf out onto a wire rack to cool completely before slicing. This prevents a soggy bottom!
Many experts emphasize cooling bread thoroughly before slicing. It lets the internal structure set properly (America’s Test Kitchen).
Your Checklist for Perfect Milk Bread
Here’s a quick reminder to ensure your milk bread turns out beautifully every time:
Fresh Ingredients: Especially yeast, for optimal rise.
Correct Order: Liquids first, then dry, then yeast on top.
Proper Cycle: “Sweet Bread” or “White Bread” setting.
Cool Completely: Let the loaf cool on a wire rack for at least an hour.
No Peeking: Resist the urge to open the lid during the rise or bake cycles.
Troubleshooting Common Milk Bread Issues
Even with careful steps, sometimes things don’t go exactly as planned. Don’t worry, it happens to the best of us! Here are a few common hiccups and how to fix them.
When the Dough Isn’t Right
- Dough didn’t rise enough: Is your yeast fresh? Was the milk too hot (killing the yeast) or too cold (slowing it down)? Also, check your expiry dates!
- Loaf is too dense: This often points to too much flour or not enough liquid. Measuring precisely, especially with a kitchen scale for flour, can really help.
- Bread collapsed: Too much liquid or too much yeast can sometimes cause this. The dough rises too quickly and then can’t support itself.
Baking is a science and an art. Slight adjustments in ingredients or environment can make a big difference (many experts attest to this).
Storing Your Homemade Milk Bread
You’ve just baked a beautiful loaf of milk bread. How do you keep it fresh and delicious? The key is proper storage to maintain that wonderful softness.
Once your bread is completely cool, store it in an airtight container or a large resealable plastic bag at room temperature. It should stay fresh and soft for 2-3 days. For longer storage, you can slice the loaf and freeze the slices in a freezer-safe bag for up to a month. Just toast directly from frozen when you’re ready to enjoy!
Conclusion
Making milk bread in a bread maker is a truly rewarding experience, offering you a shortcut to incredibly soft, flavorful bread. By understanding the correct ingredient order, choosing the right cycle, and giving it time to cool, you can consistently achieve bakery-quality results right in your own kitchen. You’re now equipped to confidently bake your next loaf. Happy baking!
Can I substitute regular all-purpose flour for bread flour in milk bread?
While you can use all-purpose flour, bread flour is highly recommended for milk bread. Bread flour has a higher protein content, which develops more gluten. This extra gluten is what gives milk bread its signature chewy yet soft texture and helps it rise beautifully in the bread maker. Using all-purpose flour might result in a slightly less chewy and potentially denser loaf.
Do I need to warm the milk before adding it to the bread maker?
Yes, warming the milk is important for activating the yeast. Ideally, it should be between 105-115°F (40-46°C). If the milk is too cold, the yeast will be slow to activate, leading to a poor rise. If it’s too hot, it can kill the yeast entirely, and your bread won’t rise at all. A quick check with a kitchen thermometer ensures the perfect temperature.
What if my bread maker doesn’t have a “Sweet Bread” setting?
If your bread maker lacks a specific “Sweet Bread” setting, the “White Bread” or “Basic” cycle is usually the next best choice. These cycles typically offer sufficient kneading and rising times suitable for most enriched bread doughs. Some users have found success with a “Dough” cycle followed by a separate bake cycle, but starting with “White Bread” is simpler for a complete process.
Why did my milk bread taste too salty or too bland?
Taste issues like being too salty or bland usually stem from incorrect measurements of salt or sugar. Ensure you are using precise measurements, especially for salt, which can easily overpower flavors if too much is added. Using a digital kitchen scale for dry ingredients like flour, sugar, and salt can significantly improve accuracy and consistency in your baking results.
How do I prevent the kneading paddle from getting stuck in my finished milk bread?
The kneading paddle can sometimes get baked into the bottom of your loaf. A common trick is to remove the dough from the machine after the last kneading cycle (before the final rise) and carefully take out the paddle, then reshape the dough by hand and return it to the pan for its final rise and bake. Some bread maker models also have paddles designed to be less prone to sticking, or you can try greasing the paddle before adding ingredients.