How To Make Your First Loaf In A Bread Maker?

To make your first loaf in a bread maker, simply measure your ingredients precisely, add them to the pan in the correct order (liquids first, then dry, yeast last), select your desired cycle, and press start. The machine handles all the mixing, kneading, rising, and baking for you.
You can enjoy a fresh, homemade loaf by following these simple steps: ensure your ingredients are fresh, especially the yeast, and always scrape down the sides of the pan after the initial mixing if necessary to include all flour.
- Making your first bread machine loaf is easier than you think.
- Start with a simple white bread recipe to get comfortable.
- Accurate measurement of ingredients is key for success.
- Always add wet ingredients first, then dry, with yeast on top.
- Don’t forget to remove the paddle before slicing for perfect loaves.
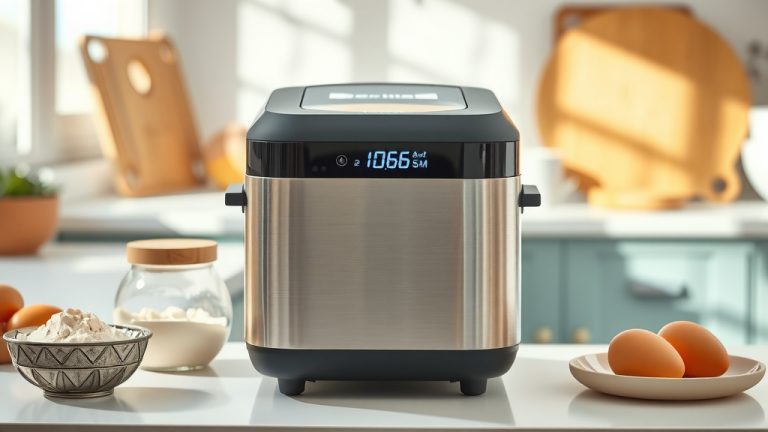
So, you’ve unboxed your new bread maker, right? It’s sitting there, maybe a bit intimidating, promising fresh bread. You might be wondering, “Where do I even begin?” Don’t worry, baking your first loaf in a bread machine is far simpler than traditional baking, and you’re about to become a pro. It’s like magic, really, but it’s actually smart engineering.
How To Make Your First Loaf In A Bread Maker?
Making your first loaf in a bread maker involves gathering fresh ingredients, layering them into the pan according to your recipe, selecting the appropriate cycle, and then letting the machine do all the hard work. It’s a straightforward process that yields delicious results.
Gather Your Baking Essentials
Before you even open the lid, let’s talk ingredients. Think of them as the building blocks of your delicious bread. You’ll need flour, water or milk, sugar, salt, butter or oil, and most importantly, yeast. We’ve found that using fresh, high-quality ingredients makes a huge difference in taste and texture.
Choosing the Right Flour
For your first loaf, we recommend using all-purpose or bread flour. Bread flour has more protein, which helps create a chewier texture. It’s forgiving for beginners. Some experts suggest avoiding bleached flour for bread machines (King Arthur Baking Company).
Yeast: The Life of Your Loaf
Active dry yeast or instant yeast works best. Always check the expiration date. Stale yeast means a flat loaf, and no one wants that! Many guidelines point to storing yeast properly, often in the refrigerator, to extend its life (Fleischmann’s Yeast).
Precision is Your Friend
Baking is a science, so measuring accurately is crucial. Use proper measuring cups and spoons. For flour, gently spoon it into the cup and level it off; don’t pack it down. A kitchen scale is a fantastic tool for accuracy, but it’s not strictly necessary for your first try.
The Order of Operations: Layering Ingredients
This is where many new bakers get tripped up, but it’s super simple once you know the rule. Think of it as a quiet agreement between the ingredients. The general rule is: liquids first, then dry ingredients, and yeast last.
Why Layering Matters
Adding ingredients in this specific order prevents the yeast from activating too early. Premature activation from contact with salt or liquid can hinder your rise. We found that following the recipe’s layering instructions almost guarantees success.
Here’s a typical layering sequence:
- Water or milk, melted butter or oil
- Sugar, salt
- Flour
- Yeast (sprinkled on top of the flour, away from liquids and salt)
Setting Up Your Bread Maker
You’ve got your ingredients in the pan. Now, it’s time to choose the cycle. Most bread machines have a “Basic White” or “White Bread” setting. This is your go-to for the first loaf. You might also select your crust color – light, medium, or dark. Go with medium for a balanced crust.
Inserting the Pan and Paddle
Ensure the kneading paddle is securely attached to the shaft inside the bread pan before adding ingredients. Then, lock the pan firmly into your bread maker. This is an easy step to overlook when you’re excited.
Selecting the Cycle and Starting
Press the “Menu” button to select your cycle. Choose “Basic” or “White.” If your machine has a loaf size option (e.g., 1.5 lb, 2 lb), pick the one that matches your recipe. Then, simply press “Start.” Now, the machine takes over! Isn’t that wonderful?
The Waiting Game: What Happens Inside?
Your bread maker will go through several stages: mixing, kneading, rising, and baking. It’s a full cycle, often lasting 3-4 hours. You’ll hear some whirring and thumping as it mixes and kneads the dough. It’s working hard for you!
Checking the Dough (Optional)
During the first kneading cycle, you might peek to check the dough consistency. It should form a smooth, elastic ball. If it looks too wet (sticky) or too dry (crumbly), you can add a tablespoon of flour or water, respectively. This is a pro-tip for perfection, but not essential for your first attempt.
| Ingredient | Standard 1.5 lb Loaf | Standard 2.0 lb Loaf |
|---|---|---|
| Water or Milk | 1 cup + 2 tbsp | 1 cup + 6 tbsp |
| Butter/Oil | 2 tbsp | 3 tbsp |
| Salt | 1.5 tsp | 2 tsp |
| Sugar | 2 tbsp | 3 tbsp |
| Bread Flour | 3 cups | 4 cups |
| Yeast (Active Dry/Instant) | 2 tsp | 2.5 tsp |
The Sweet Smell of Success: After Baking
When the cycle finishes, your bread maker will beep. Open the lid carefully; a cloud of steam and an incredible aroma will greet you. This is the moment you’ve been waiting for! The smell alone is a reward.
Removing and Cooling Your Loaf
Immediately remove the bread pan from the machine. Invert the pan onto a wire rack to release the loaf. Sometimes, the kneading paddle sticks in the bottom of the bread. Use a non-scratch utensil to carefully remove it before slicing. Always cool your bread completely on a wire rack before slicing. Slicing hot bread can make it gummy inside.
Common First-Loaf Questions Answered
It’s normal to have a few questions or minor hiccups. Did your loaf sink? Was it too dense? These are common learning experiences. Many experts say that practice makes perfect when it comes to bread making. Don’t be discouraged by a less-than-perfect first attempt.
My Loaf Didn’t Rise Enough!
This often points to inactive yeast or old flour. Check the expiration dates! Also, ensure your liquid isn’t too hot (which kills yeast) or too cold (which slows it down). Research often connects proper water temperature with yeast activity (NIH).
My Bread Is Too Dense!
This can happen if you used too much flour or not enough liquid. Humidity can also play a role. Try slightly reducing the flour next time, or adding a touch more liquid. Sometimes, a denser texture is normal for certain bread types too.
The Paddle Is Stuck!
It happens! Once the bread cools a bit, it’s easier to remove. If it’s really stuck, a gentle twist or wiggling with a wooden spoon often helps. Just be careful not to damage the bread. Many users suggest removing the paddle while the bread is warm but not hot.
Pre-Baking Checklist for Your First Loaf
Before you hit start, run through this quick checklist to ensure a smooth baking experience:
- Did you check yeast expiration?
- Are all ingredients measured precisely?
- Are liquids added first, then dry, then yeast?
- Is the kneading paddle in place?
- Is the bread pan securely locked?
- Have you selected the correct cycle and loaf size?
Conclusion
Baking your first loaf in a bread maker is a wonderfully rewarding experience. It’s a journey of simple steps leading to a delicious, homemade treat. By following these guidelines – careful measuring, correct layering, and selecting the right cycle – you’re well on your way to enjoying the aroma and taste of freshly baked bread. Don’t be afraid to experiment after your first success. Your bread maker is a powerful tool just waiting to transform basic ingredients into culinary delights. Happy baking!
Can I use all-purpose flour instead of bread flour?
Yes, you can absolutely use all-purpose flour for your first loaf. While bread flour offers a chewier texture due to higher protein content, all-purpose flour will still produce a good, edible loaf. It’s a great starting point!
How do I know if my yeast is still good?
To test your yeast, mix about half a teaspoon with a quarter cup of warm water (around 105-115°F or 40-46°C) and a pinch of sugar. If it’s active, it will foam up within 5-10 minutes. No foam means your yeast is likely inactive and should be replaced.
Do I need to warm the water or milk before adding it?
Yes, it’s generally best to use lukewarm water or milk (around 80-90°F or 27-32°C). This helps activate the yeast without shocking it. Too cold, and the yeast will be sluggish; too hot, and it could kill the yeast.
My bread machine makes a lot of noise. Is that normal?
Some noise, especially during the mixing and kneading cycles, is completely normal. Bread machines have powerful motors that work hard to mix dense dough. If you hear unusual grinding or loud banging, check if the bread pan is properly secured.
How long can I store homemade bread from a bread maker?
Freshly baked bread from a bread maker is best enjoyed within 2-3 days at room temperature. Store it in an airtight container or bread bag to keep it fresh. You can also freeze sliced bread for up to a few months, simply toasting slices as needed.