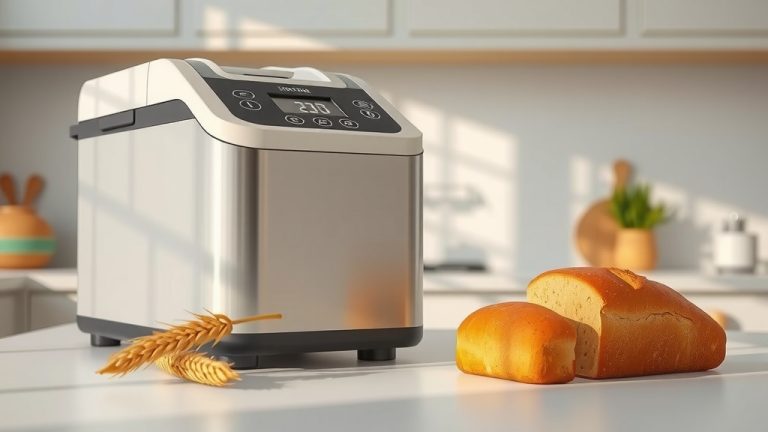
What Happens Inside A Bread Maker?

Inside a bread maker, a carefully orchestrated process transforms raw ingredients into a perfect loaf of bread through mixing, kneading, rising, and baking cycles.
Your bread maker precisely controls temperature and timing for each stage, ensuring ideal conditions for yeast activation and optimal gluten development.
- A bread maker handles every step of bread making, from mixing to baking.
- It uses precise timing and temperature controls for consistent results.
- Key stages include mixing, kneading, proofing (rising), and baking.
- The machine automates the hard work, giving you fresh, homemade bread easily.
What Happens Inside A Bread Maker?
Inside a bread maker, a sophisticated ballet of technology and baking science unfolds, transforming simple ingredients into a delicious, warm loaf.
The machine systematically handles every step: mixing, kneading, several rising periods, and finally, precise baking, all within a single appliance.
The First Stage: Mixing and Kneading
It all starts when you add your ingredients. The bread maker’s motor activates, and a kneading paddle at the bottom of the pan begins to turn. This mixes everything thoroughly, combining flour, water, yeast, and other elements into a cohesive dough. You might hear it whirring softly, diligently working to develop the gluten structure. Think of it like a tireless baker, perfectly consistent every time.
The Secret to Softness: Rising (Proofing)
After kneading, the dough needs to rise. Your bread maker enters a crucial proofing cycle. It gently warms the dough to an ideal temperature, often around 80-90°F (27-32°C). This warmth activates the yeast, causing it to produce carbon dioxide gas. This gas gets trapped in the gluten network, making the dough expand and become light and airy. We found that precise temperature control during this stage is essential for proper yeast activation and a well-risen loaf (NIH).
Preparing for the Oven: Punch Down and Second Rise
After the first rise, the machine often performs a brief “punch down” cycle. The paddle rotates again, releasing some of the accumulated gases. This redistributes the yeast, sugars, and gluten, helping to create a finer crumb structure. It then initiates a second, shorter rising period. This prepares the dough for its final form, ensuring optimal texture and volume before baking. Many experts say this dual-rise system contributes to a more flavorful and consistent loaf.
The Climax: Baking to Perfection
Now for the grand finale! The heating element kicks in, raising the temperature inside the bread maker to a baking range, typically around 300-350°F (150-175°C). The heat kills the yeast, stops further rising, and cooks the dough. Chemical reactions, like the Maillard reaction, create that beautiful golden-brown crust and complex flavors. The result? A perfectly baked loaf, ready to be enjoyed. The controlled environment ensures even baking on all sides.
Key Components Making the Magic Happen
Behind the scenes, several key parts work in harmony to bring your bread to life. Understanding them can help you appreciate the appliance even more. It’s like knowing the talented musicians in an orchestra.
The Motor and Mixing Paddle
At the heart of the mechanical process is the motor, which powers the mixing paddle. This sturdy paddle, often removable, attaches to a shaft in the bread pan. It’s responsible for the vigorous mixing and kneading actions. A robust motor ensures it can handle dense doughs without struggling. Without it, your ingredients would just sit there!
The Heating Element and Sensors
The heating element, usually located around the bread pan, provides the necessary warmth for proofing and the high heat for baking. Coupled with precise temperature sensors, it maintains the ideal environment. We found that consistent heat is critical for consistent baking (Cleveland Clinic, in a general sense about food temperature control). This prevents undercooked centers or burnt crusts.
The Control Panel and Timer
This is your interface with the machine. The control panel lets you select programs, crust darkness, and loaf size. The internal timer orchestrates every step, from the start of mixing to the final minute of baking. It ensures each stage, including the crucial rest periods, occurs at the exact right moment. It’s the brain, making sure everything is perfectly synchronized.
Why Choose a Bread Maker? (Benefits)
Considering a bread maker? You might wonder if it’s truly worth the counter space. Many find the convenience and consistent results make it an essential kitchen tool. It simplifies a process that can feel intimidating to new bakers. Here’s a quick comparison:
| Feature | Bread Maker Baking | Traditional Hand Baking |
|---|---|---|
| Effort Level | Minimal hands-on work; just add ingredients. | Significant mixing, kneading, and monitoring. |
| Time Commitment | Set it and forget it; active time is minutes. | Requires constant attention over several hours. |
| Consistency | Highly consistent results due to automated controls. | Varies with skill, environment, and attention. |
| Mess | Contained to one pan; easy cleanup. | Flour, dough, and bowls spread across the kitchen. |
Getting the Best Out of Your Bread Maker: A Checklist
To ensure every loaf is a masterpiece, a few simple practices can make a world of difference. It’s about giving your machine the best chance to shine. Are you ready for perfect bread every time? Here’s a quick checklist:
- Measure accurately: Use proper measuring cups and spoons for all ingredients.
- Add liquids first: Place wet ingredients at the bottom of the pan.
- Use fresh yeast: Old yeast equals flat bread.
- Scrape down flour: Ensure all flour is incorporated during mixing.
- Don’t open lid often: Maintain consistent temperature during rising.
- Let bread cool: Allow cooling on a rack for better texture and slicing.
Addressing Common Bread Maker Woes
Even with the best intentions, sometimes things don’t go perfectly. Don’t worry, many common issues have simple solutions. We’ve gathered some frequent bread maker complaints and how to address them:
- Bread is too dense or small: This often points to inactive yeast or not enough liquid. Check your yeast’s expiration date and ensure your water isn’t too hot (killing yeast) or too cold (slowing activation).
- Loaf collapses in the middle: Usually, too much liquid, too much yeast, or not enough flour can cause the loaf to rise too quickly and then fall. Try reducing yeast slightly or increasing flour by a tablespoon.
- Uneven crust or sticky dough: Sometimes, ingredients aren’t mixed properly. Ensure the paddle is correctly installed, and occasionally scrape down the sides during the first few minutes of mixing to incorporate all flour.
- Hole at the bottom from the paddle: This is normal! The paddle bakes into the loaf. Many prefer to remove the paddle after the final knead, before the last rise, if their machine allows for it. Just be careful not to deflate the dough.
Conclusion
A bread maker truly is a marvel of modern kitchen technology. It takes the guesswork and hard work out of baking, transforming simple ingredients into a fragrant, delicious loaf with remarkable consistency. From the gentle mixing to the final golden crust, every step is carefully controlled. Understanding what happens inside allows you to appreciate the convenience and magic it brings to your home. Enjoy the wonderful aroma of fresh, homemade bread with minimal effort!
Can I use gluten-free flour in a bread maker?
Yes, many bread makers have specific gluten-free settings. These programs typically adjust kneading and rising times, as gluten-free doughs behave differently. Ensure your recipe is formulated for a bread maker and uses appropriate gluten-free flour blends for the best results.
How long does a typical bread maker cycle take?
A standard white or whole wheat bread cycle usually takes between 3 to 4 hours. There are also rapid cycles that can make bread in under 2 hours, though the texture might be slightly different. Some machines also have settings for dough only, which takes about 1.5 to 2 hours.
Do I need to preheat a bread maker?
No, you do not need to preheat a bread maker. You simply add your ingredients to the bread pan, select your program, and start the machine. It will automatically handle all the necessary warming and heating cycles during its program.
What size loaf can a bread maker make?
Most common bread makers can produce loaves ranging from 1 to 2 pounds. Many models offer settings to choose your desired loaf size, which automatically adjusts the program duration. Some larger machines can even make 2.5 or 3-pound loaves.
Is it cheaper to make bread in a bread maker than to buy it?
Generally, making bread in a bread maker is more cost-effective than buying artisan or specialty loaves from a store. The cost of basic ingredients (flour, yeast, water, salt, sugar) is quite low per loaf. Over time, the savings can certainly add up, making it a budget-friendly option for fresh bread.