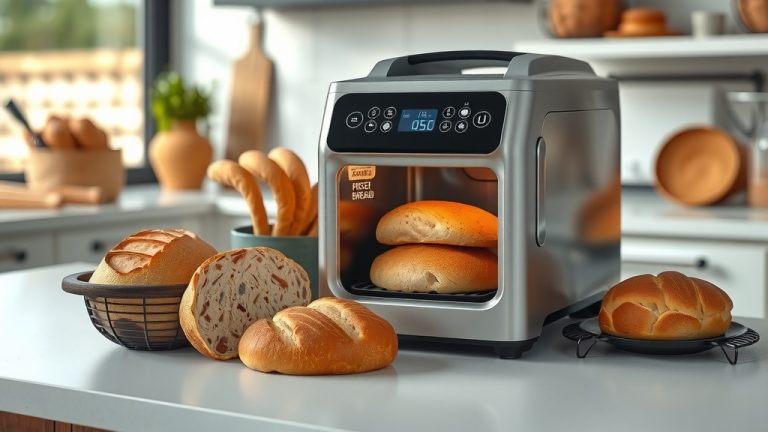
What Settings Should I Use On My Bread Maker?

Choosing the right bread maker settings depends on your recipe, desired loaf size, and preferred crust color. Most bread makers offer basic, whole wheat, rapid, and dough cycles, along with options for light, medium, or dark crusts.
To use your bread maker effectively, always start by selecting the program that matches your ingredient type, like “Basic” for white bread or “Whole Wheat” for denser grains.
- The right bread maker settings mean selecting a program cycle (like Basic, Whole Wheat, or Dough) that matches your recipe.
- You’ll also need to adjust for your desired loaf size (1 lb, 1.5 lb, 2 lb) and preferred crust color (light, medium, dark).
- Always consult your bread maker’s manual, as specific models might have unique settings or program names.
- For quick results, use the “Rapid” or “Quick” setting, but remember it might produce a slightly denser loaf.
- Custom settings are great for specialty breads or if you want to control each stage of the baking process.
What Settings Should I Use On My Bread Maker?
You’re standing there, ingredients ready, but staring at your bread maker’s buttons feels like solving a puzzle, doesn’t it? Don’t worry; we’ve all been there. Choosing the right settings is simpler than you think.
The key is matching the setting to what you’re baking. Think of it like a chef choosing the right oven temperature for a cake versus a roast. Your bread maker has programs designed for different bread types.
Understanding Your Bread Maker’s Core Programs
Most bread makers share a common language of settings. Once you understand these, you’ll feel much more confident. Let’s break down the most common ones you’ll encounter.
These core programs are your go-to for almost any bread recipe. They manage the entire process, from mixing to baking, without you needing to do much.
The Basic Program: Your Everyday Loaf
The “Basic” setting is usually your default for standard white or mixed-grain bread. It’s designed for recipes using bread flour or all-purpose flour.
This cycle includes all the stages: kneading, rising, and baking. It usually takes around 3 to 4 hours, yielding a lovely, soft loaf. It’s the setting you’ll likely use the most.
Whole Wheat Setting: For Heartier Grains
Baking with whole wheat flour? Then the “Whole Wheat” setting is your friend. Whole wheat flour needs a longer kneading time to develop gluten properly.
It also often requires a longer rise time. This setting adjusts for these needs, ensuring your whole wheat loaf isn’t too dense. Many experts recommend this specific setting for best results (NIH).
Rapid or Quick Program: When Time Is Short
Need bread in a hurry? The “Rapid” or “Quick” setting is designed for speed. It cuts down on the rising time significantly.
Keep in mind that while faster, it might produce a slightly denser loaf. It works best with recipes specifically formulated for rapid cycles, often using more yeast.
Dough Cycle: For Hand-Shaped Goodness
The “Dough” setting is fantastic if you want to bake bread in your conventional oven. This cycle performs all the kneading and first rise.
It then stops before baking. You can then remove the dough, shape it into rolls, pizza crusts, or baguettes, and bake it in your regular oven. It offers flexibility and control.
Sweet Bread Program: For Richer Recipes
If your recipe calls for lots of sugar, eggs, butter, or milk, the “Sweet” program is ideal. These ingredients can inhibit yeast activity.
The sweet setting adjusts the kneading and rising times to ensure proper development and texture. It prevents your sweet bread from being too heavy or dense.
Gluten-Free Cycle: A Specialized Choice
For those avoiding gluten, the “Gluten-Free” setting is essential. Gluten-free flours behave very differently from wheat flours.
This setting often involves a shorter rise and baking process. We found that it usually omits the punch-down cycle, which is important for gluten-free doughs to maintain their structure.
| Program Name | Best For | Key Characteristics |
|---|---|---|
| Basic | White, mixed-grain bread | Standard kneading, rising, baking; everyday use |
| Whole Wheat | 100% whole wheat, rye | Longer knead, longer rise; prevents density |
| Rapid/Quick | Quick-rise recipes | Shorter rise times; slightly denser loaf possible |
| Dough | Pizza, rolls, pretzels | Mixes, kneads, first rise only; stops before bake |
| Sweet | Brioche, cinnamon bread | Adjusts for high sugar/fat; aids yeast activity |
| Gluten-Free | Gluten-free flours | Shorter rise, no punch-down; special dough handling |
Customizing Your Loaf: Size and Crust
Beyond the main programs, you have control over how your loaf turns out. These options allow you to tailor the bread to your exact preferences.
They are usually separate buttons you select after choosing your main program. It’s like picking the perfect outfit after choosing the occasion.
Loaf Size: Small, Medium, or Large?
Most bread makers offer 1 lb, 1.5 lb, and 2 lb loaf options. Always match this setting to your recipe’s ingredient quantities.
If your recipe is for a 2 lb loaf and you select 1 lb, your bread might overflow. Conversely, selecting a larger size for a smaller recipe can result in a small, dense loaf.
Crust Color: Light, Medium, or Dark
Do you like a pale, soft crust or a dark, crispy one? Your bread maker usually gives you “Light,” “Medium,” or “Dark” options.
This setting controls the final baking time and temperature to achieve your desired crust. Most people opt for “Medium” for a balanced crust.
Beyond the Basics: Other Useful Settings
Some bread makers come with even more specialized options. These can open up a world of culinary possibilities beyond just bread.
It’s worth checking your manual to see what additional features your specific model boasts. You might be surprised!
Delay Timer: Wake Up to Fresh Bread
The delay timer is a true convenience. You can add ingredients in the evening, set the timer, and wake up to freshly baked bread in the morning.
However, be cautious with perishable ingredients like milk or eggs. We found that many experts suggest avoiding these for longer delays (Mayo Clinic).
Jam Cycle: Not Just for Bread!
Many modern bread makers include a “Jam” setting. This makes delicious fruit jams with minimal effort. The paddle stirs the fruit, and the machine heats it to the right temperature.
It’s an excellent way to use seasonal fruits and avoid constantly stirring over a hot stove. It’s a versatile feature you might love.
Custom Program: For the Adventurous Baker
If you’re an experienced baker or experimenting with unique flours, a “Custom” program is invaluable. It lets you program each stage: preheat, knead, rise 1, punch, rise 2, bake, and keep warm.
This gives you ultimate control to create unique recipes not covered by standard settings. It’s like having a miniature bakery lab.
Before You Hit Start: A Quick Checklist
Running through these points before you start ensures a smooth baking experience. It helps prevent common mistakes and ensures your bread maker does its best work.
- Read your recipe thoroughly.
- Measure ingredients precisely.
- Select the correct program cycle.
- Choose the right loaf size.
- Pick your desired crust color.
- Add ingredients in the correct order (liquids first, then dry, yeast last).
Conclusion
Navigating your bread maker’s settings might seem tricky at first, but with a little understanding, you’ll be baking perfect loaves in no time. Think of these settings as tools in your baking toolbox, each designed for a specific job.
By matching your recipe to the right program, loaf size, and crust color, you empower your bread maker to deliver consistent, delicious results. Don’t be afraid to experiment, and remember to always keep your machine’s manual handy. Happy baking!
What if my bread maker doesn’t have a specific setting like “Sweet” or “Gluten-Free”?
If your bread maker lacks a specialized setting, you can often adapt by using the “Basic” cycle and manually adjusting ingredients like yeast quantity or liquid temperature based on your recipe. For gluten-free bread, you might need a machine designed specifically for those flours, as the mixing and rising needs are quite distinct. Many experts suggest researching specific recipe modifications for basic cycles.
Can I open the lid during the bread maker’s cycle?
It’s generally best to avoid opening the lid during the rising and baking phases. Opening the lid can cause the temperature to drop significantly, which might collapse your rising dough or negatively affect the baking process. A quick peek during the mixing stage is usually fine, but try to keep it closed otherwise.
My bread is too dense. What setting might be wrong?
A dense loaf often points to insufficient rising time or an incorrect program choice. Ensure you’re using the correct program for your flour type (e.g., “Whole Wheat” for whole wheat flour). Also, check your yeast’s freshness and the temperature of your liquids; cold liquids can slow yeast activity, leading to a dense loaf. Research often connects these factors to poor rise (Cleveland Clinic).
What’s the difference between “Basic” and “French” bread settings?
The “French” bread setting typically provides a longer, slower rise and a longer, hotter bake, resulting in a loaf with a crispier crust and a more open, airy interior. The “Basic” setting is designed for a softer crust and a more uniform texture. If your machine has a “French” setting, it’s worth trying for a crustier, artisanal-style bread.
Should I always follow my bread maker’s recipe book exactly, or can I use other recipes?
While starting with your bread maker’s recipe book is a great idea, you can absolutely use other recipes. However, you might need to make minor adjustments. Pay close attention to ingredient ratios, especially liquids and yeast, and ensure you select the appropriate setting for the recipe’s flour type. Many online communities share adapted recipes specifically for various bread maker models.