
How to Make French Bread in a Bread Machine?

The easiest way to make French bread in a bread machine is by using the dough cycle. Most bread machines handle the mixing and first rise perfectly. You will then shape the dough and bake it in your oven.
Making bread this way saves you lots of hands-on time. You still get that wonderful smell of freshly baked bread at home. It’s ideal for busy weeknights or special occasions.
- Your bread machine does the hard work.
- You shape and bake for a perfect crust.
- Get bakery-quality bread at home.
- Enjoy fresh bread without the fuss.
Ready to bake some delicious French bread? Let’s walk through exactly how this works step by step.
Mastering French Bread in Your Bread Machine
Making delicious French bread at home is easier than you think, especially with a bread machine. This method saves you time and effort.
Understanding the Bread Machine Dough Cycle
Your bread machine is a multi-talented kitchen helper. For French bread, its “dough cycle” is where the magic happens. This setting handles all the hard work for you.
- It mixes the ingredients together perfectly.
- It kneads the dough until it’s smooth and elastic.
- It provides the ideal warm environment for the first rise.
Think of it as your personal baker, taking care of the most labor-intensive parts. You just add the ingredients, and it does the rest. It leaves you with a perfectly proofed dough, ready for shaping.
Gather Your Ingredients: Quality Matters
Starting with good ingredients makes a big difference in your final loaf. You don’t need many, but each plays a vital role.
For a classic French bread, you’ll need bread flour, water, active dry yeast, and salt. Some recipes might add a tiny bit of sugar to help activate the yeast, but it’s optional for traditional French bread (American Heart Association).
Choosing the Right Flour
Bread flour is key here. It has a higher protein content than all-purpose flour. This extra protein creates more gluten, which gives French bread its characteristic chewiness and structure. If you only have all-purpose flour, your bread might be a little softer, but still tasty.
The Importance of Water Temperature
Water temperature is more important than you might think. Yeast is a living organism, and it’s sensitive to temperature. Too hot, and it dies; too cold, and it won’t activate. Aim for lukewarm water, around 105-115°F (National Yeast Institute). This is warm to the touch, but not hot.
Yeast: The Leavening Agent
Active dry yeast is commonly used. Make sure yours isn’t expired! Expired yeast won’t activate, and your dough won’t rise. You can test your yeast by dissolving a teaspoon in warm water with a pinch of sugar. If it bubbles within 5-10 minutes, it’s good to go.
Salt: More Than Just Flavor
Salt isn’t just for taste; it also controls yeast activity and strengthens the gluten structure. Don’t skip it. Without salt, your dough might rise too quickly and have a bland flavor.
The Recipe: French Bread for Your Bread Machine
Here’s a typical recipe you can use. Remember to always add liquids first for most bread machines, unless your machine’s manual states otherwise.
| Ingredient | Quantity |
|---|---|
| Warm Water (105-115°F) | 1 ¼ cups |
| Bread Flour | 3 cups |
| Salt | 1 teaspoon |
| Active Dry Yeast | 2 teaspoons |
| Olive Oil (optional, for softer crust) | 1 tablespoon |
Feel free to adjust the quantities slightly based on your bread machine’s capacity. Most standard machines handle a 1.5 to 2-pound loaf size.
Steps for the Dough Cycle
Following these steps will ensure a perfect dough every time. It’s pretty straightforward.
Loading Your Bread Machine
Start by adding the liquids first. This usually means the warm water, and optional olive oil. Then add your dry ingredients: flour, sugar (if using), and salt. Finally, make a small indentation in the flour and add the yeast there. Keep the yeast and salt separate at first; salt can inhibit yeast activity if they touch directly (National Institutes of Health).
Setting the Dough Cycle
Close the lid and select the “Dough” or “French” dough cycle on your bread machine. The cycle usually takes between 1 hour 30 minutes to 2 hours. This includes mixing, kneading, and the first rise. Now, you can relax and let the machine do its job!
After the Machine: Shaping Your Loaf
Once the dough cycle finishes, your bread machine will beep. Now comes the fun part: shaping your bread. This is where you bring that classic French baguette look to life.
Preparing Your Workspace
Gently remove the dough from the bread machine pan. It should be soft, elastic, and slightly sticky. Lightly flour your work surface and your hands. Too much flour will make the bread dry, so go easy. A bench scraper can be very helpful here for handling the dough.
Deflating and Dividing the Dough
Gently punch down the dough to release the air. This step is known as “degassing.” It helps create a finer, more even crumb in the final bread. If you want two smaller baguettes, divide the dough in half at this point. For one large loaf, keep it as is.
Creating That Iconic Shape
To form a baguette:
- Roll the dough into a rough rectangle.
- Fold the top third down to the center and press firmly.
- Fold the bottom third up and over the top, pressing the seam firmly.
- Flip the dough over so the seam is underneath.
- Gently roll the dough back and forth, from the center outwards, to create a long, tapered loaf. Aim for a length that fits your baking sheet.
A tight shaping helps create those beautiful air pockets inside, and a nice crust.
The Second Rise (Proofing)
After shaping, your bread needs a second rise, also known as proofing. This is crucial for developing flavor and achieving a light, airy texture.
Using a Baguette Pan or Parchment Paper
If you have a baguette pan, place your shaped loaves directly into it. If not, you can create a makeshift proofing setup on a baking sheet lined with parchment paper. Use kitchen towels or crumpled parchment paper between the loaves to help them hold their shape as they rise.
Cover the loaves lightly with a clean, damp kitchen towel or plastic wrap. This prevents them from drying out. Let them rise in a warm, draft-free place for 30-45 minutes, or until they’ve almost doubled in size. They should feel puffy and soft.
Baking Your French Bread
Now for the grand finale! Baking is where your hard work pays off with a crispy crust and soft interior. Proper technique here is key.
Preheating Your Oven
Preheat your oven to a high temperature, typically 450-475°F (232-246°C). It’s important for the oven to be fully heated before the bread goes in. Many professional bakers preheat with a baking stone or steel inside for an even crispier bottom crust (Culinary Institute of America).
Scoring and Steaming for a Perfect Crust
Just before baking, use a sharp knife or a baker’s lame to make 2-3 diagonal slashes on the top of each loaf. These cuts, called “scoring,” allow the bread to expand without tearing during baking. It also creates those lovely ridges you see on traditional French bread.
For that signature crispy crust, you need steam in the oven. You can achieve this by doing one of the following:
- Place a shallow pan of hot water on the bottom rack of your oven during preheating.
- Spray the oven walls with water after placing the bread inside (be quick!).
The steam helps the crust stay soft longer, allowing the bread to expand fully before the crust crisps up.
Baking Time and Temperature Tips
Bake for 20-30 minutes, or until the crust is deeply golden brown and the internal temperature reaches 200-210°F (93-99°C) (USDA). Rotate the loaves halfway through baking for even browning.
Your kitchen will smell amazing! It’s one of the best parts of baking bread at home, wouldn’t you agree?
Cooling and Enjoying Your Homemade French Bread
This last step is vital for the bread’s texture. Resist the urge to tear into it right away!
The Importance of Cooling
Once baked, transfer the loaves to a wire rack to cool completely. Cooling allows the internal structure of the bread to set and steam to escape properly. If you cut into hot bread, it can make the inside gummy. Let it cool for at least 30-60 minutes.
Serving Suggestions
French bread is wonderfully versatile. Serve it simply with butter, or alongside a hearty soup or stew. It’s fantastic for sandwiches, bruschetta, or just dipping in olive oil. You made this! Enjoy every bite.
Troubleshooting Common French Bread Problems
Even experienced bakers have issues sometimes. Here are quick fixes for common problems:
Here’s a quick checklist to review:
- Dense, heavy bread? Your yeast might be old, or your water was too cold.
- Too crispy/hard crust? Maybe too much steam or baked too long.
- Not enough rise? Check yeast freshness, or water wasn’t warm enough.
- Flat loaf? Could be over-proofing or too much flour during shaping.
- Uneven browning? Rotate your loaves during baking.
Baking is a learning process. Don’t be afraid to experiment and find what works best with your specific bread machine and oven.
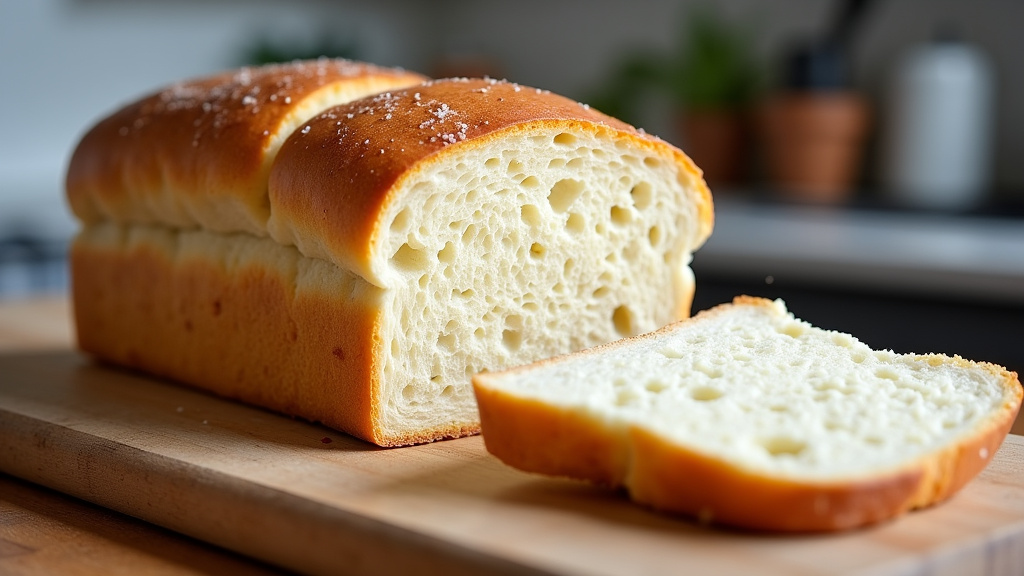
Conclusion
Making French bread at home doesn’t have to be intimidating. By letting your bread machine handle the dough cycle, you save significant time and effort. You get to enjoy the rewarding process of shaping and baking, resulting in a beautiful, crusty loaf.
Remember that fresh, quality ingredients and accurate measurements are your best friends. Don’t be afraid to experiment with your oven’s nuances to achieve that perfect golden crust. Soon, you’ll be pulling warm, fragrant French bread straight from your oven, ready to share (or not!).
Now, go forth and bake some amazing French bread!
Frequently Asked Questions
Can I use all-purpose flour instead of bread flour for French bread?
You can, but the texture might be slightly different. Bread flour has more protein, which creates greater gluten development for that classic chewy French bread texture. All-purpose flour will still make a tasty loaf, but it might be a bit softer.
My bread machine dough cycle is shorter than suggested. Is that okay?
Absolutely! Bread machine cycles vary by model. As long as your dough looks smooth, elastic, and has risen well after its cycle, it’s ready. The key is the dough’s condition, not just the clock.
How do I store homemade French bread to keep it fresh?
For best results, store French bread at room temperature in a paper bag. This allows the crust to stay crisp. Avoid plastic bags, which can make the crust soft and chewy. Enjoy within 1-2 days for peak freshness.
Can I make French bread ahead of time?
Yes! You can let your bread machine make the dough, then loosely cover and refrigerate the dough for up to 24 hours. When you’re ready to bake, let it come to room temperature for about an hour before shaping and continuing with the second rise and baking.
What if my French bread doesn’t get a crispy crust?
Several factors affect crispiness. Make sure your oven is fully preheated to a high temperature, around 450-475°F. Using steam during the first few minutes of baking is also critical. Placing a pan of hot water in the oven or spraying the oven walls can help achieve that signature crispy crust.
