
Can You Use a Sourdough Starter in a Bread Machine?

Yes, you absolutely can use a sourdough starter in a bread machine. We found many bakers successfully create delicious loaves this way. It’s a great option if you want to enjoy sourdough flavor with less hands-on effort.
You might think a bread machine is just for yeast bread, but it’s more versatile than that. Combining your active sourdough starter with the machine’s convenience opens up a world of possibilities. It helps with the kneading and bulk fermentation, making sourdough baking much simpler for your busy life.
- You can use sourdough starter in a bread machine.
- The machine handles kneading and first rise.
- Adjusting your recipe for hydration is important.
- Active starter is key for good rise.
- Expect a slightly different texture than hand-baked.
Are you ready to transform your bread machine into a sourdough powerhouse? Let’s walk through how to adapt your recipes and get the best results every time.
Using Sourdough Starter with Your Bread Machine
You can absolutely use your vibrant sourdough starter in a bread machine. It’s a fantastic way to enjoy the tangy flavor of sourdough with less effort. Think of your bread machine as a helpful assistant in your baking journey.
Many home bakers successfully make sourdough loaves this way. They find it saves time, especially with the kneading and bulk fermentation stages. You still get that satisfying homemade bread, but with added convenience.
Why Choose a Bread Machine for Sourdough?
Life can be busy, right? That’s where a bread machine shines. It tackles the most labor-intensive parts of sourdough baking for you. You don’t have to spend time kneading or worrying about consistent temperatures for the first rise.
We found that for many, the biggest draw is the reduced hands-on time. You can simply add your ingredients, select a cycle, and let the machine do its magic. This makes sourdough more accessible for everyday enjoyment.
Convenience and Time Savings
Imagine this: you mix your ingredients, press a button, and go about your day. The machine handles the mixing, kneading, and that all-important bulk fermentation. This convenience is a huge benefit for busy schedules.
We often hear people say they want to bake sourdough but feel daunted by the process. A bread machine removes many of those barriers. It truly helps streamline your baking routine.
Temperature Control and Consistency
Sourdough starters love a consistent, warm environment. Bread machines often have built-in heaters that provide this ideal temperature. This can lead to a more reliable and active rise for your dough.
We found this consistency can be a game-changer, especially in cooler kitchens. It helps your starter work optimally, giving you a better rise and crumb structure.
Adapting Your Sourdough Recipe for the Bread Machine
You can’t just use a regular bread machine recipe with sourdough. You’ll need to make a few key adjustments. The starter itself brings moisture and leavening power that traditional yeast doesn’t.
The main things to consider are hydration, starter activity, and mixing sequence. Getting these right will lead to a delicious loaf. It’s all about understanding what your sourdough starter needs.
Adjusting for Hydration
Your sourdough starter is typically 100% hydration (equal parts flour and water by weight). When you add it to your recipe, it’s essentially adding both flour and water. This means you’ll need to slightly reduce the amount of water and flour from your base recipe.
For example, if your recipe calls for 500g of flour and 350g of water, and you add 100g of 100% hydration starter, you’re adding 50g flour and 50g water. So, you’d then adjust your main ingredients to 450g flour and 300g water. This keeps your overall hydration balanced.
The Importance of an Active Starter
This is perhaps the most important tip. Your sourdough starter needs to be very active and bubbly. A sluggish starter won’t provide enough lift for your bread. It’s like trying to run a marathon on an empty stomach!
We recommend feeding your starter 4-12 hours before you plan to bake. It should have doubled in size and pass the float test (a small spoonful floats in water). This ensures it’s ready to do its job effectively.
Recommended Bread Machine Cycles for Sourdough
Not all bread machine cycles are created equal for sourdough. You’re looking for cycles that allow for longer fermentation times. This gives your sourdough starter the time it needs to develop flavor and rise.
Many machines have a “dough” cycle, which is a great starting point. Some even have a dedicated “sourdough” cycle. Always check your machine’s manual for the best options.
Using the Dough Cycle
The “dough” cycle is your best friend here. It typically kneads the dough and then allows for a first rise (bulk fermentation). Once this cycle is complete, you can remove the dough.
After removing the dough, you’ll need to shape it by hand. Then, you can perform a secondary rise (proof) and bake it in a conventional oven. This method gives you more control over the final shape and crust.
Using the Basic or Whole Wheat Cycle (with Adjustments)
Some bakers successfully use the “basic” or “whole wheat” cycles. However, these cycles are usually designed for commercial yeast, meaning shorter fermentation. You’ll likely need to “trick” your machine or add extra time.
We found that interrupting the cycle to allow for a longer bulk fermentation is a common technique. You might let it knead, then unplug the machine for several hours, and then plug it back in to resume. This gives your sourdough more time to work its magic.
Some modern machines also have a “delay timer” or custom settings. These can be useful for extending the fermentation. Check your specific machine’s features.
Step-by-Step Guide to Sourdough in Your Bread Machine
Ready to get baking? Here’s a general guide to help you succeed. Remember, every machine and starter is a little different, so be prepared to make small adjustments.
- Activate Your Starter: Feed your starter 4-12 hours before baking. It should be very bubbly and active.
- Measure Ingredients: Weigh all your ingredients precisely. This is key for sourdough success.
- Add Liquids First: Pour water, then active sourdough starter into the bread machine pan.
- Add Dry Ingredients: Layer flour, salt, and any other dry ingredients on top of the liquids.
- Select Cycle: Choose the “dough” cycle if you plan to bake in a regular oven later, or a modified “basic” cycle if you’re baking entirely in the machine.
- Monitor Dough: During the kneading phase, check the dough consistency. It should form a smooth ball. Add a tablespoon of flour if it’s too sticky, or a teaspoon of water if it’s too dry.
- First Rise: Let the machine complete its cycle for the first rise.
- Shape and Bake (if using Dough Cycle): Remove dough, shape, proof, and bake in a preheated oven.
- Bake in Machine (if using Full Cycle): Allow the machine to complete its full cycle including the bake.
Troubleshooting Common Sourdough Bread Machine Issues
Don’t get discouraged if your first loaf isn’t perfect. Sourdough baking is a journey, and there’s a learning curve. Many common issues have simple solutions.
We understand it can be frustrating, but with a few tweaks, you’ll be making delicious bread in no time. Think of it as getting to know your starter and your machine better.
| Problem | Possible Cause | Solution |
|---|---|---|
| Dense, heavy loaf | Inactive starter, not enough bulk fermentation, too much flour | Ensure starter is very active; extend bulk fermentation time; check hydration levels |
| Loaf doesn’t rise enough | Cold kitchen, weak starter, not enough gluten development | Use warm water for starter feeding; ensure warm proofing environment; allow for adequate kneading |
| Sticky dough, hard to handle | Too much water (high hydration) | Reduce water slightly in the next batch (1-2 tablespoons); add a little extra flour during kneading if necessary |
| Crumbly or dry bread | Not enough water, over-baking | Increase water slightly; shorten baking time or reduce temperature if possible |
Tips for Success with Sourdough in Your Bread Machine
Here are a few extra pointers we’ve gathered from experienced bread machine sourdough bakers. These small details can make a big difference in your results.
- Use a Digital Scale: Measuring ingredients by weight (grams) is far more accurate than by volume (cups) for baking. This is especially true for sourdough.
- Know Your Starter: Understand how active your starter is. A young or weak starter needs more time to leaven.
- Warm Water for Dough: Using slightly warm water (around 90-100°F / 32-38°C) in your dough can help activate the starter more quickly.
- Patience is Key: Sourdough takes time. Don’t rush the fermentation process. It’s where all that wonderful flavor develops.
- Experiment with Flour: Try different types of flour. Bread flour often gives a better structure than all-purpose flour.
What to Expect: Texture and Flavor
Your bread machine sourdough will be delicious, but it might have a slightly different character than a hand-baked loaf. This is perfectly normal and part of the charm.
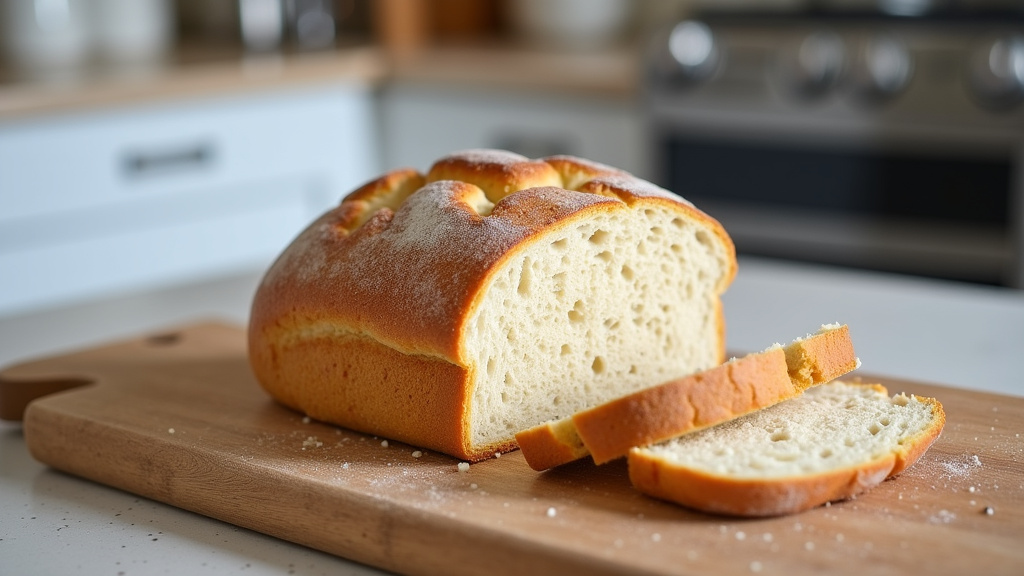
We found that loaves baked entirely in the machine often have a softer crust. The crumb will still be chewy and flavorful, though perhaps not as open and airy as a highly hydrated, oven-baked artisan loaf. You’ll still get that signature sourdough tang!
Conclusion
You’ve seen that using your sourdough starter in a bread machine is not only possible but can also simplify your baking routine. It’s a fantastic way to enjoy delicious, homemade sourdough with significantly less hands-on effort. We found that by understanding a few key adjustments—like hydration and using an active starter—you can achieve wonderful results.
Don’t be afraid to experiment with your machine’s settings and your starter’s behavior. We encourage you to try these tips and start baking. You’re now equipped to turn that trusty bread machine into a sourdough helper. Happy baking!
Frequently Asked Questions
Will my bread machine sourdough have the same open crumb as oven-baked?
Generally, bread machine sourdough will have a slightly denser crumb and a softer crust compared to a high-hydration, artisan loaf baked in a hot oven. It still offers excellent flavor and chewiness, just a different texture profile.
Can I use a “sourdough” specific bread machine cycle?
If your bread machine has a dedicated “sourdough” cycle, that’s often your best bet. These cycles are designed with longer fermentation times suitable for sourdough. Always refer to your machine’s manual for specific instructions.
How much sourdough starter should I use in my bread machine recipe?
A common starting point is around 150-200 grams of active sourdough starter for a standard 1.5 to 2-pound loaf. Remember to adjust your flour and water amounts accordingly to maintain proper hydration for the dough.
What if my sourdough doesn’t rise much in the bread machine?
A lack of rise often points to an inactive starter or insufficient fermentation time. Ensure your starter is very bubbly and doubles after feeding. You might also need to use a warmer proofing environment or extend the “dough” cycle for a longer first rise.
Do I need to autolyse when making sourdough in a bread machine?
Autolysing (mixing flour and water and letting it rest) can improve gluten development, but it’s often skipped for bread machine sourdough due to convenience. If you want to try it, mix flour and water, let it rest for 20-30 minutes, then add the starter and salt.
