
How to Make Artisan Bread Using Bread Machine Dough?
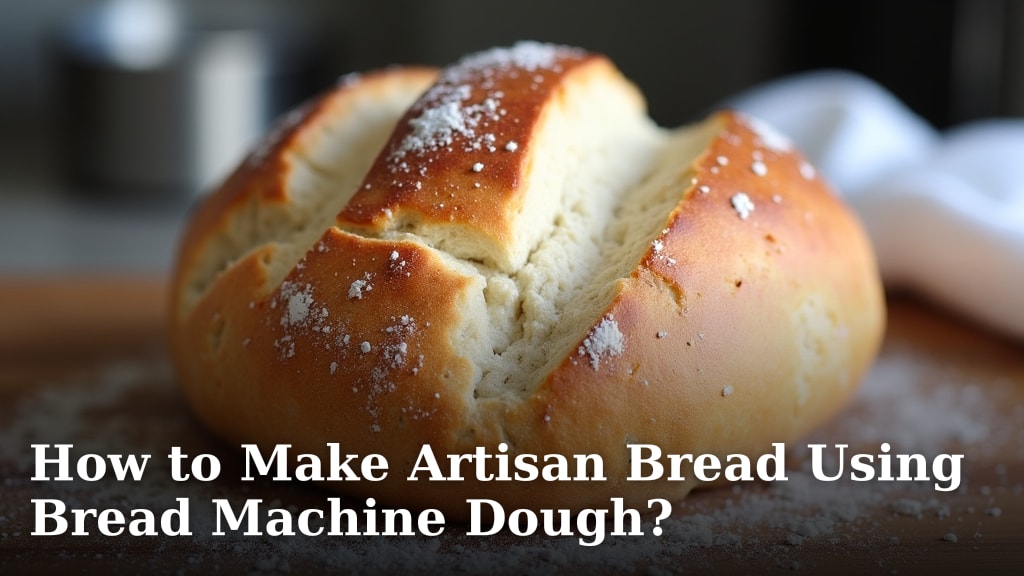
Yes, you can absolutely make delicious artisan bread using your bread machine’s dough cycle! It’s a fantastic way to get that perfect dough without all the manual kneading. Your bread machine does the hard work, making Yes, you can absolutely make delicious artisan bread using your bread machine’s dough cycle!artisan bread at home much more achievable. You get the same rich flavor and chewy texture you love.
Using your bread machine for dough means you can skip the mess and the guesswork. It’s a smart shortcut for bakers of all levels. We found that this method consistently produces a beautifully kneaded dough. It sets you up for a truly wonderful homemade loaf.
- Use the dough cycle on your bread machine.
- It handles all the kneading for you.
- This ensures a perfectly developed dough.
- You get artisan bread with less effort.
Ready to see how easy it is? Let’s walk through the simple steps to transform your bread machine dough into a stunning artisan loaf.
Making Amazing Artisan Bread with Your Bread Machine Dough
So, you’ve got a bread machine and a hankering for crusty, chewy artisan bread. What if I told you your bread machine is your secret weapon? It is! You can totally use its dough cycle to do all the heavy lifting. This frees you up to focus on the fun part: shaping and baking. We found that this method makes getting that perfect dough consistency a breeze. It’s like having a personal bread-making assistant.
Think about it: no more sticky counters or aching arms from kneading. Your bread machine is designed to mix, knead, and let dough rise beautifully. This cycle alone is a game-changer for anyone who loves artisan bread but dreads the manual labor. Many bakers are discovering this shortcut leads to fantastic results. You get a wonderfully developed dough ready for its second act.
Why Use Your Bread Machine for Dough?
Let’s break down why this is such a smart move for your artisan bread journey. Your bread machine is built for consistent mixing and kneading. This is exactly what artisan dough needs. It ensures even gluten development every single time. This consistency is hard to achieve by hand, especially for beginners. We found that the dough cycle takes the guesswork out of kneading.
Perfect Kneading Power
The heart of great artisan bread is properly developed gluten. This gives the bread its structure and that satisfying chew. Your bread machine’s kneading blades are designed to work the dough efficiently. They mix the ingredients thoroughly and then knead until the dough is smooth and elastic. Many experts suggest that proper kneading is key to a light and airy crumb (The Kitchn).
This automated process means you don’t have to worry about under-kneading or over-kneading. The machine follows a set program, ensuring the dough gets just the right amount of attention. We found that relying on the dough cycle simplifies the entire process considerably. It means your dough is consistently prepared for the next steps.
Saving Time and Effort
Who wouldn’t want to save time? Using the dough cycle means you bypass the most labor-intensive part of bread making. You can set it and forget it while it does its magic. This is especially helpful on busy days. It allows you to fit homemade artisan bread into your schedule more easily. We found that this method significantly cuts down on active preparation time.
Imagine getting the perfect dough without spending 15-20 minutes wrestling with it. This leaves you more time for other things. You can prep your baking sheets, preheat your oven, or even just relax. It’s a truly efficient way to bake. Many find this convenience makes them bake artisan bread more often.
Getting Started: The Bread Machine Dough Cycle
Before you start, make sure you have your bread machine’s manual handy. While cycles are similar, there can be slight variations. You’ll want to know the correct order for adding ingredients. Generally, liquid ingredients go in first, followed by dry ingredients, and then yeast last.
Gathering Your Ingredients
You’ll need your standard bread ingredients: flour, water, yeast, salt, and possibly a touch of sugar or fat depending on your recipe. We recommend using bread flour for the best gluten structure. All-purpose flour can work in a pinch, but bread flour gives a superior result for artisan loaves.
The type of yeast matters too. For most bread machines, instant yeast (also called rapid-rise or bread machine yeast) is the best choice. It’s designed to work well with the machine’s cycles. Fresh ingredients make a big difference. Always check the expiration dates on your yeast and flour.
Loading Your Bread Machine
This is a critical step. Your bread machine manufacturer will have specific instructions. However, a common and effective order is:
- Liquids First: Water, milk, or other liquid ingredients go into the bread pan.
- Add Fats and Sweeteners: Butter, oil, or sugar usually follow.
- Dry Ingredients: Flour and salt are added next. Make a well in the center of the flour.
- Yeast Last: Sprinkle the yeast into the well you made in the flour. Keep it separate from the salt, as salt can inhibit yeast activity.
We found that this order helps prevent the yeast from prematurely activating. It also ensures the flour and salt are well mixed before the kneading begins. Many sources suggest this method for optimal dough development (King Arthur Baking Company).
Selecting the Dough Cycle
Locate the “Dough” or “Pizza Dough” setting on your bread machine. This cycle typically includes mixing, kneading, and one rise. It will run for a set amount of time, usually around 1 to 1.5 hours. The machine will beep when the cycle is complete. You’ll then have a beautifully risen ball of dough.
Don’t be tempted to use the “Bake” cycle if your machine has it. You only want the dough cycle. This cycle stops before baking, leaving you with perfectly prepared dough. We found that this is the essential step for using your machine as a dough maker.
What to Expect After the Dough Cycle
Once the dough cycle finishes, you’ll open your bread machine to a wonderful sight. The dough should have doubled in size and feel soft and elastic. It will be smooth, with a slightly tacky surface. It should pull away cleanly from the sides of the bread pan.
Checking Dough Consistency
Is the dough too sticky? Add a tablespoon of flour at a time. Is it too dry and crumbly? Add a teaspoon of water. You can do this during the first few minutes of the kneading cycle if you catch it early. However, since you are using the completed dough cycle, you will be working with the dough after it has risen. If it seems excessively sticky or dry *after* the cycle, you can gently adjust it with a little flour or water while shaping. Many experts say a slightly tacky dough is ideal for artisan bread (The Perfect Loaf).
Removing the Dough
Lightly flour your work surface. Gently tip the bread pan upside down to release the dough. It should slide out easily. If it sticks a bit, gently coax it out with a spatula. Be careful not to deflate the dough completely. We found that working gently preserves the air bubbles created during the rise.
Shaping Your Artisan Loaf
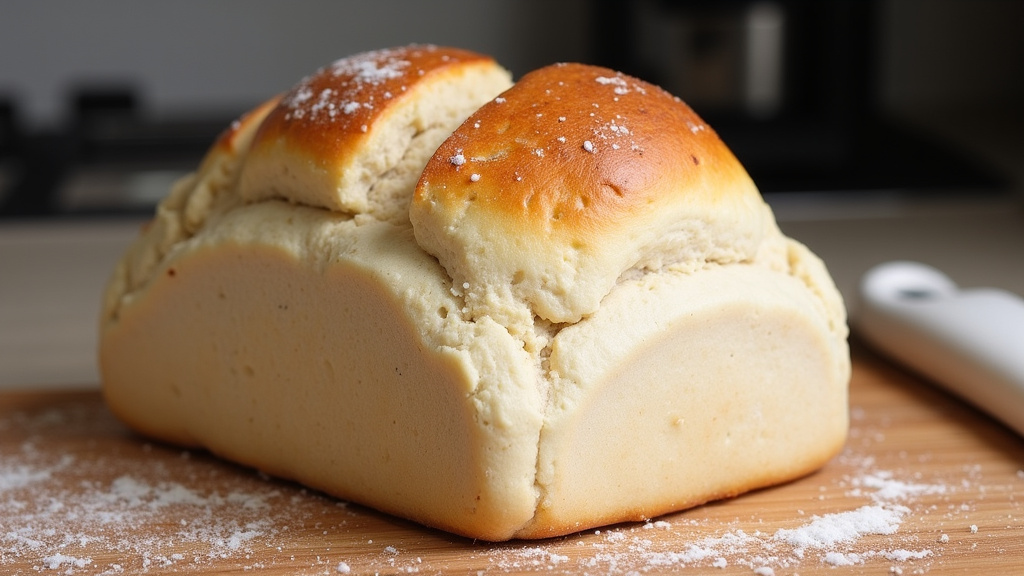
Now for the truly artistic part! You can shape your dough into almost anything. Common artisan shapes include boules (round loaves) and batards (oval loaves). For a crusty exterior, you’ll want to bake your loaf in a Dutch oven or on a baking stone.
The Importance of Gentle Handling
When you shape the dough, be gentle. You want to retain as much of the air incorporated during the rise as possible. This air is what creates that lovely open crumb structure in artisan bread. Overworking or deflating the dough now can lead to a dense loaf.
We found that a few simple folds are all you need to create surface tension. This helps the loaf hold its shape during the final rise and baking. Think of it like giving your dough a gentle hug to form its final structure. Many bakers emphasize a light touch for optimal crumb.
Creating Surface Tension
To create surface tension, gently flatten the dough into a rough rectangle. Fold the top third down towards the center. Then, fold the bottom third up over the first fold, like folding a letter. For a boule, you can then cup your hands around the dough and gently rotate it against the counter, pulling it towards you to create a taut surface. For a batard, shape it into an oval.
This technique helps build a strong exterior that will hold its shape. It also contributes to a better oven spring. We found that practicing this gentle shaping makes a noticeable difference in the final appearance and texture of your loaf. It’s a skill that improves with every bake.
The Final Rise and Baking
After shaping, your dough needs another rise, called the proof. Place your shaped loaf on a piece of parchment paper or directly into a floured proofing basket (banneton). Cover it loosely with plastic wrap or a clean kitchen towel.
Proofing Your Dough
Let the dough rise again. This time, the rise will be shorter, about 30-60 minutes. You’re looking for the dough to get puffy but not double in size. A good test is to gently poke the dough with a floured finger. If the indentation springs back slowly, it’s ready. If it springs back immediately, it needs more time. If it stays indented, it may be over-proofed.
We found that the exact proofing time can vary based on your kitchen’s temperature. Warmer kitchens mean a faster rise. We recommend checking the dough visually and by touch. This ensures you catch it at the perfect moment for baking. Many guides suggest proofing until the dough looks “billowy” (The Spruce Eats).
Baking to Perfection
Preheat your oven, ideally with a Dutch oven or baking stone inside, to a high temperature (usually around 450-475°F or 230-245°C). Carefully transfer your proofed loaf onto the hot Dutch oven or stone. If using a Dutch oven, score the top of the loaf with a sharp knife or lame. Score it deeply enough to allow the bread to expand. Lid on the Dutch oven, or if using a stone, consider creating steam in your oven.
Bake covered for about 20-25 minutes. Then, remove the lid (if using a Dutch oven) and continue baking for another 15-25 minutes, or until the crust is deep golden brown and the internal temperature reaches about 205-210°F (96-99°C). A dark, crackly crust is the hallmark of great artisan bread. We found that baking in a Dutch oven creates excellent steam, leading to a crispier crust.
A Quick Checklist for Success
Ready to give it a try? Here’s a quick recap of what you need to do:
- Use your bread machine’s dough cycle only.
- Follow the correct ingredient order (liquids first, yeast last).
- Gently remove and shape the dough after the cycle.
- Let the shaped dough have a second, shorter rise (proof).
- Bake in a very hot oven, ideally with steam.
- Cool completely before slicing to enjoy your creation.
Conclusion
You’ve discovered how your bread machine can be your secret weapon for amazing artisan bread. By using its dough cycle, you bypass the kneading hassle and get a perfectly developed dough every time. From loading your machine correctly to gently shaping your loaf, you’re now equipped to create beautiful, crusty bread at home. Don’t let the fear of kneading stop you from enjoying homemade artisan loaves. Your next delicious, crackly-crusted bread is just a dough cycle away! Try it this weekend and taste the difference.
Frequently Asked Questions
Can I just bake the dough in the bread machine after the dough cycle?
No, you should not bake the dough in the bread machine after the dough cycle. The dough cycle is designed only for mixing, kneading, and rising. For artisan bread, you’ll need to remove the dough, shape it, let it proof again, and then bake it in a conventional oven for that signature crust.
What if my dough seems too sticky or too dry after the dough cycle?
If your dough is slightly too sticky, you can add a tablespoon of flour while shaping. If it’s too dry, a teaspoon of water can help. It’s best to make these minor adjustments when you remove the dough from the machine. Remember, a slightly tacky dough is often ideal for artisan loaves.
How long does the bread machine dough cycle usually take?
The dough cycle on most bread machines typically lasts between 1 to 1.5 hours. This time includes mixing, kneading, and the first rise. Your machine will usually beep to let you know when the cycle is complete and the dough is ready for shaping.
Why is the order of ingredients so important in the bread machine?
The order of ingredients matters to ensure the yeast activates properly and doesn’t get killed by salt. Liquids go first, followed by dry ingredients, with yeast added last into a well in the flour. This separation prevents premature yeast activation and ensures better dough development.
What kind of flour is best for bread machine artisan dough?
Bread flour is highly recommended for artisan bread because it has a higher protein content. This higher protein helps develop a stronger gluten structure, leading to that desirable chewy texture and airy crumb. While all-purpose flour can work, bread flour gives superior results.
