How To Make Honey Wheat Bread In A Bread Maker?

Making honey wheat bread in a bread maker is a straightforward process that combines all ingredients and uses the machine’s automated cycle to mix, knead, rise, and bake the perfect loaf. You simply add your ingredients in the correct order, select the appropriate setting, and let the appliance handle the rest.
For a delicious loaf, you will need bread flour, whole wheat flour, yeast, honey, water, oil, and salt. Your bread maker typically takes care of the hands-on work, delivering a warm, fragrant bread with minimal effort.
- To make honey wheat bread, gather your simple ingredients like flours, yeast, honey, water, oil, and salt.
- Load the liquids first, then dry ingredients, with yeast going last to ensure proper activation.
- Select your bread maker’s “whole wheat” or “sweet bread” setting and your preferred crust color.
- Allow the machine to complete its full cycle of mixing, kneading, rising, and baking.
- Cool the bread completely on a wire rack before slicing for the best texture and flavor.
How To Make Honey Wheat Bread In A Bread Maker?
Making honey wheat bread in your bread maker is a rewarding experience, giving you a warm, wholesome loaf with very little effort. Your machine automates much of the process, transforming simple ingredients into a delicious household staple.
Why Choose Your Bread Maker for Honey Wheat?
Using a bread maker means less mess and consistent results. You simply add ingredients, and the machine mixes, kneads, and bakes for you. This saves time and ensures your bread rises perfectly every time.
Many experts say that bread makers create an ideal environment for yeast. This consistent warmth helps your dough proof beautifully. It’s like having a little bakery assistant right in your kitchen.
Gathering Your Ingredients for Perfection
A great loaf starts with the right components. You’ll need specific flours and sweeteners to achieve that signature honey wheat flavor. We found that measuring accurately is key to success here.
Below is a general list. Always check your bread maker’s recipe book for specific cup and spoon amounts related to your machine’s size.
- Warm Water (or milk)
- Honey
- Vegetable Oil (or melted butter)
- Salt
- Bread Flour
- Whole Wheat Flour
- Dry Milk Powder (optional, for softer crumb)
- Active Dry Yeast or Instant Yeast
The Right Flour Makes All the Difference
Combining bread flour with whole wheat flour gives you a lovely balance. Bread flour provides the gluten needed for a good rise and chewy texture (NIH). Whole wheat flour adds the nutty flavor and fiber we love in honey wheat bread.
Some people say using only whole wheat flour can result in a denser loaf. Others prefer that hearty texture. For a softer crumb, many bakers use a mix, as we recommend here.
Sweetening with Natural Honey
Honey adds moisture, flavor, and helps brown the crust. It also feeds the yeast. We found that local, raw honey often provides the best depth of flavor. If your honey is very thick, you might warm it slightly for easier pouring.
Step-by-Step: Loading Your Bread Maker
The order you add ingredients truly matters. This sequence prevents premature yeast activation and ensures proper mixing. Think of it like building a perfect bread layer cake!
The Liquids Go In First
Start by pouring your warm water or milk into the bread machine pan. Then, add the honey and oil. This creates a base for the dry ingredients and keeps the yeast separate until it’s time to work.
Layering Your Dry Ingredients
Next, add the salt, bread flour, whole wheat flour, and any dry milk powder. Gently spread these dry ingredients over the liquids. Try to create a little mound, like a tiny mountain in your bread pan.
Yeast: The Final Touch
Finally, make a small indentation or “well” in the center of your dry ingredients. Place the yeast right into this well. This keeps it dry and separate from the liquids and salt until the mixing begins. Salt can slow down yeast, so keeping them apart initially is a good tip (Mayo Clinic).
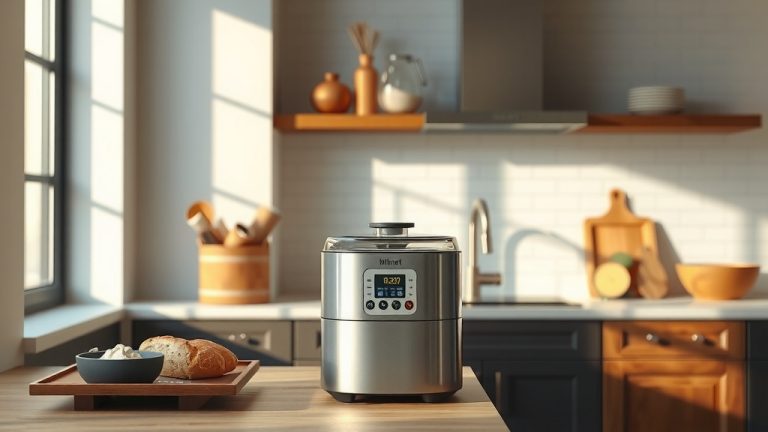
Selecting the Correct Bread Maker Setting
Your bread maker has specific programs designed for different bread types. For honey wheat, you’ll generally use a “Whole Wheat” or sometimes a “Sweet Bread” setting. Check your machine’s manual for its exact program names.
| Bread Type | Common Setting | Notes |
|---|---|---|
| White Bread | Basic / White | Standard cycle for plain loaves. |
| Whole Wheat Bread | Whole Wheat | Longer rise and knead times for denser flours. |
| Sweet Bread | Sweet / Rapid Sweet | Often shorter bake, good for high-sugar recipes. |
| Dough Only | Dough | Prepares dough for oven baking or rolls. |
You will also typically select your crust color preference: light, medium, or dark. For a slightly crispier, browner crust, opt for medium or dark. Then, press start and let the magic happen!
What to Expect During the Cycle
After you press start, your bread maker will begin its cycle. First, it will mix the ingredients, then knead the dough into a smooth ball. Next come one or more rise cycles, where the dough doubles in size.
Finally, the baking cycle begins. Your kitchen will soon fill with an amazing, comforting aroma. It’s part of the fun, isn’t it?
The Aroma of Success
As your bread bakes, that unmistakable smell will waft through your home. This is the best part of homemade bread. When the machine beeps, your beautiful honey wheat loaf is ready.
Cooling and Slicing Your Homemade Loaf
Once the cycle finishes, immediately remove the bread pan from the machine. Carefully tip the bread out onto a wire cooling rack. This allows air to circulate around the loaf, preventing a soggy bottom.
Resist the urge to slice it right away! Hot bread can be gummy. Let it cool for at least an hour, or even longer, before slicing. We found that cooling fully improves both texture and flavor.
Storing Your Delicious Bread
Store your cooled honey wheat bread in an airtight container or bread bag at room temperature. It will stay fresh for 3-5 days. For longer storage, slice and freeze the bread; it toasts beautifully from frozen.
Troubleshooting Common Bread Maker Issues
Sometimes, things don’t go exactly as planned. Don’t worry, many common bread maker problems have simple fixes. We found that small adjustments make a big difference.
- If your loaf is too dense, you might need more liquid or less flour.
- If it collapses, you might have too much yeast or too much liquid.
- Is the crust too dark? Try selecting a lighter crust setting next time.
Adjusting for Altitude
For those living at higher altitudes, baking can be a bit different. Air pressure changes affect yeast activity and moisture evaporation. Many experts suggest slightly decreasing yeast (by about 1/4 teaspoon) and increasing liquid (by 1-2 tablespoons) at high altitudes (Kansas State University).
Experimenting with Your Honey Wheat Recipe
Once you master the basic recipe, feel free to get creative! Add a sprinkle of cinnamon for a spiced honey wheat. Toss in some sunflower seeds or chopped nuts for added texture and nutrition during the mix cycle.
You can even try replacing some of the water with milk for an even softer crumb. Think of your bread maker as a starting point for countless delicious variations!
Conclusion
Making honey wheat bread in your bread maker is a fantastic way to enjoy fresh, wholesome bread with minimal fuss. By carefully measuring ingredients, loading them in the correct order, and selecting the right machine setting, you’re set for success. Enjoy the process, the incredible aroma, and most importantly, your warm, homemade loaf!
What is the best type of yeast for bread makers?
For bread makers, instant yeast or bread machine yeast works best. These yeasts activate quickly and do not require proofing beforehand, which fits well with the machine’s automated cycle. Active dry yeast can also be used, but some suggest activating it in warm water first.
Can I use all whole wheat flour in my bread maker?
Yes, you can use all whole wheat flour, but be aware that it often results in a denser, heavier loaf. Whole wheat flour has less gluten development than bread flour. You might need to add a bit more liquid to ensure the dough is pliable enough for the machine to knead effectively.
Why did my bread maker loaf collapse in the middle?
A collapsed loaf often indicates too much liquid, too much yeast, or not enough flour. The dough rises too quickly and then cannot support its structure, causing it to fall. Try reducing yeast by a quarter teaspoon or increasing flour by a tablespoon next time, and ensure your liquid measurement is exact.
How do I prevent my bread from sticking to the pan?
To prevent sticking, ensure your bread pan is clean and free of scratches. You can also lightly grease the pan with a little cooking spray or oil before adding ingredients. Removing the bread promptly after the cycle finishes and cooling it on a wire rack also helps prevent moisture buildup that can cause sticking.
Can I add nuts or seeds to my honey wheat bread?
Absolutely! Most bread makers have a “mix-in” beep or dispenser during the kneading cycle. This is the perfect time to add nuts, seeds, dried fruits, or even chocolate chips. Adding them too early can crush them; adding them too late might not incorporate them evenly. Check your machine’s manual for specific timing.