How to Make Low Carb Bread in a Bread Machine?
On this page (6 sections)
You can make low-carb bread in a bread machine. If you are also limiting sodium, see our guide to low-sodium bread. It involves using special flours and specific ingredients. We found that a bread machine simplifies the process greatly.
Many people find traditional bread making tricky. A bread machine takes away the kneading and proofing guesswork. This means you can enjoy delicious, low-carb bread with less effort and more consistency.
- Bread machines simplify low-carb bread making.
- Special low-carb flours are essential.
- Follow recipes carefully for best results.
- Enjoy fresh, homemade bread on your diet.
Ready to bake? Let’s walk through exactly how to make your own low-carb bread in a bread machine, step by step.
Getting Started with Low-Carb Bread Machine Baking
Making low-carb bread in your bread machine is a rewarding experience. You’ll need to gather some special ingredients first. This preparation ensures your baking journey is smooth and successful.
Think of it like setting up your artist’s palette before painting. Having everything ready means you can focus on the baking itself. It also helps prevent last-minute scrambles for forgotten items.
Essential Ingredients for Low-Carb Bread
The biggest difference from regular bread is the flour. You’ll be using alternatives to traditional wheat flour. These flours are key to keeping the carb count down.
You’ll also need binders and leavening agents. These help give low-carb bread its structure and rise. Without them, your bread might be too dense or crumbly.
Low-Carb Flour Alternatives
Almond flour is a popular choice. It’s finely ground and has a mild flavor. You’ll often find it in many low-carb recipes.
Coconut flour is another option. It’s very absorbent, so you’ll use less of it. Coconut flour also adds a slightly sweet taste. Some recipes use low-carb flour blends that combine almond and coconut flours for the best texture (Journal of Food Science and Technology).
Other flours you might encounter include lupin flour or vital wheat gluten. Vital wheat gluten helps with the bread’s chewiness, even though it’s wheat-derived, its carb count is low because it’s mostly protein.
Binders and Leavening Agents
Xanthan gum or psyllium husk powder are crucial binders. They mimic the gluten found in wheat flour. This helps your low-carb dough hold together.
Without these binders, your bread might fall apart. They give it the elasticity and structure you expect from bread. A little goes a long way with these ingredients.
For leavening, you’ll use active dry yeast, just like in regular bread. The yeast still needs a little sugar to activate, but most of it will be consumed during the proofing process, keeping the final carb count low.
Baking powder is also often included. It helps with a lighter, airier texture. Sometimes, you’ll see baking soda too, usually paired with an acidic ingredient.
Here’s a quick look at common ingredients:
| Ingredient Type | Common Examples | Why It’s Used |
|---|---|---|
| Low-Carb Flours | Almond flour, Coconut flour, Lupin flour, Vital Wheat Gluten | Replaces high-carb wheat flour |
| Binders | Xanthan gum, Psyllium husk powder | Provides structure and elasticity |
| Leavening Agents | Active dry yeast, Baking powder, Baking soda | Helps the bread rise |
| Liquids | Warm water, Almond milk, Eggs | Moisture and structure |
| Fats | Olive oil, Melted butter, Coconut oil | Adds moisture and tenderness |
| Sweeteners (optional) | Erythritol, Stevia (small amounts) | Balances flavors, aids yeast activation |
Mastering Your Bread Machine for Low-Carb Baking
Your bread machine is a powerful tool. It automates much of the bread-making process. But for low-carb recipes, you need to understand its specific settings and cycles.
Not all bread machine cycles are created equal. Some work better for low-carb doughs than others. Choosing the right one is crucial for a good loaf.
Understanding Bread Machine Cycles
Most bread machines have various settings. You’ll see options like “Basic,” “Whole Wheat,” “Dough,” and “Rapid.” For low-carb bread, you’ll often need to experiment a bit.
We found that the “Basic” or “Whole Wheat” cycle can sometimes work. However, these cycles might be too long for delicate low-carb doughs. Over-kneading can ruin the texture.
A better option might be the “Dough” cycle. This allows you to mix and rise the dough in the machine. Then you can remove it and bake it in a conventional oven. This gives you more control.
Some bread machines also have a “Low Carb” or “Keto” setting. If yours does, start there! These are designed for the specific needs of these doughs. They often have shorter kneading and proofing times.
Tips for Bread Machine Success
Always add liquids first. Then add your dry ingredients on top. Yeast typically goes last, nestled in a small well in the flour. This order is important for proper activation (Journal of Culinary Science & Technology).
Measure your ingredients precisely. Low-carb baking is more finicky than traditional baking. Small variations can lead to big differences in outcome. Use a kitchen scale for best accuracy.
Resist the urge to open the lid during the baking cycle. This can cause the bread to collapse. The bread machine maintains a consistent temperature, which is vital for rising.
Step-by-Step: Making Your First Low-Carb Loaf
Now, let’s put it all together. This general guide will help you bake your first low-carb bread. Remember, always follow your specific recipe’s instructions closely.
Think of this as a roadmap. Your recipe provides the exact directions. But this gives you the overall journey.
Preparation and Ingredient Order
First, gather all your ingredients. Measure everything out before you start. This mise en place approach prevents errors and stress.
Next, add the liquids to your bread machine pan. This usually includes warm water or milk and eggs. Ensure liquids are at the correct temperature—too hot will kill the yeast, too cold won’t activate it.
Then, add your dry ingredients. This means your low-carb flours, binders, baking powder, and salt. Spread them evenly over the liquids.
Finally, make a small well in the center of the dry ingredients. Add your yeast directly into this well. Try to keep the yeast separate from salt and sugar until mixing begins.
Selecting the Right Cycle and Monitoring
Place the bread pan securely into your bread machine. Close the lid.
Select your desired cycle. As we discussed, a “Low Carb” setting is ideal. If not available, try the “Dough” cycle and finish in a conventional oven, or experiment with “Basic” or “Whole Wheat” on a shorter setting if your machine allows.
Press start. Now, let the machine do its work! During the kneading phase, you might want to check the dough. It should form a ball and not be too sticky or too dry. Adjust with a teaspoon of liquid or flour if needed.
We found that sometimes low-carb doughs need a bit of nudging. Use a rubber spatula to scrape down the sides of the pan if ingredients aren’t fully incorporating.
Baking and Cooling Your Loaf
Once the baking cycle is complete, carefully remove the bread pan. Use oven mitts, as it will be hot.
Immediately remove the bread from the pan. If you leave it in, the crust can become soggy. Place the hot loaf on a wire rack to cool completely.
Cooling is a non-negotiable step. Low-carb bread needs to cool fully to set its structure. Cutting into a warm loaf can make it gummy or crumbly (Cook’s Illustrated).
We typically recommend cooling for at least 2-3 hours, or even longer. Patience here truly pays off with a much better texture.
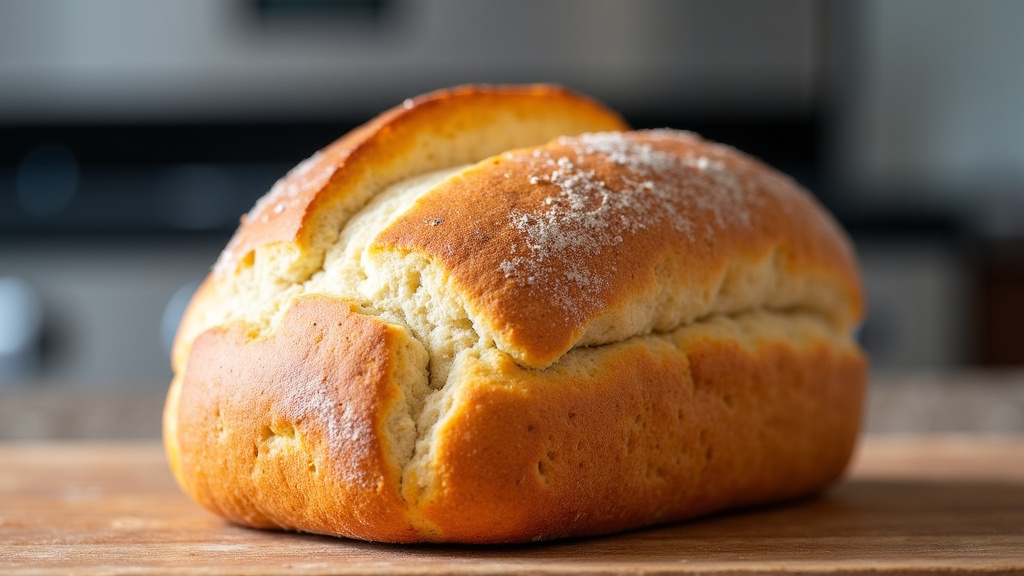
Troubleshooting Common Low-Carb Bread Issues
Don’t get discouraged if your first loaf isn’t perfect. Low-carb baking has a learning curve. Many common problems have simple solutions.
Think of it as refining your technique. Each loaf teaches you something new about your machine and your recipe.
Why Your Bread Might Not Rise Enough
A common issue is a lack of rise. This can happen for several reasons. The yeast might be old or inactive. Always check the expiration date on your yeast.
Water temperature is also critical. If the water was too hot, it killed the yeast. If it was too cold, the yeast wouldn’t activate properly. Aim for lukewarm, around 105-115°F (40-46°C).
Too much salt can also inhibit yeast activity. Ensure you’re measuring correctly. Conversely, not enough sugar (which helps activate yeast) can also be a problem, even in low-carb recipes.
Sometimes, simply adjusting the amount of binder (like xanthan gum) can help. Too little, and the structure won’t hold the rise. Too much, and it can make the dough too dense.
Solving Crumbly or Gummy Textures
Is your bread crumbly? This often means there isn’t enough moisture or binder. Try adding an extra tablespoon of liquid next time. You might also need slightly more xanthan gum or psyllium husk.
Gummy bread, on the other hand, usually means it was underbaked or not cooled properly. Make sure your bread machine cycle goes the full duration. And remember that crucial cooling step!
Another cause for gumminess can be too much liquid. Low-carb flours absorb differently. Experiment with small adjustments. Even small changes can make a big difference.
Sometimes, a combination of flours works best. For example, too much coconut flour can lead to a drier, more crumbly bread. Blending it with almond flour can create a better balance.
Your Low-Carb Bread Machine Checklist
To help you on your baking journey, here’s a quick checklist:
- Double-check yeast expiration date.
- Ensure water/liquid temperature is correct.
- Measure all ingredients precisely (use a scale!).
- Add ingredients in the recommended order (liquids first).
- Select the appropriate bread machine cycle.
- Monitor dough consistency during early kneading.
- Allow bread to cool completely on a wire rack.
Conclusion
You now have the knowledge to successfully make low-carb bread in your bread machine. We covered essential ingredients and mastering your machine’s cycles. You also learned how to troubleshoot common issues like crumbly texture or poor rise.
Remember that baking low-carb bread is a skill you’ll refine with practice. Don’t be afraid to experiment with different flours and binders. Enjoy the satisfaction of baking fresh, healthy bread at home, perfectly suited to your dietary needs. Go ahead and bake your next delicious, low-carb loaf!
Frequently Asked Questions
Can I use any bread machine for low-carb bread?
Most standard bread machines can be used for low-carb bread. However, machines with a “Low Carb” or “Keto” specific setting will offer the best results. These specialized settings account for the unique characteristics of low-carb doughs, like their shorter kneading and proofing needs.
Why is low-carb bread often denser than regular bread?
Low-carb flours like almond and coconut lack gluten, which is what gives traditional bread its elastic structure and airy texture. While binders like xanthan gum help, they can’t fully replicate gluten. This often results in a bread that is naturally denser and more compact.
How long does homemade low-carb bread last?
Homemade low-carb bread generally lasts 3-5 days at room temperature. Because it lacks preservatives, it tends to spoil faster than store-bought bread. For longer storage, you can slice and freeze it for up to 2-3 months. Thaw slices as needed for toast or sandwiches.
Do I really need a kitchen scale for low-carb baking?
Yes, a kitchen scale is highly recommended for low-carb baking. Low-carb flours and binders are very sensitive to measurement variations. Using a scale ensures precise ingredient amounts, which significantly increases your chances of baking a successful loaf with the correct texture and rise.
Can I substitute ingredients in low-carb bread recipes?
It’s generally best to stick to the recipe as closely as possible, especially when you’re starting out. Low-carb ingredients interact differently than traditional ones. Swapping flours or binders without careful adjustments can significantly alter the outcome, leading to undesirable textures or failure to rise.



