How to Make Multigrain Bread in a Bread Machine?
On this page (10 sections)
- Baking Multigrain Bread with Your Machine
- Setting Up Your Bread Machine
- Step-by-Step Baking Process
- Understanding the Machine’s Behavior
- Getting the Loaf Out and Cooling
- Troubleshooting Common Multigrain Bread Issues
- Expert Tips for an Even Better Loaf
- Your Multigrain Bread Checklist
- Conclusion
- Frequently Asked Questions
To make multigrain bread in a bread machine, simply combine your ingredients in the order specified, use the machine’s manual for your specific model, and select the multigrain or whole wheat setting. This process is designed to handle the dense ingredients and unique kneading requirements automatically.
A quality bread machine multigrain bread offers a fantastic mix of flavors and a hearty, nutritious loaf with minimal effort. We found that many home bakers appreciate the set-it-and-forget-it convenience for achieving a consistent, healthy result. You get all the benefits of a complex grain profile without the constant monitoring required for oven baking.
- Gather multigrain flour, seeds, yeast, water, salt, and a bit of sweetener.
- Add ingredients to the bread pan, typically liquids first.
- Choose the correct cycle on your machine, often “Whole Wheat” or “Multigrain.”
- Let the machine handle the mixing, kneading, rising, and baking.
- Enjoy a fresh, warm loaf with a wonderful nutty flavor.
Let’s walk through exactly how to do this step by step, from picking the right grains to troubleshooting a perfect bake. You’ll have a delicious, homemade loaf in no time.
Baking Multigrain Bread with Your Machine
Let’s get straight to the heart of the matter. Your bread machine is a fantastic partner for this job. It does the heavy lifting, literally. The key is understanding the unique needs of multigrain dough. It’s denser than white bread. It needs a specific sequence and often a longer cycle. We found that following these core principles leads to a loaf that’s consistently good.
Choosing Your Grains and Ingredients
The soul of your bread is the grain mix. This isn’t just about flavor; it’s about nutrition and texture. The FDA notes that whole grains are part of a healthy diet, linked to reduced risks of certain chronic diseases. Your blend should be a mix of whole and cracked grains.
Core Grains for Your Blend
You can buy a pre-mixed multigrain flour, but creating your own gives you control. A good starting point is a 50/50 split between your primary flour and a secondary mix. Think of it as building a flavor team.
- Whole wheat flour: The sturdy backbone of your loaf.
- Rye or spelt flour: Adds a lovely, earthy depth.
- Rolled oats: Provides a soft, hearty texture.
- Cracked wheat or millet: For a wonderful, nutty crunch.
- Seeds (flax, sunflower, sesame): These are optional but highly recommended for nutrition and texture.
Remember, every grain has a different absorbency. We found that using a recipe specifically designed for multigrain bread is the best first step (USDA Dietary Guidelines).
The Supporting Cast of Ingredients
Good grains need good support. Your yeast is the engine, your water is the catalyst, and salt and sugar balance everything. Don’t skip these simple but vital elements.
| Ingredient | Role | Pro Tip |
|---|---|---|
| Lukewarm Water | Activates yeast | Test it on your wrist. It should feel warm, not hot. |
| Active Dry Yeast | Leavens the dough | Check the expiration date. Dead yeast makes a flat brick. |
| Salt | Enhances flavor, controls yeast | Never let it touch the yeast directly in the pan. |
| Sweetener (Honey, Molasses) | Feeds yeast, adds flavor | Molasses gives a darker color and richer taste. |
| Oil or Butter | Softens the crumb | Helps keep your loaf from being too dry or dense. |
Setting Up Your Bread Machine
Every bread machine is a little different. Your user manual is your best friend here. We recommend you place it on the counter before you start. You’ll need to reference it for the exact cycle names and loaf size options.
Adding Ingredients in the Correct Order
This is non-negotiable. Most machines want you to add ingredients in a specific sequence. Doing it wrong can prevent the dough from forming properly. The usual rule is simple: liquids first, then dry, then yeast last.
The Layering Technique
Think of it like making a cake in a pan. You want the wettest ingredients at the bottom. This helps the paddle mix everything evenly from the start. A typical order looks like this:
- Water or milk: Pour it into the bread pan first.
- Oil, butter, or honey: Add these to the liquid.
- Dry ingredients: Add your flour, grains, and seeds.
- Salt and sugar: Place them in separate corners on top of the flour.
- Yeast: Create a small well or dip in the center of the flour and add your yeast there. This keeps it away from the salt and liquids until mixing begins.
Selecting the Perfect Cycle
Your machine likely has a “Whole Wheat” or “Multigrain” setting. This is the most important choice you’ll make today. These cycles are longer. They include a more intensive kneading phase and often a longer rise time. This is exactly what dense, grain-filled dough needs to develop properly.
If your machine doesn’t have a multigrain setting, the “Whole Wheat” cycle is the next best option. Some people even use the “Basic” cycle, but they often report a denser loaf. The extended knead and rise times are the machine’s way of handling the tough grains.
Step-by-Step Baking Process
Now, let’s put it all together. You’ve got your ingredients layered. You’ve chosen your cycle. The process is now mostly hands-off, which is the beauty of this method.
- Secure the bread pan: Place it into the machine and lock it into position.
- Close the lid: Ensure the lid is fully closed. Some machines won’t start otherwise.
- Set the program: Select “Multigrain” or “Whole Wheat” using the menu buttons.
- Choose loaf size and crust: Typically, you can choose a 1.5 or 2-pound loaf. A medium or dark crust works well with these hearty grains.
- Press Start: Walk away. Let the machine work its magic. You might hear it knead, which can be a bit loud with the hard grains. That’s normal.
The entire cycle usually takes 3 to 4 hours. Avoid opening the lid during the rising or baking phases. This can cause the bread to collapse.
Understanding the Machine’s Behavior
Your machine will go through several stages. Knowing what to expect helps you feel in control, even when you’re not actively doing anything. It’s like waiting for a good friend to get ready—you know the process has its own rhythm.
The Kneading Phase
This is where the magic happens. The paddle will turn the dough, incorporating all the grains. You may see the dough form a ball and slap against the sides of the pan. This is a good sign. It means the gluten is developing. If the dough looks too dry, you can open the lid and add a tablespoon of water. If it’s too sticky, a tiny sprinkle of flour.
The Rising and Baking Phases
After kneading, the machine will heat up slightly for the first rise. Then, it will knead again (a second rise). Finally, it will bake. The baking phase will make your kitchen smell incredible. The crust will form, and you’ll hear a gentle thumping as the loaf bakes. When it’s done, the machine will usually beep and switch to a “Keep Warm” setting.
Getting the Loaf Out and Cooling
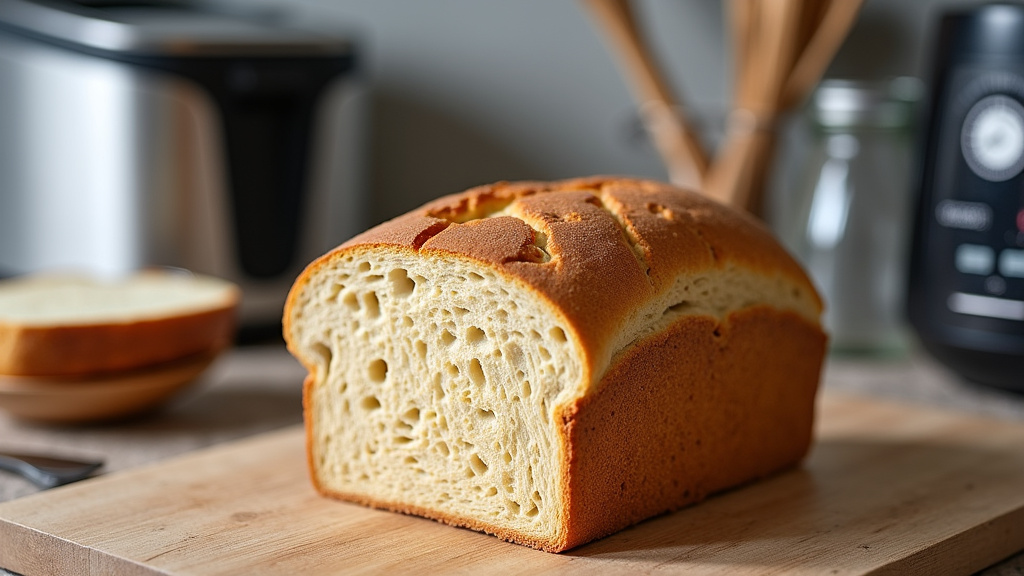
This is a crucial step that many people rush. A hot loaf is fragile. The crumb inside is still setting. Taking it out too soon can make it gummy or dense. Patience is key here.
- Remove the pan: Use oven mitts. The handle and pan are extremely hot.
- Shake the loaf: Gently shake the pan to loosen the bread. It might slide right out.
- Cool on a wire rack: Let the loaf cool completely. This can take 1-2 hours. Cutting into it while warm will release steam and make the interior sticky.
Troubleshooting Common Multigrain Bread Issues
Sometimes, things don’t go perfectly. Don’t worry. Most issues are easy to fix on your next try. We’ve compiled a checklist to help you diagnose common problems. Think of it as a quick reference guide for your next bake.
Dense or Heavy Loaf
This is the most common complaint with multigrain bread. If your loaf feels like a brick, it usually means the dough didn’t rise enough. This can happen for a few reasons. The yeast might be old, or the water was too hot and killed it. We found that using expired yeast is a frequent culprit.
Quick Fixes for Density
- Check yeast freshness: Always check the date. Store it in the fridge.
- Verify water temperature: It should be between 100°F and 110°F.
- Consider using vital wheat gluten: This helps the dough rise better with heavy grains. A tablespoon can make a big difference.
Crumbly or Cracked Top
If your loaf has a cracked or crumbly top, it might have risen too fast or been under-kneaded. Sometimes, the dough is too dry. A bit more liquid can help. Also, ensure you’re using the correct cycle. The “Multigrain” cycle has a longer knead to fully incorporate the grains.
Burnt Bottom
A dark bottom is often due to the baking element being too close. Try placing a thin, insulated baking sheet or a piece of foil under the bread pan. Some machines have a “dark crust” setting that might be too strong. Try a medium crust next time.
Expert Tips for an Even Better Loaf
Once you’ve mastered the basics, these small tweaks can elevate your bread. They’re about refining the process for your specific machine and taste preferences.
- Toast your grains first: Lightly toast oats, flax, or sunflower seeds before adding them. It amplifies their nutty flavor dramatically.
- Use bread flour for part of it: If your multigrain loaf is too dense, replace 1/4 of the multigrain flour with bread flour. It adds more gluten for a better rise.
- Add a “tang” with buttermilk: Replace some of the water with buttermilk. It adds moisture and a subtle tang that pairs well with the grains.
- Let the dough “autolyse”: For advanced bakers, let the flour and water mix sit for 20 minutes before starting the cycle. It helps the grains absorb moisture.
Your Multigrain Bread Checklist
Before you press start, run through this quick checklist. It covers the essentials for a successful bake. Keep it handy for your first few tries.
- Ingredients are fresh: Especially the yeast and flour.
- Pan is clean and dry: No old crumbs or moisture.
- Ingredients are layered correctly: Liquids
Conclusion
You now have the complete blueprint for turning your bread machine into a multigrain powerhouse. Remember, the magic lies in the details: a thoughtful grain blend, precise ingredient layering, and selecting the correct long cycle. We found that patience during the cooling phase is just as important as the mixing. Your next step is simple. Gather your favorite grains, pull out your machine, and press start. You’ve got this. Enjoy the incredible aroma and taste of your own fresh, hearty loaf.
Frequently Asked Questions
Can I freeze my multigrain bread machine loaf?
Absolutely. For the best results, let the loaf cool completely. Then, wrap it tightly in plastic wrap and again in aluminum foil or place it in a freezer-safe bag. It will maintain excellent quality for up to three months. Just thaw slices as needed.
What if my machine doesn’t have a multigrain setting?
You can still make great bread. Use the “Whole Wheat” setting as your first choice. If that’s not available, the “Basic White” cycle can work. You may end up with a slightly denser loaf, but it will still be delicious and nutritious.
Why do I need to use lukewarm water instead of cold?
Lukewarm water (100°F to 110°F) is the ideal temperature to wake up the yeast. Cold water will slow down or prevent activation. Hot water, on the other hand, can kill the yeast. A quick wrist test is a reliable way to check.
Is it okay to replace all the white flour with multigrain flour?
We recommend a blend for the best texture. Using 100% multigrain flour can create a very dense, heavy loaf because it has less gluten. Starting with a 50/50 split, as suggested in the article, gives you a great balance of flavor and a good rise.
How long does a loaf from the machine really stay fresh?
A whole-grain loaf typically stays fresh at room temperature for 2 to 3 days due to its lack of preservatives. To extend freshness, store it cut-side down on a cutting board. For longer storage, slice it and freeze it for individual servings.



