How To Make Olive Bread In A Bread Maker?

To make olive bread in a bread maker, you typically add ingredients like flour, water, yeast, salt, sugar, olive oil, and chopped olives into the bread machine pan in the order specified by your manufacturer, then select the “Basic” or “Whole Wheat” cycle, often with a “Dough” cycle option if you prefer to bake it in a conventional oven.
The key steps involve precise measurement, layering wet and dry ingredients correctly, and allowing the machine to handle the mixing, kneading, and rising processes, often using a dedicated fruit and nut dispenser for the olives.
Here’s a quick overview of how to achieve delicious olive bread with your machine:
- Gather your essential ingredients, focusing on fresh yeast and good quality olives.
- Layer ingredients carefully in the bread pan, typically liquids first, then dry, and yeast last.
- Choose the appropriate bread maker cycle, usually “Basic” or “Whole Wheat,” depending on your desired crust.
- Add your chopped olives at the machine’s “mix-in” signal, or use the automatic dispenser.
- Allow the bread to cool completely after baking for the best texture and flavor.
How To Make Olive Bread In A Bread Maker?
Making olive bread in a bread maker involves combining your ingredients in the machine’s pan, letting it mix and knead, then bake it to a perfect, fragrant loaf.
This method saves you time and effort, making fresh, savory bread an everyday possibility.
Why Use Your Bread Maker for Olive Bread?
Using a bread maker for your olive bread is a game-changer for many home bakers. It handles all the heavy lifting for you.
Think about it: no messy kneading, no waiting by the oven, and consistent results every time. It’s like having a little bakery assistant right on your countertop.
We found that machines offer a stable, controlled environment for yeast to work its magic (NIH).
Gathering Your Ingredients: The Heart of Your Loaf
Every great loaf starts with great ingredients. For olive bread, this means not just flour and yeast, but also those wonderful olives and quality olive oil.
Consider these points when stocking your pantry for baking day.
Flour Power: Choosing the Right Type
For a robust olive bread, bread flour is often best. It has a higher protein content, which creates a stronger gluten structure.
This structure helps your loaf rise beautifully and gives it that satisfying chew. All-purpose flour can work, but the texture might be slightly different.
Yeast: The Lifeblood of Your Bread
Active dry yeast or instant yeast are your go-to options. Instant yeast is super convenient as you can often add it directly with other dry ingredients.
Ensure your yeast is fresh; old yeast means a flat, sad loaf. You can test it by dissolving it in warm water with a pinch of sugar to see if it foams up.
Liquid Love: Water or Milk?
Most olive bread recipes call for water, and for good reason. Water lets the olive flavor really shine through.
Some recipes might suggest milk for a softer crumb and richer taste. We found that water generally produces a chewier crust, which pairs well with savory breads.
Salt and Sugar: Flavor Balancers
Salt isn’t just for taste; it also helps control yeast activity and strengthens the gluten. Don’t skip it!
A small amount of sugar feeds the yeast, helping the dough rise, and also aids in browning the crust. It’s a tiny amount, so your bread won’t taste sweet.
Olive Oil: The Signature Flavor
A good quality olive oil is essential here. It adds richness, moisture, and that unmistakable Mediterranean flavor.
Extra virgin olive oil brings the most flavor, but a lighter olive oil will also work beautifully.
The Star: Olives, Of Course!
Choose your olives wisely! Kalamata olives offer a briny, fruity flavor, while green olives like Manzanilla add a sharper, saltier kick.
Be sure to drain and chop your olives before adding them. You might want to pat them dry slightly to prevent adding too much moisture to your dough.
Your Essential Ingredient Checklist
Before you begin, make sure you have everything ready. This prevents last-minute scrambles.
- Bread Flour: 3 cups (approx. 360-390g)
- Water: 1 cup (approx. 240ml), lukewarm
- Olive Oil: 2 tablespoons
- Salt: 1 teaspoon
- Sugar: 1 tablespoon
- Instant Yeast: 2 teaspoons
- Chopped Olives: 1/2 to 1 cup (drained and patted dry)
Step-by-Step: Making Olive Bread in Your Machine
The beauty of a bread maker is its simplicity. Follow these steps, and you’ll be enjoying fresh olive bread soon.
Measuring Precisely: No Guesswork Here
Accurate measurements are the secret to consistent baking. Use proper measuring cups for liquids and spoons for dry ingredients.
A kitchen scale is even better for flour, as scooping can pack it down and lead to too much flour.
Adding Ingredients: The Right Order Matters
Most bread makers recommend adding liquids first, then dry ingredients, and finally the yeast on top. This order keeps the yeast separate from the salt and sugar until mixing begins.
Always check your bread maker’s manual for its specific layering instructions.
Selecting Your Bread Maker Cycle
For olive bread, the “Basic” or “White Bread” cycle is usually appropriate. If your machine has a “Whole Wheat” cycle, it might also work for a denser loaf.
Some people prefer the “Dough” cycle. This lets the machine mix and knead, then you shape and bake the bread in your regular oven for a truly artisan crust (Cleveland Clinic).
Adding Olives: When to Incorporate Them
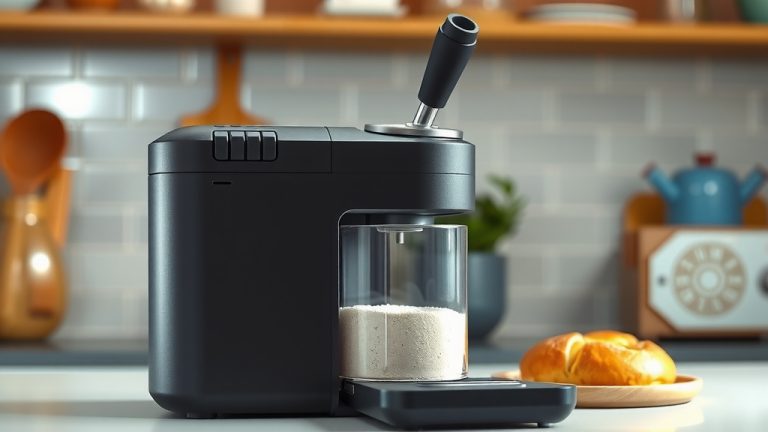
Many bread makers have an automatic fruit and nut dispenser. This is perfect for olives!
If yours doesn’t, listen for the machine’s “add-in” beep (usually about 5-10 minutes into the first kneading cycle) and manually add the olives then. Adding them too early might crush them too much.
The Waiting Game: Let the Machine Work
Once you’ve pressed start, your job is mostly done. The machine will mix, knead, rise, and bake your bread.
Resist the urge to open the lid too often, especially during the rising and baking stages, as this can cause the bread to collapse.
Cooling Your Loaf: A Vital Step
After the cycle finishes, immediately remove the bread pan from the machine. Then, turn the loaf out onto a wire rack to cool completely.
Cutting into warm bread can make it gummy and dense. Patience is key for the best texture and flavor.
Troubleshooting Common Olive Bread Issues
Even with a bread maker, sometimes things go a little differently than planned. Don’t worry, most issues have simple fixes.
Why is My Bread Too Dense?
A dense loaf often means too much flour, too little liquid, or inactive yeast. Double-check your measurements, especially for flour.
Ensure your water is lukewarm, not hot, to avoid killing the yeast (Mayo Clinic).
Bread Not Rising Enough?
If your bread barely rises, the culprit is almost always the yeast. It might be expired, or the water temperature was off.
Also, ensure your salt and yeast didn’t come into direct contact before mixing, as salt can inhibit yeast activity.
Olives Sinking to the Bottom?
This happens if the olives are too heavy or wet. Patting them very dry after chopping helps.
If you’re adding manually, try adding them a bit later in the kneading cycle, when the dough has developed more structure.
Creative Variations for Your Olive Bread
Once you master the basic olive bread, feel free to get creative! Here are a few ideas.
Adding Herbs and Spices
Try adding dried oregano, rosemary, or thyme to your dough for an aromatic twist. About a teaspoon of dried herbs is usually enough.
Fresh herbs can also be added with the olives during the mix-in cycle.
Cheese Pairings
Feta, Parmesan, or even a sharp cheddar can elevate your olive bread. Add about 1/2 cup of shredded or crumbled cheese with the olives.
Cheese adds moisture and a wonderful savory depth.
Sun-Dried Tomatoes: A Flavor Boost
For another layer of Mediterranean flavor, add 1/4 to 1/2 cup of chopped sun-dried tomatoes (oil-packed and drained) along with your olives.
The sweet-tartness of the tomatoes complements the salty olives perfectly.
Ingredient Comparison: Green vs. Black Olives
Choosing between green and black olives can change the whole character of your bread. Here’s a quick comparison:
| Feature | Green Olives (e.g., Manzanilla) | Black Olives (e.g., Kalamata) |
|---|---|---|
| Flavor Profile | Sharper, saltier, sometimes a bit bitter. | Fruiter, milder, slightly sweeter, less bitter. |
| Texture | Firmer, denser. | Softer, meatier. |
| Common Use | Often in martinis, salads, pimento-stuffed. | Mediterranean dishes, tapenades, salads. |
| Impact in Bread | Provides a bold, distinct salty kick. | Adds a more mellow, earthy olive background. |
Conclusion
Making olive bread in a bread maker is a truly rewarding experience. It brings the wonderful aromas of a bakery into your home with minimal effort.
By following simple steps and paying attention to your ingredients, you can consistently produce a delicious loaf.
Don’t be afraid to experiment with different types of olives or add other savory mix-ins to make the recipe truly your own. Happy baking!
Can I use any type of olive in my bread maker?
Yes, you can use almost any type of olive you enjoy. Just make sure they are pitted and chopped into small pieces. Olives packed in oil should be drained well, and those in brine might need a quick rinse and pat dry to control saltiness and moisture.
What if my bread maker doesn’t have a fruit/nut dispenser?
If your bread maker lacks a dispenser, simply listen for the machine’s “add-in” signal, which usually beeps around 5 to 10 minutes into the first kneading cycle. Pause the machine, add your chopped olives, and then restart the cycle.
My olive bread is coming out too salty. What can I do?
If your olive bread is too salty, consider rinsing your olives thoroughly before chopping them. You can also slightly reduce the amount of salt in the dough recipe. Some olives are naturally saltier than others, so experimenting with different varieties helps.
Can I add other ingredients like cheese or herbs to the olive bread?
Absolutely! Adding ingredients like crumbled feta cheese, shredded Parmesan, dried oregano, or fresh rosemary can enhance the flavor significantly. Add these extra mix-ins at the same time you would add the olives, either via the dispenser or manually during the kneading cycle.
How should I store homemade olive bread?
Once cooled, olive bread is best stored at room temperature in an airtight container or a bread bag for 2-3 days. For longer storage, slice the bread and freeze it in an airtight freezer bag for up to 2-3 months. Thaw slices as needed.