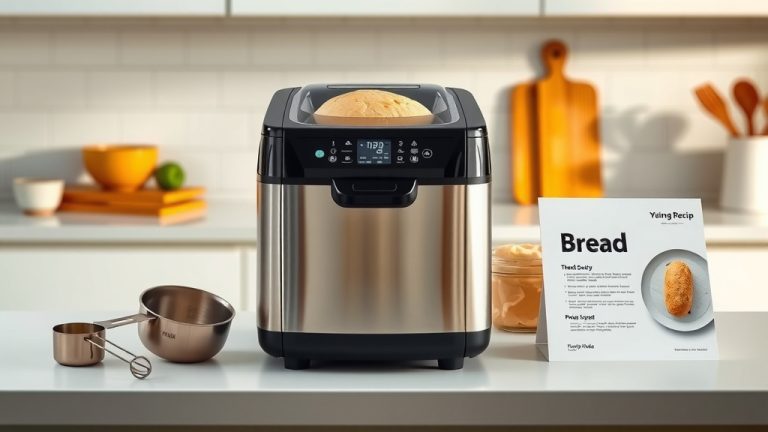
What Should You Not Do With A Bread Maker?
You should not overload your bread maker, use incorrect ingredient ratios, or open the lid too frequently during the kneading and rising cycles. These actions can compromise your loaf’s texture and structure.
To avoid common pitfalls with your bread maker, refrain from using expired ingredients, neglecting proper cleaning, or substituting essential ingredients without understanding their role in the recipe.
Here’s a quick glance at what you definitely want to avoid for perfect bread every time:
- Don’t overload your bread maker with too many ingredients; it won’t bake properly.
- Never use cold liquids directly from the fridge; they hinder yeast activation.
- Avoid opening the lid during crucial kneading or rising phases; temperature is key.
- Don’t ignore proper ingredient measurement; baking is a science.
- Remember to always clean the pan and paddle after each use to prevent residue buildup.
What Should You Not Do With A Bread Maker?
You should avoid mismeasuring ingredients, opening the lid during cycles, or using expired yeast to ensure a perfectly baked loaf every time.
Overfilling Your Bread Pan
Imagine a small car trying to carry too much luggage. It simply won’t work well, will it? Your bread maker is much the same. Adding too many ingredients beyond the recommended capacity can lead to a messy overflow or, worse, an **unbaked, dense loaf**. We found that overfilling is a common mistake that often disappoints new users.
Always stick to the recipe’s specified amounts for your machine’s size. Most bread makers come in 1-pound, 1.5-pound, or 2-pound capacities. Respecting these limits is **crucial for success** (Consumer Reports).
Ignoring Ingredient Order and Temperature
Baking is a precise art and science. The order you add ingredients and their temperature significantly impact the outcome of your bread. It’s not just a suggestion; it’s a **fundamental rule for bread machines**.
The Cold Truth About Liquids
Pouring ice-cold water or milk directly from the refrigerator into your bread maker can shock your yeast. Yeast needs a comfortable, **lukewarm environment to activate** and thrive. Many food science experts emphasize the importance of using liquids at room temperature, typically around 70-80°F (21-27°C), for optimal yeast performance.
If your yeast doesn’t wake up properly, your bread won’t rise. You’ll end up with a heavy, **brick-like texture**, and nobody wants that!
Layering Matters
Most bread maker recipes instruct you to add liquids first, then dry ingredients, and finally the yeast on top. Why this specific order? It keeps the yeast from activating too early by **separating it from the liquids** and salt initially. Salt can inhibit yeast activity if it comes into direct contact too soon. Following this layering ensures a slow, controlled start to the proofing process.
Peeking During the Process
It’s tempting to lift the lid and see what’s happening inside, isn’t it? Like checking on a child’s nap. But resist the urge! Opening the lid, especially during the **kneading and rising cycles**, can cause problems. It disrupts the internal temperature and humidity, which are carefully controlled by the machine.
Why Stability is Key
A sudden change in temperature can cause the dough to collapse, especially during its final rise. This is called “deflating” and it means your bread won’t be as light and fluffy. We found that maintaining a stable environment is **vital for a good rise** and consistent texture (culinary school guidelines).
Using Expired or Wrong Ingredients
A loaf of bread is only as good as its ingredients. Using old or incorrect items is a surefire way to disappointment.
Yeast: Your Loaf’s Best Friend (or Foe)
Yeast is a living organism. If it’s old or expired, it loses its power to produce carbon dioxide, which makes bread rise. Always **check the expiration date** on your yeast package. If you’re unsure, you can “proof” a small amount in warm water with a pinch of sugar; if it bubbles, it’s alive.
The Peril of Old Flour
While flour doesn’t expire as quickly as yeast, it can go stale or absorb odors. Old flour might give your bread an **off-taste or an unusual texture**. Research often connects fresh ingredients with superior baking results, including better flavor and rise (food science journals).
Skipping the Paddle Removal
Most bread makers have a small kneading paddle at the bottom of the pan. If you don’t remove it before the bread cools, it can get stuck in your loaf, leaving a hole or a **paddle-shaped indent**. Many users forget this step. Some machines have a collapsible paddle, but if yours doesn’t, remember to remove it carefully after baking.
Neglecting Proper Cleaning
A clean bread maker pan means happy bread. If you leave dough residue or crumbs inside, they can bake onto the surface during the next cycle, making them harder to remove. This residue can also affect the heating elements or even impart a **burnt taste to your next loaf**.
The Hidden Crumbs
Always wash the bread pan and kneading paddle with warm, soapy water after each use. Avoid abrasive scrubbers that can damage the non-stick coating. Proper cleaning ensures your machine lasts longer and your bread tastes its best. Food safety guidelines advise regular cleaning of all **food contact surfaces**.
Relying Only on Default Settings
While preset cycles are convenient, they aren’t always perfect for every recipe or situation. Sometimes, you might need a custom cycle for whole wheat bread or a dough setting for pizza. Don’t be afraid to **experiment with custom programs** if your machine offers them. Many experts say understanding your machine’s manual can unlock a world of possibilities beyond basic white bread.
Improper Bread Removal and Cooling
Once your bread maker signals it’s done, don’t just pull the loaf out and slice it immediately. Allow the bread to **cool on a wire rack** for at least 20-30 minutes. This process allows the internal starches to set, making the bread easier to slice and improving its texture. Slicing too soon can result in a gummy texture.
Don’t Forget Ingredient Precision
Baking is science, not just cooking. Precision is your best friend when using a bread maker. Even small errors can lead to big disappointments.
- Always level your flour: Spoon flour into your measuring cup, then level it off with a straight edge. Don’t pack it down.
- Measure liquids accurately: Use liquid measuring cups at eye level for precise readings.
- Don’t eyeball ingredients: Even a slight deviation in yeast or salt can alter the entire loaf.
- Use kitchen scales: For the most accurate results, weigh your ingredients, especially flour. Many professional bakers rely on scales for **consistent outcomes**.
Common Ingredient Missteps
Understanding key ingredient roles can prevent many issues. Here’s a quick guide on what to avoid swapping without caution:
| Ingredient Type | What Not to Do | Why Avoid It |
|---|---|---|
| Yeast | Using active dry instead of instant without adjusting liquid/temp. | Requires different activation and may not rise. |
| Flour | Swapping bread flour for all-purpose in yeast recipes. | Lower protein in all-purpose leads to less chewy texture. |
| Salt | Omitting salt entirely. | Crucial for flavor, yeast control, and dough structure. |
| Sugar | Using artificial sweeteners in yeast recipes. | Yeast needs real sugar to feed and activate. |
Post-Bake Checklist
After your delicious bread is baked, a few simple steps ensure longevity for your machine and enjoyment of your loaf.
- Remove the pan promptly: Don’t leave the hot pan in the machine.
- Extract the paddle: Carefully remove the kneading paddle from the bottom of the loaf.
- Cool the bread: Transfer the loaf to a wire rack for proper cooling.
- Clean thoroughly: Wash the pan and paddle, wiping down the machine’s interior if needed.
- Store properly: Keep your fresh bread in an airtight container once completely cooled.
Conclusion
Your bread maker is a fantastic tool for bringing fresh, homemade bread to your table. By understanding and avoiding these common pitfalls, you can ensure consistent, delicious results every time. Remember, it’s all about **precision, patience, and proper care**. Treat your machine and ingredients with respect, and you’ll be rewarded with wonderful loaves. Happy baking!
Can I use gluten-free flour directly in my bread maker?
Yes, you can use gluten-free flour in your bread maker, but you should always follow recipes specifically designed for gluten-free bread. Gluten-free flours behave differently and often require additional binders like xanthan gum or different liquid ratios to achieve a good texture. Standard wheat flour recipes will not yield good results with a simple swap.
What if my bread maker loaf comes out too dense or heavy?
A dense or heavy loaf usually points to issues with yeast activation or rising. This can happen if your yeast is expired, the water temperature was too cold, or you used too much flour. Double-check your yeast’s freshness, ensure liquids are room temperature, and precisely measure all ingredients, preferably by weight.
Is it okay to add extra ingredients like nuts or dried fruit?
Yes, you can definitely add nuts, dried fruits, or seeds to your bread. However, it’s best to add them at the specific “add-in” signal from your bread maker, usually during the second kneading cycle. Adding them too early can crush them or interfere with gluten development. Don’t add more than the recipe suggests, as it can affect the overall structure.
My bread often sticks to the pan; what am I doing wrong?
Bread sticking to the pan is often a sign of damage to the non-stick coating or residue buildup. Make sure you are not using abrasive sponges or metal utensils when cleaning. If the coating is significantly scratched, you might need a new pan. Also, ensure you remove the bread promptly after baking and allow it to cool on a rack, as advised by many manufacturers.
Can I use baking powder or soda instead of yeast in my bread maker?
While baking powder and soda are leavening agents, they are typically not suitable for most standard bread maker recipes designed for yeast. Yeast-based breads require specific kneading and rising cycles that baking powder/soda breads do not. Using them in a yeast recipe will result in a very dense, unrisen loaf. There are specific “quick bread” recipes for bread makers that use these, but they are generally for cake-like loaves, not traditional yeast bread.