
How To Prevent Bread From Sticking To The Pan In A Bread Maker?
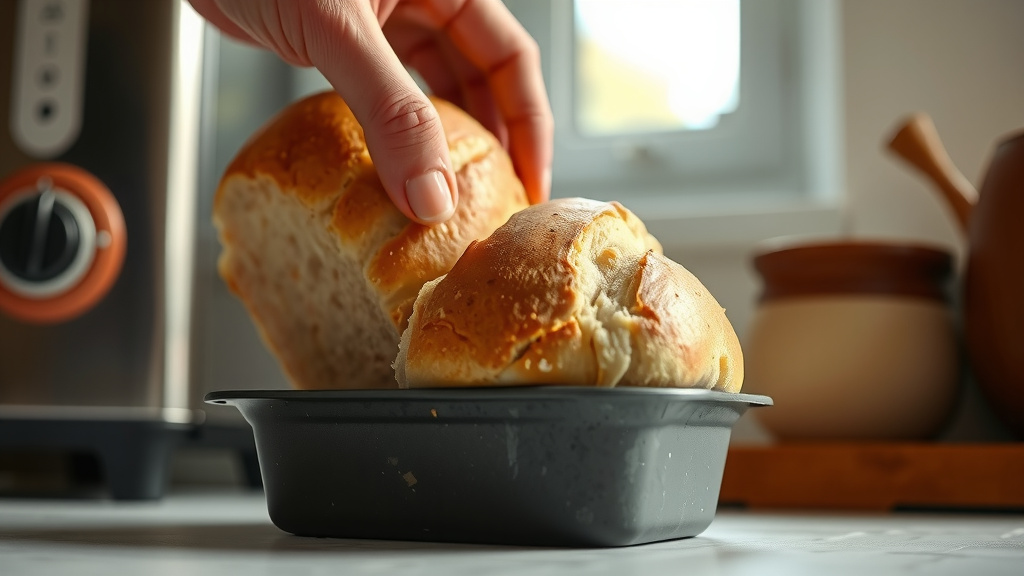
To prevent bread from sticking to the pan in a bread maker, always make sure your pan is thoroughly greased before adding ingredients.
Additionally, removing the kneading paddle right after the final kneading cycle, and ensuring the pan’s non-stick coating is in good condition, are crucial steps for an easy release.
- Always grease your bread maker pan well with a suitable fat.
- Remove the kneading paddle promptly after the last kneading cycle finishes.
- Maintain a clean pan, washing it gently after every use.
- Regularly check your pan’s non-stick coating for any signs of wear.
- Ensure accurate measurement of all ingredients for a balanced dough.
How To Prevent Bread From Sticking To The Pan In A Bread Maker?
It’s frustrating, isn’t it? You’ve waited patiently, the aroma fills your kitchen, but then your beautiful homemade loaf clings stubbornly to the pan. Many home bakers face this issue, and it can feel like a genuine puzzle. But don’t worry, you’re not alone, and there are straightforward solutions to get that perfect, unblemished loaf every time. We’re here to guide you through the process, step by step.
Why Your Bread Might Be Sticking
Understanding the root cause helps a lot. Imagine trying to pull a sticker off a dry, rough surface; it’s tough, right? Bread sticking works similarly. There are a few main culprits behind this common bread maker mishap, and identifying them is the first step to enjoying easy-release loaves.
One common reason is insufficient greasing. If the pan isn’t properly lubricated, the dough forms a bond with the metal surface. Think of it like a sticky glue, making release difficult.
Another frequent issue involves the kneading paddle. This little component, essential during the mixing phase, can become embedded in the finished loaf. This makes extraction tricky and often tears a chunk out of your bread.
Sometimes, the pan itself is the problem. A bread maker pan, especially older ones, might have a worn-out non-stick coating. Once this protective layer degrades, sticking becomes almost inevitable, no matter how much grease you add.
The Foundation: Proper Pan Greasing
Greasing your bread maker pan is perhaps the most important preventative step. It creates a barrier between your dough and the pan, allowing for a smooth release. Think of it like applying a slip-and-slide for your loaf!
Choosing the Right Oil or Spray
What should you use? We found that options like vegetable oil, canola oil, or even butter work well. Many experts suggest using a neutral-flavored oil that won’t impact your bread’s taste (Cleveland Clinic). Some prefer a non-stick baking spray, which can provide an even coat.
Research often shows that solid fats like shortening can offer a very effective barrier. Just make sure whatever you choose can withstand the heat without burning or creating an off-flavor.
How to Apply Grease Effectively
You want to coat every internal surface that will touch the dough. Don’t forget the corners and up the sides. If using oil, pour a small amount (about 1-2 teaspoons) and spread it with a paper towel or pastry brush. For spray, aim for a light, even mist across the entire interior.
A little extra attention here goes a long way. This ensures there are no dry spots where the bread can grab hold. A well-greased pan feels slightly slick to the touch, ready for your ingredients.
Dealing with the Kneading Paddle
Ah, the kneading paddle – a tiny hero that can become a villain at the end. It’s a key part of the bread-making process, but it can cause big headaches if left in place. We found that managing the paddle is a common point of frustration for many bread maker users.
Timing Your Paddle Removal
The trick is to remove the paddle before the final rise and baking. Most bread makers have an audible signal for this. This usually happens after the last kneading cycle, when the dough has formed into a smooth ball. Check your bread maker’s manual for the specific timing or signal (NIH often emphasizes reading device instructions).
Missing this window means the paddle bakes into the bread, creating a stubborn anchor. You want to extract it when the dough is still pliable but has finished its main work.
Tips for Easy Extraction
When the signal sounds, carefully open the lid. Your dough ball will be resting inside. Gently lift the dough just enough to reveal the paddle. We recommend using lightly oiled hands or a spatula to avoid sticking to the dough itself.
Twist and pull the paddle straight up and out. Then, gently settle the dough back into place. This quick intervention saves your finished loaf from a ragged bottom and makes removal much simpler.
Keeping Your Pan in Top Shape
Your bread maker pan is a workhorse, but it needs care to perform its best. A pan in good condition is your best friend against sticking. Think of it as investing in the longevity of your bread-making joy.
Gentle Cleaning for Longevity
After each use, clean your pan promptly. Hot, soapy water and a soft sponge are usually all you need. Many experts warn against abrasive scrubbers or harsh detergents (Mayo Clinic). These can scratch and degrade the non-stick coating over time. Even dishwashers can be too harsh for some bread maker pans.
Ensure the pan is completely dry before storing it. Any moisture can lead to rust or damage to the coating, inviting future sticking problems. A dry, clean pan is a happy pan.
When to Replace Your Pan
No non-stick coating lasts forever. If you start noticing flakes, scratches, or areas where the coating is simply gone, it’s time for a replacement. Even with the best care, wear and tear happen. A damaged pan will consistently lead to sticking issues.
Consider the investment in a new pan as an investment in stress-free baking. A fresh pan with an intact non-stick surface will bring back the joy of easy bread release.
Ingredient Accuracy and Other Smart Moves
While greasing and paddle removal are key, other factors contribute to a successful, non-stick loaf. Sometimes, the problem isn’t just the pan; it’s the recipe itself or how you handle the finished product.
Measure Precisely
Accuracy matters a lot in baking. Using too much flour can result in a dry, dense dough that might stick more. Too little liquid can also make the dough rigid and prone to tearing upon removal. Many expert bakers agree that precision is non-negotiable (USDA guidelines on baking). Use proper measuring cups and spoons, and level off ingredients correctly.
Let It Cool Down Properly
Resist the urge to immediately remove the bread. A hot loaf can be more fragile and prone to sticking or tearing. Allow the bread to cool in the pan for 10-15 minutes after baking. This cooling period helps the crust firm up and the loaf contract slightly, making it easier to slide out.
After this initial cooling, invert the pan onto a wire rack. Gently shake it, and the loaf should release. If it’s still hesitant, a slight tap on the bottom can help. Always let it cool completely on a rack before slicing for the best texture.
Recipe Adjustments
Different recipes can behave differently. Whole grain breads, for instance, can sometimes be stickier than white breads due to their fiber content. If you’re consistently having issues with a particular recipe, a minor adjustment might help. We’ve seen success with slightly increasing the oil or fat content in the dough itself, by just a tablespoon, for very sticky recipes.
| Bread Type | Sticking Tendency | Greasing Tip |
|---|---|---|
| White Bread | Low to Moderate | Standard oil/spray |
| Whole Wheat | Moderate to High | Thorough oil/shortening |
| Gluten-Free | Often High | Generous oil/baking spray |
| Rye Bread | Moderate | Butter or oil |
Your Handy Bread Maker Sticking Prevention Checklist
Here’s a quick recap of the key actions to ensure your bread never sticks again:
- Always grease your bread pan thoroughly before adding ingredients.
- Ensure the non-stick coating of your pan is in good condition; replace if worn.
- Remove the kneading paddle right after the bread maker’s final knead cycle beep.
- Clean your pan gently after each use, avoiding harsh scrubbers.
- Measure all ingredients accurately to achieve the correct dough consistency.
- Allow your baked bread to cool in the pan for 10-15 minutes before removal.
Conclusion
Getting your bread to slide effortlessly out of the pan can transform your baking experience. It turns a moment of potential frustration into one of pure satisfaction. By following these practical tips – focusing on proper greasing, timely paddle removal, and diligent pan maintenance – you’re well on your way to perfectly released loaves every time. Remember, a little preparation goes a long way, ensuring your homemade bread is not only delicious but also beautifully intact. Enjoy your baking journey!
FAQs
Can I use parchment paper in my bread maker pan?
Using parchment paper in a bread maker pan is generally not recommended. The paper can interfere with the kneading paddle and may not fit snugly, potentially leading to uneven baking or issues with the machine’s mechanics. Greasing the pan directly is usually more effective and safer for the appliance.
What if my bread always sticks, even after greasing and paddle removal?
If you’re still experiencing sticking, it might be time to inspect your bread maker pan more closely. The non-stick coating could be compromised, even if not visibly flaking. Consider replacing the pan, as a degraded surface will consistently cause issues regardless of your efforts.
Does the type of flour affect how much bread sticks?
Yes, the type of flour can play a role. Dough made with higher protein or whole grain flours can sometimes be stickier due to their composition. Ensuring precise measurements and adequate hydration for these doughs is especially important to prevent them from adhering to the pan.
How do I remove a stuck bread paddle without damaging the loaf?
If the paddle is stuck after baking, first allow the bread to cool completely. Sometimes, a gentle twist or wiggling motion while holding the bread can help loosen it. If it’s still very stubborn, you might need to carefully cut a small portion of the bread around the paddle to free it, minimizing damage to the rest of the loaf.
Is it possible to “re-season” a non-stick bread maker pan?
Unlike cast iron, typical bread maker non-stick pans cannot be “re-seasoned” once their factory coating is worn. The non-stick surface is usually a synthetic material that degrades over time. Attempts to re-season might leave a sticky residue or further damage the pan. Replacement is generally the best solution for a worn non-stick pan.


