
How to Make Dinner Rolls from Bread Machine Dough?
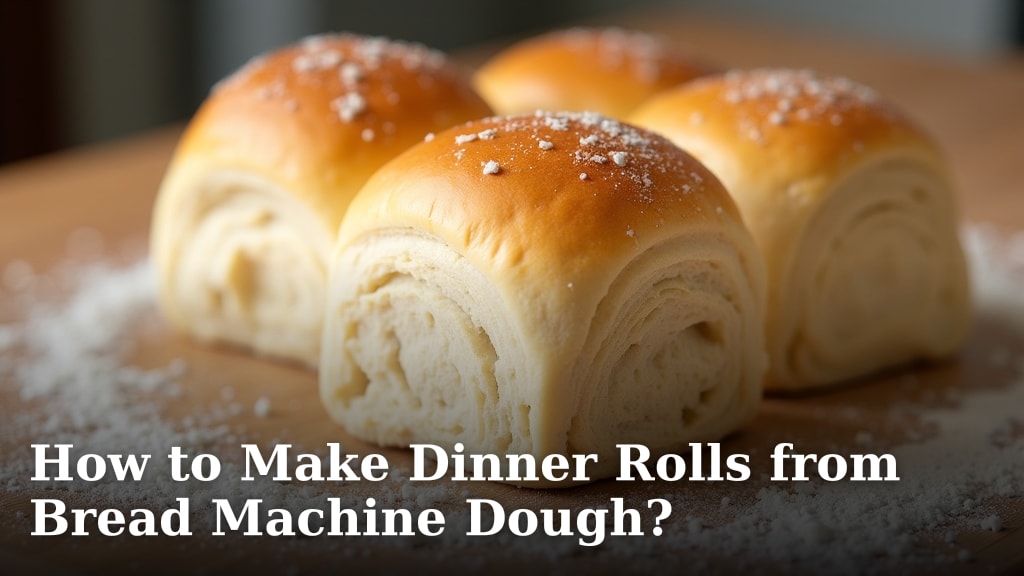
Yes, you absolutely can make delicious dinner rolls using your bread machine dough! It’s a fantastic way to get Yes, you absolutely can make dinner rolls using your bread machine dough!freshly baked rolls with minimal hands-on effort. Your bread machine does the hard work of kneading and the first rise, so you’re already halfway there to warm, fluffy rolls.
Many home bakers love this method because it simplifies the usually time-consuming process of making dough from scratch. It’s a great shortcut for busy weeknights or when you’re hosting guests. We found that using the bread machine ensures a consistently perfect dough every time.
- Bread machine makes dough easy.
- Form dough into small rolls.
- Let rolls rise again.
- Bake until golden brown.
Let’s walk through exactly how to turn that wonderful bread machine dough into delightful dinner rolls, step by step.
Transforming Bread Machine Dough into Fluffy Dinner Rolls
You’ve got that wonderful dough chilling or waiting in your bread machine. Now, let’s turn it into something even more delightful: warm, soft dinner rolls. It’s surprisingly simple! Your bread machine has done the heavy lifting of kneading and the initial rise. Now, it’s just about shaping and a final proof before they hit the oven.
Many people find this process less intimidating than starting rolls from scratch. You get that amazing homemade bread smell without the fuss. We’ve found this method works consistently well for getting tender rolls every time. Let’s get those hands-on shaping skills ready!
Getting Your Dough Ready for Shaping
First things first, you need to get the dough out of the bread machine. If your machine has a “dough cycle,” you likely used that. The dough should be smooth, elastic, and have doubled in size. It will be a bit sticky, which is perfectly normal.
Tip: Some recipes suggest chilling the dough for about 30 minutes after the dough cycle. This makes it less sticky and easier to handle. Research shows that slightly chilled dough is often easier to shape without tearing. This isn’t strictly necessary, but it can make the process smoother for beginners.
Preparing Your Workspace
You’ll need a clean, lightly floured surface to work on. A large cutting board or your kitchen counter works well. Have a bench scraper or spatula handy. This will help you gently lift the dough from the machine or bowl without stretching it too much.
Make sure you have your baking sheet ready too. Line it with parchment paper or lightly grease it. This prevents the rolls from sticking and makes cleanup a breeze. We found that parchment paper is a fantastic helper here.
Shaping Your Dinner Rolls
Now for the fun part! Gently turn the dough out onto your prepared surface. If you used a bread machine, you might need to scrape it out with a spatula. Be gentle; you don’t want to deflate all that lovely air the yeast created.
You have a couple of popular ways to shape your rolls. Let’s look at the most common methods. Your preference might depend on how much time you have or the look you want.
The Classic Round Roll Method
This is perhaps the easiest and quickest way. Take a portion of the dough and roll it into a ball. You want the balls to be roughly the same size for even baking. Think about the size of a golf ball or a small apple.
To shape, gently cup your hand around the dough. Roll it against the counter in a circular motion until it forms a smooth ball. Don’t overwork it; you just want to create tension on the surface. Many bakers find this technique builds strength in the dough.
The Knotted Roll Method
This method looks a little fancier but is also quite simple. Take a portion of dough and roll it into a short rope, about 6-8 inches long. Then, tie it into a loose knot. You can tuck the ends under slightly if you like.
This method is visually appealing and creates a slightly different texture. It also allows for more surface area for butter to melt into when served warm. Research on bread structures suggests knots can create interesting pockets of air during baking.
The Simple Bun Method
For a very straightforward roll, simply divide the dough into portions. Flatten each portion slightly into a small disc. Then, gently fold the edges into the center and flip it over so the seam is on the bottom. Roll it gently into a ball.
This is similar to the classic round roll but incorporates a quick folding step. It can help create a slightly softer interior. We found this method works well for kids to help with.
Determining Roll Size and Quantity
The size of your rolls will depend on how much dough your bread machine recipe makes and how large you cut your portions. A typical 1.5-pound loaf recipe usually yields enough dough for 12 to 16 dinner rolls. You can aim for rolls that are about 2-3 ounces each.
Use a kitchen scale for precision if you want perfectly uniform rolls. However, eyeballing it works just fine for most home bakers. The key is consistency so they all bake at the same rate. Experts at food science labs often point to uniformity as a key to even cooking.
Arranging Rolls on the Baking Sheet
Once your rolls are shaped, arrange them on your prepared baking sheet. You can place them close together for a pull-apart style roll, or leave a little space between them if you prefer individual rolls. For pull-apart rolls, leave about 1 inch between them.
If you want them to touch and bake into each other, place them about half an inch apart. This will make them softer on the sides. For crisper sides, give them more room, about 2 inches apart. We found the pull-apart style is popular for casual dinners.
The Second Rise (Proofing)
After shaping and arranging, your rolls need another rise. This is often called proofing. Cover the baking sheet loosely with plastic wrap or a clean kitchen towel. This prevents the dough from drying out.
Find a warm, draft-free spot for them to rise. Your oven (turned off, but with the light on) is a great place. Some people use a slightly warmed oven (turned off immediately after warming). A spot on top of your refrigerator can also work. Let them rise until they are puffy and have increased in size by about 50-75%.
This rise usually takes anywhere from 30 to 60 minutes. The exact time depends on the room temperature and the yeast activity. Don’t rush this step; a good second rise is key to light, fluffy rolls. The CDC offers guidance on safe food temperatures, and while not directly about rising, ensuring your environment is temperature-stable is good practice.
Checking for Readiness
How do you know they’re ready? Gently poke a roll with a lightly floured finger. If the indentation springs back slowly, they’re ready to bake. If it springs back immediately, they need more time. If it stays indented, they might have over-proofed slightly, but they’ll still bake up okay.
We found that paying attention to the visual cues is just as important as the time. They should look noticeably puffed up and soft. It’s like seeing a happy sigh from your dough.
Optional Enhancements Before Baking
Want to give your rolls a little extra flair? You have a few options before they go into the oven.
Egg Wash or Milk Wash
For a golden-brown, slightly shiny crust, you can brush the tops of the rolls with an egg wash or a milk wash. An egg wash is typically one egg beaten with a tablespoon of water. A milk wash is simply a tablespoon or two of milk.
Brush gently over the tops of the rolls. Avoid letting the wash drip down the sides, as this can hinder their rise. Many bakers swear by the egg wash for that bakery-quality finish. Research into food browning reactions shows sugars and proteins in these washes contribute to color.
Toppings
You can also sprinkle on some toppings after applying the wash. Popular choices include sesame seeds, poppy seeds, garlic powder, or a sprinkle of coarse salt.
Be mindful of what you’re serving the rolls with. Garlic and herb toppings are great for Italian-themed meals. Simple seeds are classic. The NIH notes that dietary choices can impact overall health, but toppings for rolls are generally for enjoyment.
Baking Your Delicious Dinner Rolls
Preheat your oven to the temperature specified in your bread machine recipe for baking. This is often around 375°F to 400°F (190°C to 200°C). Make sure your oven is fully preheated before you put the rolls in.
Place the baking sheet in the center of the preheated oven. Bake for about 15 to 20 minutes. The exact time will depend on your oven and the size of your rolls.
Checking for Doneness
Your rolls are done when they are beautifully golden brown on top and sound hollow when you tap the bottom. You can also use an instant-read thermometer. The internal temperature should be around 190°F to 200°F (88°C to 93°C).
If the tops are browning too quickly, you can loosely tent the baking sheet with aluminum foil. This protects them from over-browning while the inside finishes baking. We’ve found this trick saves many batches!
Cooling and Serving Your Rolls
Once baked, remove the rolls from the oven. Transfer them immediately to a wire cooling rack. This prevents the bottoms from getting soggy from residual steam.
Let them cool for at least 5-10 minutes before serving. They are absolutely divine when served warm with butter. The smell alone is enough to make anyone happy! For pull-apart rolls, you can gently separate them as you serve them.
Enjoy your homemade dinner rolls. You did it! They are perfect for any meal, from weeknight dinners to holiday feasts. This simple adaptation of your bread machine dough is a real crowd-pleaser.
Quick Checklist for Roll Success
- Ensure dough has completed its first rise in the machine.
- Prepare your workspace and baking sheet.
- Shape rolls to a consistent size.
- Allow rolls a second rise until puffy.
- Bake until golden brown and hollow-sounding.
- Serve warm and enjoy!
Conclusion
You’ve successfully transformed simple bread machine dough into a batch of warm, homemade dinner rolls. It’s a fantastic shortcut that delivers delicious results with far less effort than traditional methods. Remember, the key steps are gentle shaping, a patient second rise, and baking until golden brown. Your bread machine has done the heavy lifting, and you’ve added that special homemade touch. Now, gather your family and friends, and enjoy the fruits of your labor with a warm roll and a pat of butter. Your next step? Try this method for your next family dinner and watch the smiles appear!
Frequently Asked Questions
Can I use any bread machine recipe for dinner rolls?
Yes, most standard bread machine dough recipes work wonderfully for dinner rolls. Look for recipes that use a basic white or wheat dough setting. You might find that some enriched doughs (with eggs or butter) also make lovely, softer rolls.
My bread machine dough is too sticky to handle, what should I do?
A little stickiness is normal, but if it’s unmanageable, try chilling the dough for 20-30 minutes as we discussed. You can also lightly flour your hands and your work surface. Avoid adding too much extra flour, as this can make your rolls tough.
How do I know if my rolls have risen enough during the second rise?
Gently poke a roll with a floured finger. If the indentation springs back slowly, they are ready. They should look visibly puffy and about 50-75% larger than when you shaped them. Over-proofing can happen, but they’ll still bake up nicely.
What’s the best way to store leftover dinner rolls?
Once cooled, store leftover rolls in an airtight container or a resealable plastic bag at room temperature. They are best enjoyed within 1-2 days. For longer storage, you can freeze them wrapped tightly.
Can I make the dough ahead of time and use it for rolls later?
Yes, you can. After the bread machine finishes its dough cycle, you can let the dough rise, then punch it down, cover it tightly, and refrigerate it for up to 2-3 days. Let it come to room temperature for about an hour before shaping.
