How to Make Sourdough Bread in a Bread Machine?
On this page (3 sections)
Yes, you can absolutely make sourdough bread in a bread machine, and it often results in a delicious loaf with far less hands-on effort. Your bread maker takes care of the kneading, bulk fermentation, and baking, simplifying a traditionally complex process.
Many home bakers find this method perfect for enjoying that signature tangy sourdough flavor without the constant attention. It’s a great way to integrate sourdough into your busy life. You won’t believe how easy it is to wake up to freshly baked bread.
- Your bread machine handles the hard work.
- Enjoy classic sourdough taste with minimal effort.
- A convenient way for busy schedules.
- Perfect for beginners and experienced bakers alike.
Ready to turn your kitchen into a sourdough bakery with minimal fuss? Let’s walk through exactly how to make a beautiful sourdough loaf using your bread machine, step by step.
Making Sourdough Bread in Your Bread Machine
You can make fantastic sourdough bread with your bread machine. It simplifies the process dramatically. Your machine handles most of the hard work for you.
This method saves you time and effort. You get a wonderful homemade loaf. It’s perfect for busy bakers who love that tangy sourdough taste.
Understanding the Sourdough Starter
The heart of any sourdough recipe is the sourdough starter. This is a living culture of wild yeast and bacteria. It gives sourdough its unique flavor and rise.
For your bread machine, you’ll want an active, bubbly starter. It should have been fed recently. A strong starter ensures your bread rises properly.
Liquid vs. Stiff Starter
Starters come in different hydration levels. A liquid starter (100% hydration) is very common. This means it has equal parts flour and water by weight.
Some recipes might call for a stiffer starter. Always check your recipe. Most bread machine recipes work well with a standard 100% hydration starter.
Feeding Your Starter for Baking
Plan to feed your starter 4-12 hours before you bake. This makes it active and ready. A well-fed starter will be bubbly and almost doubled in size.
If your starter isn’t robust, feed it every 12 hours for a couple of days. This helps it regain strength. A strong starter is key to good bread.
Gathering Your Ingredients and Equipment
Making sourdough in a bread machine is straightforward. You’ll need just a few key items. Having everything ready before you start helps a lot.
This organized approach ensures a smooth baking experience. No last-minute searching for ingredients. You want to enjoy the process.
Essential Ingredients
Here’s what you’ll need for a basic sourdough bread machine recipe:
- Active Sourdough Starter: This is your leavening agent. Ensure it’s bubbly and well-fed.
- Bread Flour: High protein content helps with gluten development. You’ll get a better chew.
- Water: Use filtered or unchlorinated water if possible. Chlorine can harm your starter.
- Salt: Essential for flavor and controlling fermentation. Don’t forget it!
- Optional Sweetener (Sugar/Honey): A small amount can boost yeast activity. It also adds a touch of flavor.
- Optional Fat (Oil/Butter): A little fat can improve crumb texture. It makes the bread softer.
Your Bread Machine Settings
Most bread machines have a “dough” cycle and a “basic” or “whole wheat” cycle. For sourdough, you’ll typically use a combination of these.
Some machines even have a dedicated “sourdough” setting. If yours does, wonderful! Otherwise, adapting a basic setting works perfectly.
Step-by-Step Instructions for Your Sourdough Loaf
Here’s the simple process for making sourdough bread in your machine. Follow these steps for a delicious, easy loaf.
You’ll be surprised how little effort it takes. Your bread machine does most of the heavy lifting. You get to enjoy the smells. And, of course, the taste!
Adding Ingredients to Your Bread Machine
Always add liquids first, then dry ingredients. This is a common rule for bread machines. It helps with proper mixing.
Start with water, then your active sourdough starter. Add salt, any optional sugar or oil. Finally, add your flour on top.
Make sure the salt doesn’t touch the starter directly for too long. Salt can inhibit yeast activity initially. Creating a small “well” in the flour for the salt helps.
| Order of Ingredients | Notes |
|---|---|
| 1. Water | Use lukewarm water for quicker activation. |
| 2. Sourdough Starter | Ensure it’s active and bubbly. |
| 3. Salt | Keep it separate from the starter initially. |
| 4. Optional Sweeteners/Fats | If using. |
| 5. Bread Flour | Pile it on top of the wet ingredients. |
Choosing Your Bread Machine Cycle
This is where your bread machine really shines. It takes over the labor-intensive parts. You get to relax while it works.
Here’s how to choose the right cycle:
If your machine has a “sourdough” cycle, use it. This cycle is designed for the longer fermentation that sourdough needs.
If not, use the “dough” cycle first. This kneads and proofs the dough. It builds structure and flavor.
After the dough cycle, you’ll often need to remove the dough. Reshape it slightly and place it back in the pan. Then, use the “bake only” cycle.
Alternatively, many people use a “basic” or “whole wheat” cycle. For sourdough, you might need to stop the cycle before baking. Let it rise longer manually. Then resume the bake cycle. This gives it the full sourdough-appropriate rise (The Bread Machine Cookbook).
The All-Important Fermentation Time
Sourdough needs time to develop its flavor. Don’t rush this part. Your bread machine’s “dough” cycle often includes the first proof.
Many recipes recommend an extended bulk fermentation. This might mean letting the dough sit in the turned-off machine for a few hours. Or removing it to a bowl for an overnight proof in the fridge.
You are looking for the dough to show signs of life. It should look a bit puffy. You should see some air bubbles.
Baking Your Sourdough Loaf
Once your dough has risen, it’s ready for baking. Your bread machine handles this too. Most “basic” or “whole wheat” cycles include baking.
If you used the “dough” cycle, you’ll need the “bake” cycle. Choose your desired crust color if your machine has that option. A medium crust is often perfect.
The aroma filling your kitchen will be incredible. This is the reward for your minimal effort.
Troubleshooting Common Sourdough Issues
Even with a bread machine, you might encounter a few hiccups. Don’t worry, these are usually easy to fix. We want you to feel confident.
- Dense Loaf: Your starter might not be active enough. Ensure it’s very bubbly before use. You might also need more flour or better gluten development.
- No Rise: Again, check your starter’s activity. Is your water too hot or too cold? Extreme temperatures can kill or slow yeast.
- Gummy Texture: The bread might be underbaked. Try increasing the bake time slightly. Or your dough might have been too wet.
- Sourness Too Mild: Your fermentation might have been too short. Try a longer bulk fermentation or a cold proof.
- Overflowing Dough: This often means too much liquid, too much starter, or too long a rise time. Reduce one or all of these next time.
Tips for Perfect Bread Machine Sourdough Every Time
Achieving consistent results is satisfying. Here are some extra tips to help you along the way. These small adjustments can make a big difference.
Ingredient Weights vs. Volumes
Measuring by weight is far more accurate than by volume. Flour and water can vary greatly when scooped. A kitchen scale is your best friend here (King Arthur Baking).
Adjusting for Humidity
Flour absorbs moisture differently based on humidity. On a humid day, you might need slightly less water. On a dry day, a little more. Pay attention to your dough consistency.
The Peek and Poke Test
During the kneading cycle, check your dough. It should form a smooth, elastic ball. It should pull away from the sides of the pan. If it’s too sticky, add a tablespoon of flour. If it’s too dry, add a teaspoon of water.
Patience is a Virtue (of Sourdough)
Sourdough takes time. Don’t rush the fermentation stages. The longer, slower process develops the flavor. This is what makes sourdough so special.
Cooling Your Bread Properly
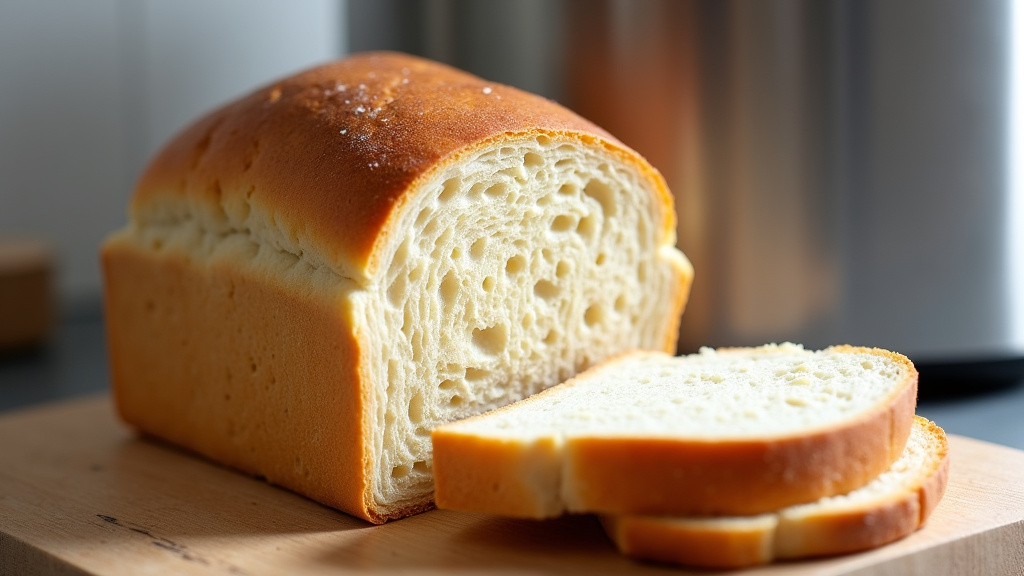
Once baked, let your sourdough cool completely on a wire rack. This is crucial for texture. Slicing hot bread can result in a gummy crumb. Wait at least an hour, or even two. It’s tough, but worth it!
Your Sourdough Checklist:
- Is your starter active and bubbly?
- Are all ingredients measured accurately by weight?
- Did you add ingredients in the correct order?
- Is your bread machine set to the right cycle?
- Have you allowed for sufficient fermentation time?
- Is the bread fully cooled before slicing?
Conclusion
Making sourdough bread in your bread machine truly eliminates much of the traditional fuss. You leverage modern convenience to enjoy an ancient delight. By understanding your starter and following simple steps, you’ll achieve fantastic results.
You can wake up to the wonderful aroma and distinct tang of fresh sourdough with minimal effort. Don’t be afraid to experiment with settings and timing. Your journey to effortless, delicious sourdough starts now. Get baking!
Frequently Asked Questions
Can I use all-purpose flour instead of bread flour in my bread machine sourdough?
While you can use all-purpose flour, your results might be a bit different. Bread flour has a higher protein content, which develops more gluten. This gives sourdough its characteristic chewy texture and better structure. All-purpose flour may yield a softer, less chewy loaf.
How long does bread machine sourdough stay fresh?
Homemade sourdough generally stays fresh for about 2-3 days at room temperature



