How to Make Banana Bread in a Bread Machine?
On this page (10 sections)
- Baking Banana Bread in Your Bread Machine: The Simple Method
- Preparing Your Bananas for Maximum Flavor
- Layering Your Ingredients: The Right Order Matters
- Selecting the Correct Bread Machine Setting
- After Baking: Cooling and Slicing Your Loaf
- Tips for Perfect Bread Machine Banana Bread Every Time
- Troubleshooting Common Bread Machine Banana Bread Issues
- Your Banana Bread Checklist
- Conclusion
- Frequently Asked Questions
The easiest way to make banana bread in a bread machine is to add all your ingredients according to your machine’s manual, then select the quick bread or sweet bread setting. Your bread machine handles all the mixing and baking. This method creates a perfectly moist loaf with minimal effort.
You might wonder if a bread machine can really bake banana bread well. We found that it does a fantastic job. The consistent temperature and gentle mixing create a tender crumb and golden crust. It’s an excellent way to use up those overripe bananas without heating up your whole kitchen.
- Add wet ingredients first, then dry.
- Use the ‘Quick Bread’ or ‘Sweet Bread’ setting.
- Overripe bananas are key for flavor.
- Enjoy warm slices with butter.
Let’s walk through exactly how to make delicious banana bread in your bread machine, step by step.
Baking Banana Bread in Your Bread Machine: The Simple Method
Making delicious banana bread in a bread machine is surprisingly straightforward. You just need to gather your ingredients and understand the basic steps. It’s much like baking a regular loaf of bread, but even easier because the machine does most of the heavy lifting. Think of your bread machine as your personal baking assistant.
Gathering Your Ingredients: What You’ll Need
Before you start, make sure you have all your ingredients ready and measured. This makes the process much smoother. It’s like preparing your mise en place in a professional kitchen – everything in its place. We found that having everything prepped prevents last-minute scrambling.
The Essential Ingredients
- Overripe Bananas: You’ll need about 3 medium-sized ones. They should be very ripe, with lots of brown spots. This is key for flavor and sweetness.
- All-Purpose Flour: About 1 ½ to 2 cups.
- Granulated Sugar: Typically ¾ to 1 cup, depending on your sweetness preference.
- Eggs: Usually 2 large eggs.
- Vegetable Oil or Melted Butter: ½ cup. Either works well, but butter adds a richer flavor.
- Baking Soda: 1 teaspoon. This helps your bread rise beautifully.
- Salt: ½ teaspoon. It balances the sweetness.
- Vanilla Extract: 1 teaspoon. For that classic banana bread aroma.
Optional Add-Ins for Extra Flavor
Once you’ve mastered the basic recipe, you might want to experiment. Many enjoy adding extra ingredients. These small additions can really personalize your loaf.
- Chopped Nuts: Walnuts or pecans are popular choices. Add ½ to 1 cup.
- Chocolate Chips: ½ cup of semi-sweet chocolate chips makes it a treat.
- Cinnamon: A ½ teaspoon can add a nice warmth.
Preparing Your Bananas for Maximum Flavor
The secret to truly great banana bread lies in the bananas themselves. They need to be very ripe. This means soft, with a peel that’s spotted brown, or even almost entirely black. Don’t throw them away; they’re perfect for this!
Why Overripe Bananas Are Best
Overripe bananas are sweeter and more fragrant than their green or yellow counterparts. As bananas ripen, their starches convert to sugars. This natural sweetness means you might even reduce the amount of added sugar in your recipe. They also mash much more easily, giving your bread a smoother texture. Research shows that fully ripened fruits offer higher antioxidant levels as well (USDA).
How to Mash Your Bananas
Mashing your bananas is simple. You can use a fork, a potato masher, or even a hand mixer. Aim for a consistency that’s mostly smooth, but with a few small lumps for texture. Don’t worry about perfection; a little texture is nice in banana bread. We found that about one cup of mashed banana is usually enough for most recipes.
Layering Your Ingredients: The Right Order Matters
One of the most common questions about bread machines is the order of ingredients. For quick breads like banana bread, the rule is usually wet ingredients first, then dry. This helps prevent the dry ingredients from sticking to the bottom of the pan and not mixing properly.
The Wet Ingredients Go In First
Start by adding your liquid ingredients to the bread machine pan. This typically includes the mashed bananas, eggs, oil or melted butter, and vanilla extract. Pour them directly into the bottom of the pan. It’s like building a good foundation for your house.
Adding Your Dry Ingredients
Next, carefully spoon in your dry ingredients. Layer the flour evenly over the wet mixture. Then, add the sugar, baking soda, and salt on top of the flour. If you’re adding cinnamon, sprinkle that in too. We recommend making a small “well” in the center of the flour for the baking soda and salt. This keeps them separate from the wet ingredients until the mixing cycle begins, ensuring proper activation.
Selecting the Correct Bread Machine Setting
Your bread machine has various settings, and choosing the right one is important for banana bread. Most machines have a specific setting designed for quick breads or sweet breads.
‘Quick Bread’ or ‘Sweet Bread’ Setting
Look for a button labeled “Quick Bread,” “Sweet Bread,” or sometimes “Cake.” This setting typically combines a mixing cycle with a baking cycle, but without the long proofing (rising) times used for yeast breads. Yeast isn’t used in banana bread, so you don’t need those proofing stages. If your machine has a “Rapid” or “Express” setting, avoid it for quick breads, as it may not bake thoroughly.
Understanding the Cycle
Once you select the setting, the machine will mix the ingredients, often with a short resting period, and then bake. The total time usually ranges from 1 hour 30 minutes to 2 hours. Your machine’s manual is your best friend here. Always consult it for specific instructions regarding your model.
After Baking: Cooling and Slicing Your Loaf
The smell of fresh banana bread filling your kitchen is one of life’s simple joys. But patience is key once the baking cycle is complete.
Removing the Bread from the Pan
Once the machine beeps, indicating the end of the cycle, carefully remove the bread pan. It will be very hot. Use oven mitts! Invert the pan onto a wire cooling rack and gently shake or tap it until the loaf slides out. Sometimes, the kneading paddle might stick in the bottom of the loaf. If it does, carefully remove it once the bread has cooled slightly.
The Importance of Cooling
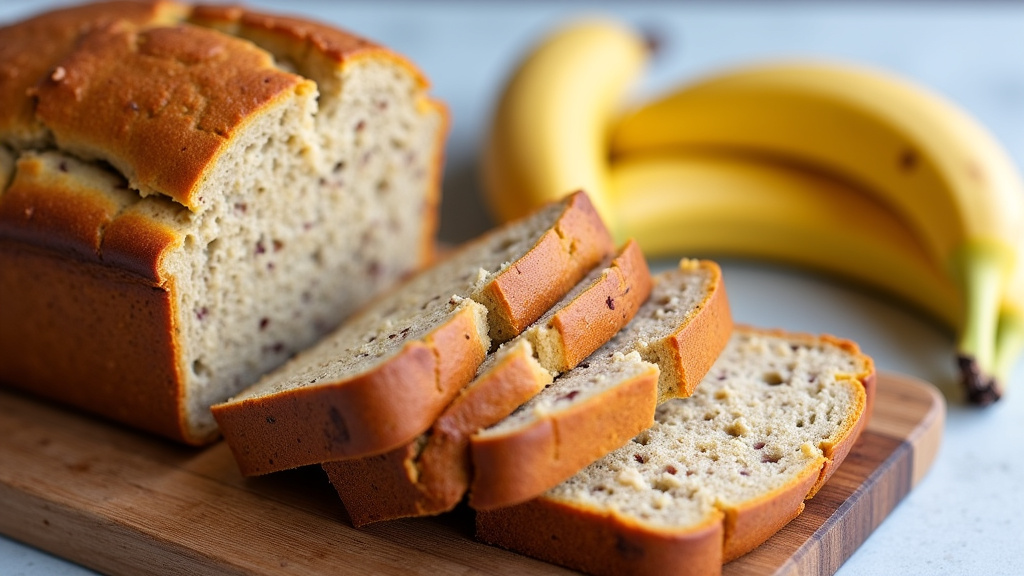
Resist the urge to slice into your warm, fragrant loaf immediately. Allowing the banana bread to cool completely on a wire rack is crucial. This lets the internal structure set and prevents it from becoming gummy or falling apart when sliced. We found that at least an hour, or even two, provides the best texture. Warm banana bread is good, but cooled banana bread is even better for slicing and texture.
Tips for Perfect Bread Machine Banana Bread Every Time
Even with a bread machine doing the work, a few small tips can make a big difference. These are simple tricks we’ve learned over many loaves.
Do Not Overmix
While the bread machine handles mixing, be aware that overmixing quick breads can lead to a tough texture. The machine’s quick bread setting is designed to avoid this, but avoid restarting cycles or adding extra mixing time. Just let it do its thing.
Measure Accurately
Baking is a science, and precise measurements are important. Use proper measuring cups and spoons. For flour, spoon it into the measuring cup and then level it off with a straight edge. Don’t scoop directly from the bag, as this can pack the flour too tightly. This practice is supported by baking experts to ensure consistent results (King Arthur Baking).
Adjusting for Altitude
If you live at a high altitude, you might need to make slight adjustments. Higher altitudes can cause baked goods to rise too quickly and then collapse. You might need to slightly reduce baking soda or sugar, or increase liquid. A small amount of extra flour might also help. Your bread machine manual or online resources for high-altitude baking can guide you.
Troubleshooting Common Bread Machine Banana Bread Issues
Sometimes, things don’t go exactly as planned. But don’t worry, most common issues are easy to fix for your next loaf.
Dense or Gummy Loaf
A dense or gummy texture often means too much liquid, not enough leavening (baking soda), or not letting the bread cool completely. Double-check your measurements, ensure your baking soda isn’t expired, and give your loaf plenty of time to cool.
Loaf Didn’t Rise Enough
If your banana bread didn’t rise well, the most likely culprit is old or inactive baking soda. Baking soda loses its potency over time. Test it by adding a spoonful to a small amount of vinegar; if it fizzes, it’s still good. Also, ensure you used the correct setting on your bread machine.
Pale Crust or Overly Dark Crust
A pale crust might indicate the quick bread setting isn’t quite right for your machine, or you’re using too light a crust setting if your machine offers that option. An overly dark crust could mean the opposite. You might need to experiment with your machine’s settings or even try a different quick bread recipe tailored for bread machines.
Your Banana Bread Checklist
Here’s a quick list to ensure you hit all the key points for a perfect bread machine banana bread experience:
- Use very ripe bananas.
- Measure ingredients accurately.
- Add wet ingredients first, then dry.
- Select the ‘Quick Bread’ or ‘Sweet Bread’ setting.
- Cool completely on a wire rack.
Conclusion
You now have everything you need to create perfect banana bread in your bread machine. It’s a simple, hands-off method for a delicious treat. By using overripe bananas and selecting the right setting, you’ll achieve a wonderfully moist loaf every time. Remember to allow it to cool properly for the best texture.
We found this method consistently delivers fantastic results. So, grab those ripe bananas and your bread machine. Go ahead and bake a comforting loaf that your whole family will love!
Frequently Asked Questions
Can I add nuts or chocolate chips to my bread machine banana bread?
Absolutely! Most bread machines have a “mix-in” beep during the first kneading cycle. This is the perfect time to add chopped nuts, chocolate chips, or dried fruit. Check your machine’s manual for the exact timing.
What if my bread machine doesn’t have a “Quick Bread” setting?
If your machine lacks a dedicated “Quick Bread” or “Sweet Bread” setting, look for a “Cake” setting. Some older models might not have one. In that case, you can often use a “Dough” cycle for mixing, then transfer the batter to a regular loaf pan and bake it in a conventional oven.
How should I store leftover banana bread?
Store your cooled banana bread in an airtight container at room temperature for up to 2-3 days. For longer storage, you can refrigerate it for about a week. We’ve also found it freezes beautifully when wrapped tightly, lasting up to 3 months.
Can I use frozen bananas for bread machine banana bread?
Yes, you can! Thaw the frozen bananas completely first, then drain off any excess liquid before mashing. Frozen bananas often become very liquidy, so be prepared to adjust your wet ingredient measurements slightly if needed to avoid a gummy loaf.
Why did my banana bread sink in the middle?
A sunken middle can happen for a few reasons. Common culprits include too much liquid, too much leavening (baking soda), or opening the lid too early during the baking cycle. Ensure your ingredients are measured accurately and trust your machine to do its job without interruption.



